•
Document any damage carefully and contact your GE Healthcare representative.
3.4 Installation of the software
3.4.1 Installation (Windows XP)
Installation is performed in the following sequence.
1
Installation of USB Control driver
2
Installation of USB Function driver
3
Installation of ImageQuant LAS 4000
3.4.1.1 Installation of the USB Control Driver (Windows XP)
Note:
The computer and ImageQuant LAS 4000 must not be connected with a USB cable
during the operation.
1
Open the control panel and select Printers and Other Hardware.
2
Click Add Hardware.
3
Click the Next button in the Add Hardware Wizard.
4
Select Yes, I have already connected the hardware and click the Next button.
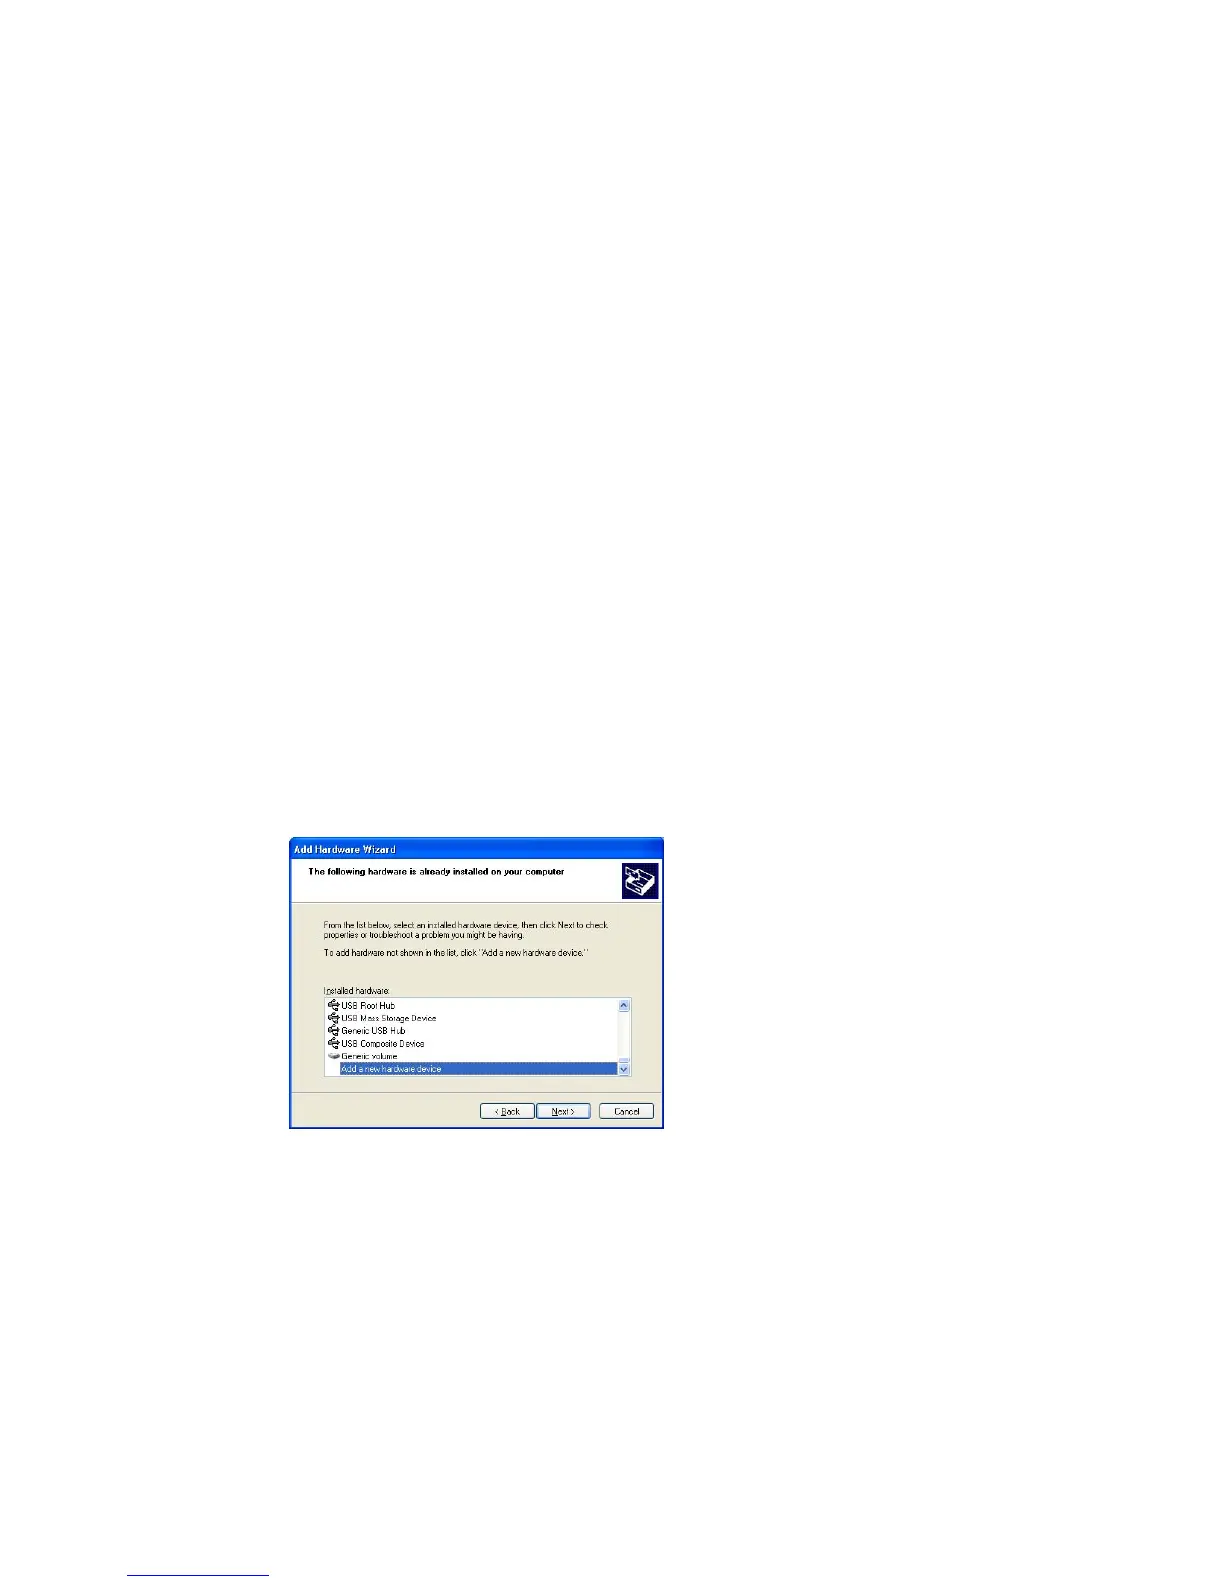
5
Select Add a new hardware device and click the Next button.
6
Select Install the hardware that I manually select from a list [Advanced] and click the Next button.
Getting Started with ImageQuant LAS 4000 28-9607-59 AB 27
3 Installation
3.3 Unpacking
 Loading...