EasyManuals Logo

GE LOGIQ E9 Service Manual

GE LOGIQ E9
808 pages
To Next Page IconTo Next Page
To Previous Page IconTo Previous Page
Page #405 background imageLoading...
Page #405 background image
GE
D
IRECTION 5535208-100, REV. 2 LOGIQ E9 SERVICE MANUAL
Chapter 8 Replacement procedures 8 - 59
8-5-12-4 Door, I/O Panel removal
1.) At the back of the system, push a four, flat blade screwdriver into the rectangular hole, next to the
Door, I/O panel until it reaches the lock mechanism.
2.) Push the handle on the screwdriver to the left to release the lock.
3.) Open the Door, I/O Panel.
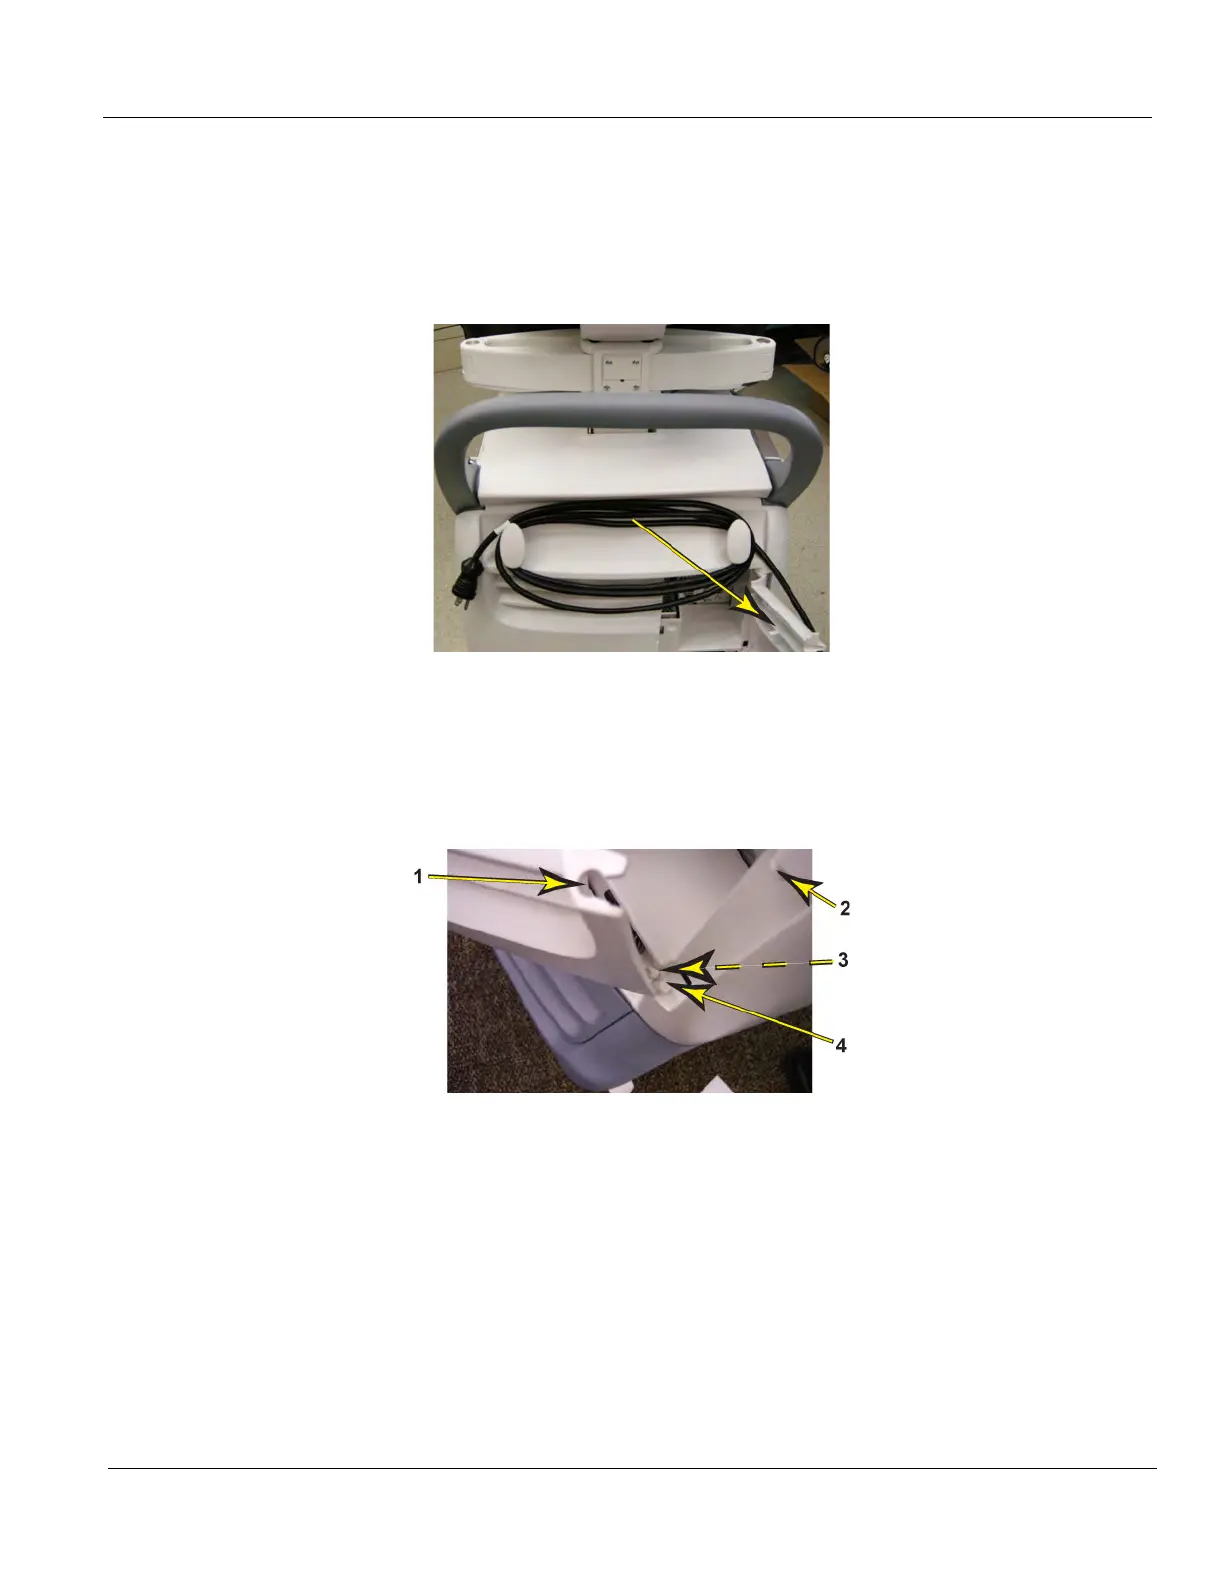
4.) Hold the Door, I/O Panel near the upper hinge (1), and pop hinge out and away from the upper hinge
post (2) on the Rear Cover.
8-5-12-5 Door, I/O Panel installation
1.) Place the Door, I/O Panel into position by sliding lower hinge (3) onto lower hinge post (4).
2.) Pop the upper hinge into place onto the upper hinge post.
Figure 8-23 Door, I/O Panel
Figure 8-24 Hinge placement on Door, I/O Panel

Table of Contents

Other manuals for GE LOGIQ E9

Questions and Answers:

Question and Answer IconNeed help?

Do you have a question about the GE LOGIQ E9 and is the answer not in the manual?

GE LOGIQ E9 Specifications

General IconGeneral
TypeUltrasound System
3D/4D ImagingYes
Transducer Ports4 active ports
ConnectivityDICOM, USB, Ethernet
ApplicationsAbdominal, Vascular, Musculoskeletal, Small Parts, Urology, Pediatric, Cardiac, Obstetrics/Gynecology
TransducersLinear, Convex, Phased Array, Volume
Doppler ModesColor Doppler, Power Doppler, Pulsed Wave Doppler, Continuous Wave Doppler
ElastographyYes
Advanced FeaturesB-Flow, Volume Navigation
PortabilityCart-based system
Display19-inch high-resolution LCD monitor

Related product manuals