EasyManuals Logo

GE LOGIQ E9 Service Manual

GE LOGIQ E9
808 pages
To Next Page IconTo Next Page
To Previous Page IconTo Previous Page
Page #583 background imageLoading...
Page #583 background image
GE
D
IRECTION 5535208-100, REV. 2 LOGIQ E9 SERVICE MANUAL
Chapter 8 Replacement procedures 8 - 237
8-9-8-1 BEP Battery Pack removal
Table 8-149 BEP Battery Pack removal
Steps Corresponding Graphic
1.
Loosen the thumb screws or screws at the top of the BEP cover that attach the cover to the BEP.
Tilt the top of the BEP cover away from the BEP.
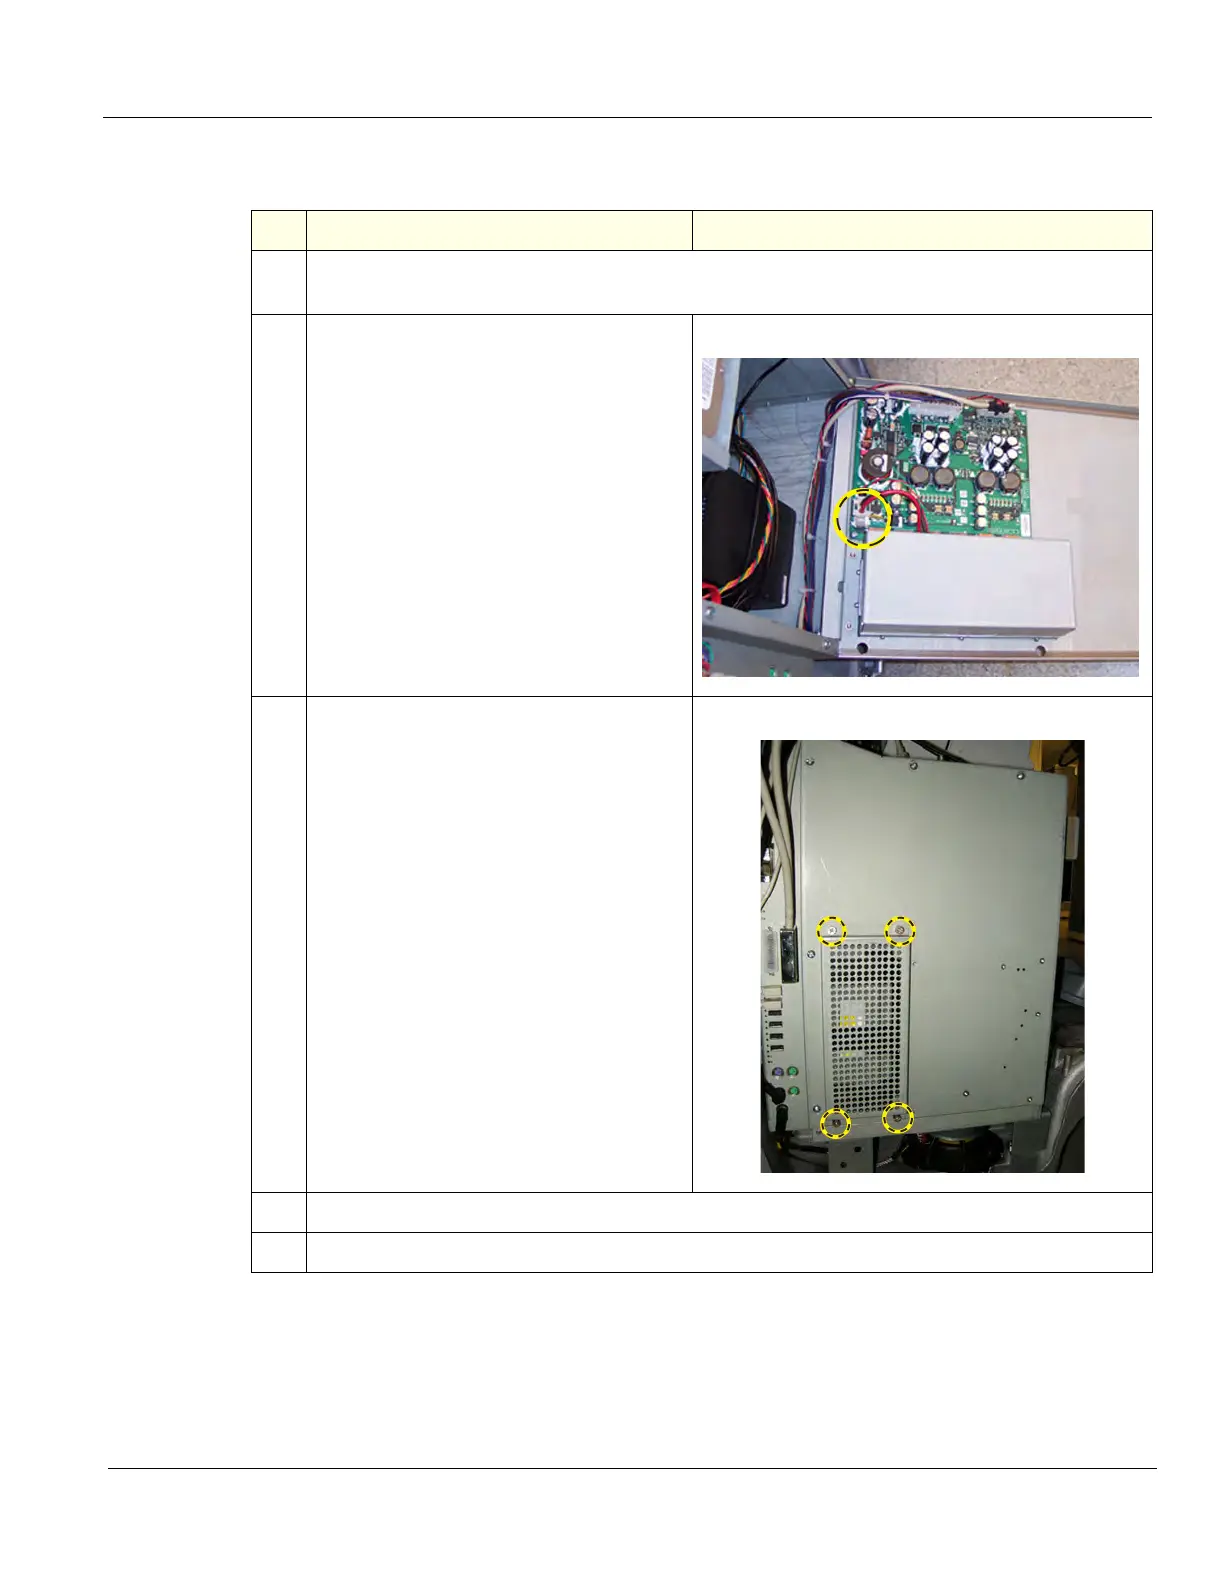
2.
Disconnect the battery cable connecting to
J3 on the EPS.
Position the cable connector into the
opening of the battery cavity, so the cable
and battery can be easily removed.
Close BEP door and secure closed.
EPS Battery connection (J3)
3.
Remove the four screws to the Battery
Cover on the BEP cover.
Remove the Battery Pack Cover.
BEP Cover, BEP Battery Pack Cover screws
4.
Remove the stabilizing foam strip beside the battery pack.
5.
Remove the BEP Battery Pack.

Table of Contents

Other manuals for GE LOGIQ E9

Questions and Answers:

Question and Answer IconNeed help?

Do you have a question about the GE LOGIQ E9 and is the answer not in the manual?

GE LOGIQ E9 Specifications

General IconGeneral
TypeUltrasound System
3D/4D ImagingYes
Transducer Ports4 active ports
ConnectivityDICOM, USB, Ethernet
ApplicationsAbdominal, Vascular, Musculoskeletal, Small Parts, Urology, Pediatric, Cardiac, Obstetrics/Gynecology
TransducersLinear, Convex, Phased Array, Volume
Doppler ModesColor Doppler, Power Doppler, Pulsed Wave Doppler, Continuous Wave Doppler
ElastographyYes
Advanced FeaturesB-Flow, Volume Navigation
PortabilityCart-based system
Display19-inch high-resolution LCD monitor

Related product manuals