GE
D
IRECTION 5535208-100, REV. 2 LOGIQ E9 SERVICE MANUAL
Chapter 8 Replacement procedures 8 - 245
8-10-2-1 Main Power Supply removal (cont’d)
Table 8-158 Main Power Supply (PS) removal
Steps Corresponding Graphic
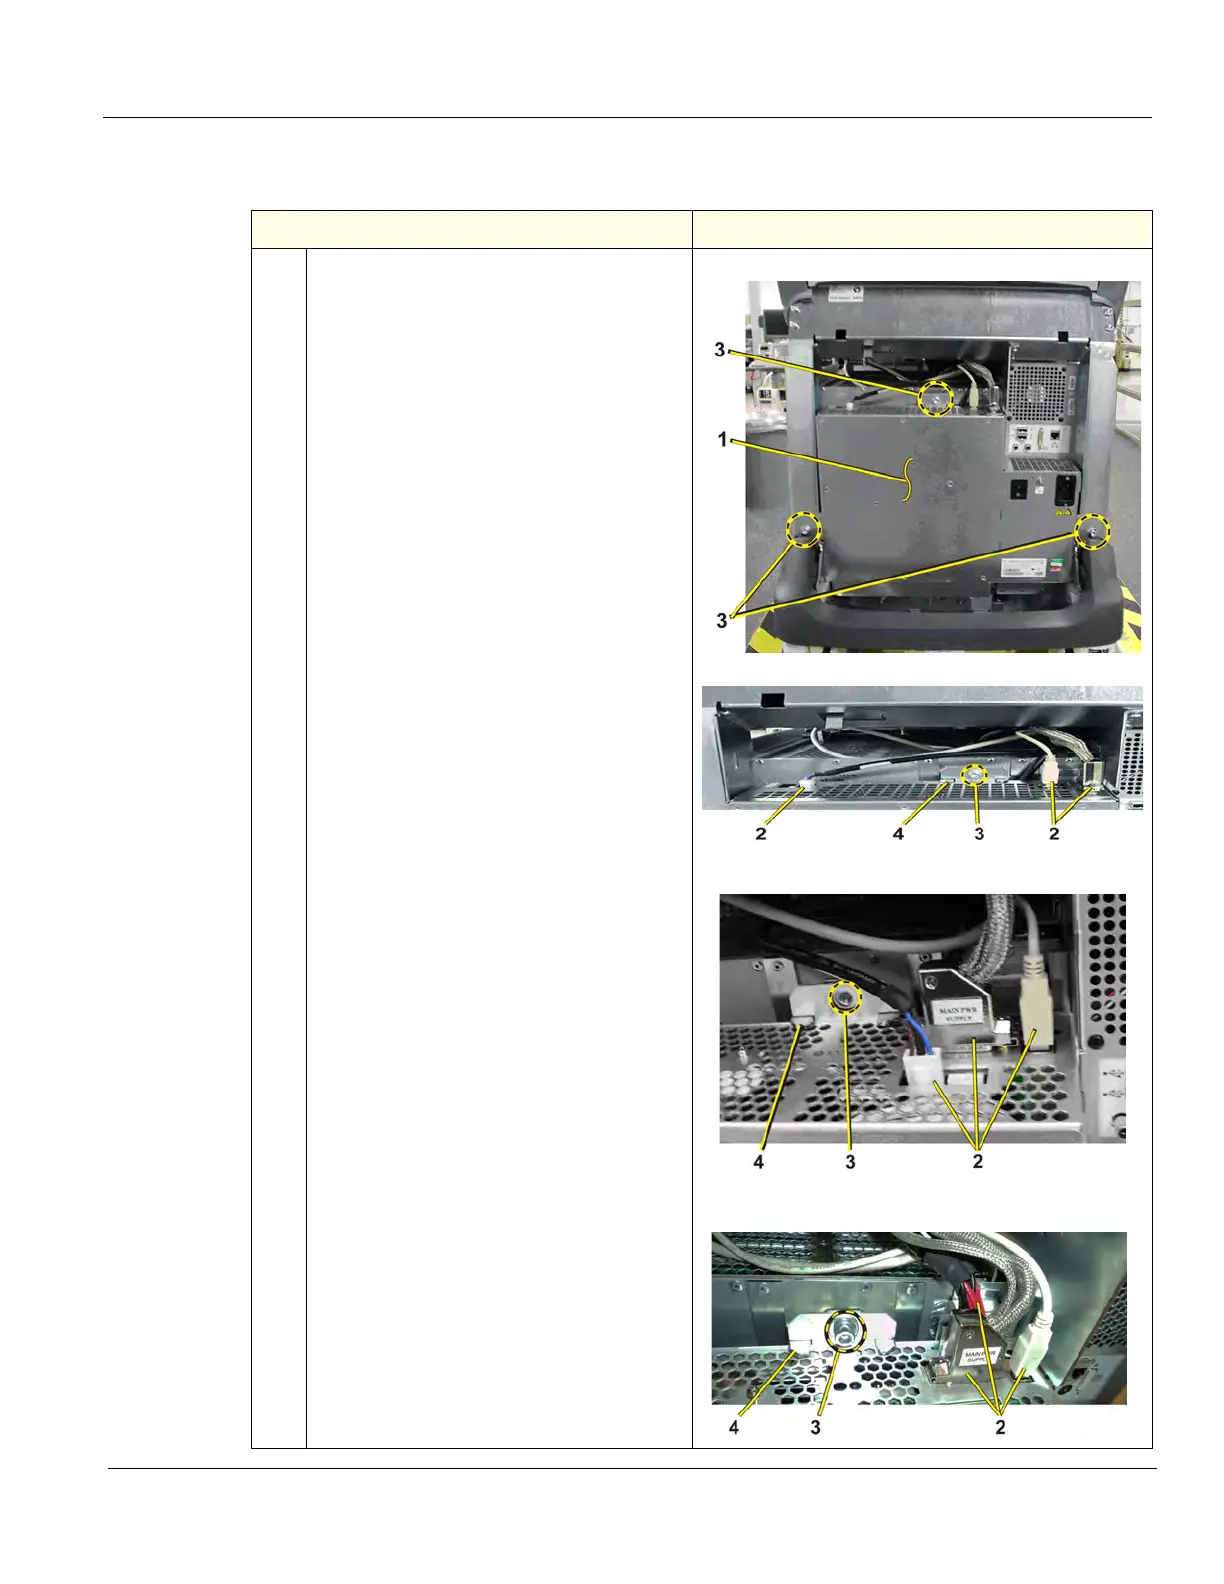
1.
To remove Main PS (1):
NOTE: The mounting of a Cherokee/Mitra
PS and Lambda PS are the same. The PS
connectors are in different locations.
NOTE: When the system is in standby, the
Lambda PS will be warm. This is normal for
a Lambda PS.
Disconnect the Mains PS Cable and all
cables (2) - AC Output to Peripherals,
Printer, Power to BEP and USB on top of
the Main PS.
Remove the three screws (3) that secure
the Main PS using a 5 mm Allen wrench.
Ease the Main PS away from the fang
bracket (4).
Pull/slide the entire Main PS backwards
until the connectors to the Card Cage/
Backplane are unseated.
NOTE: If the 4D MC option is installed,
proceed to Step 2. If not proceed to Step 3.
NOTE: If the Shear Wave option is
installed, the cable that supplies voltage to
the Capacitor Pack is located behind the
BEP Power Cable and the Printer Cable
may not be present.
Main PS and mounting
(Cherokee/Mitra) PS connectors
(Lambda) PS connectors without Shear Wave option
(R4 and earlier)
(Lambda) PS connectors with Shear Wave option
(R5 and later)