GE
D
IRECTION 5535208-100, REV. 2 LOGIQ E9 SERVICE MANUAL
Chapter 8 Replacement procedures 8 - 277
8-11-5-3 Preparations (cont’d)
Follow these links if you need more information:
• 4-2-3 "Power shut down" on page 4-7.
• 8-5-2 "Side Covers replacement" on page 8-30.
• 8-5-4 "Top Cover replacement" on page 8-38.
• 8-11-3 "DVD R/W drive replacement" on page 8-270.
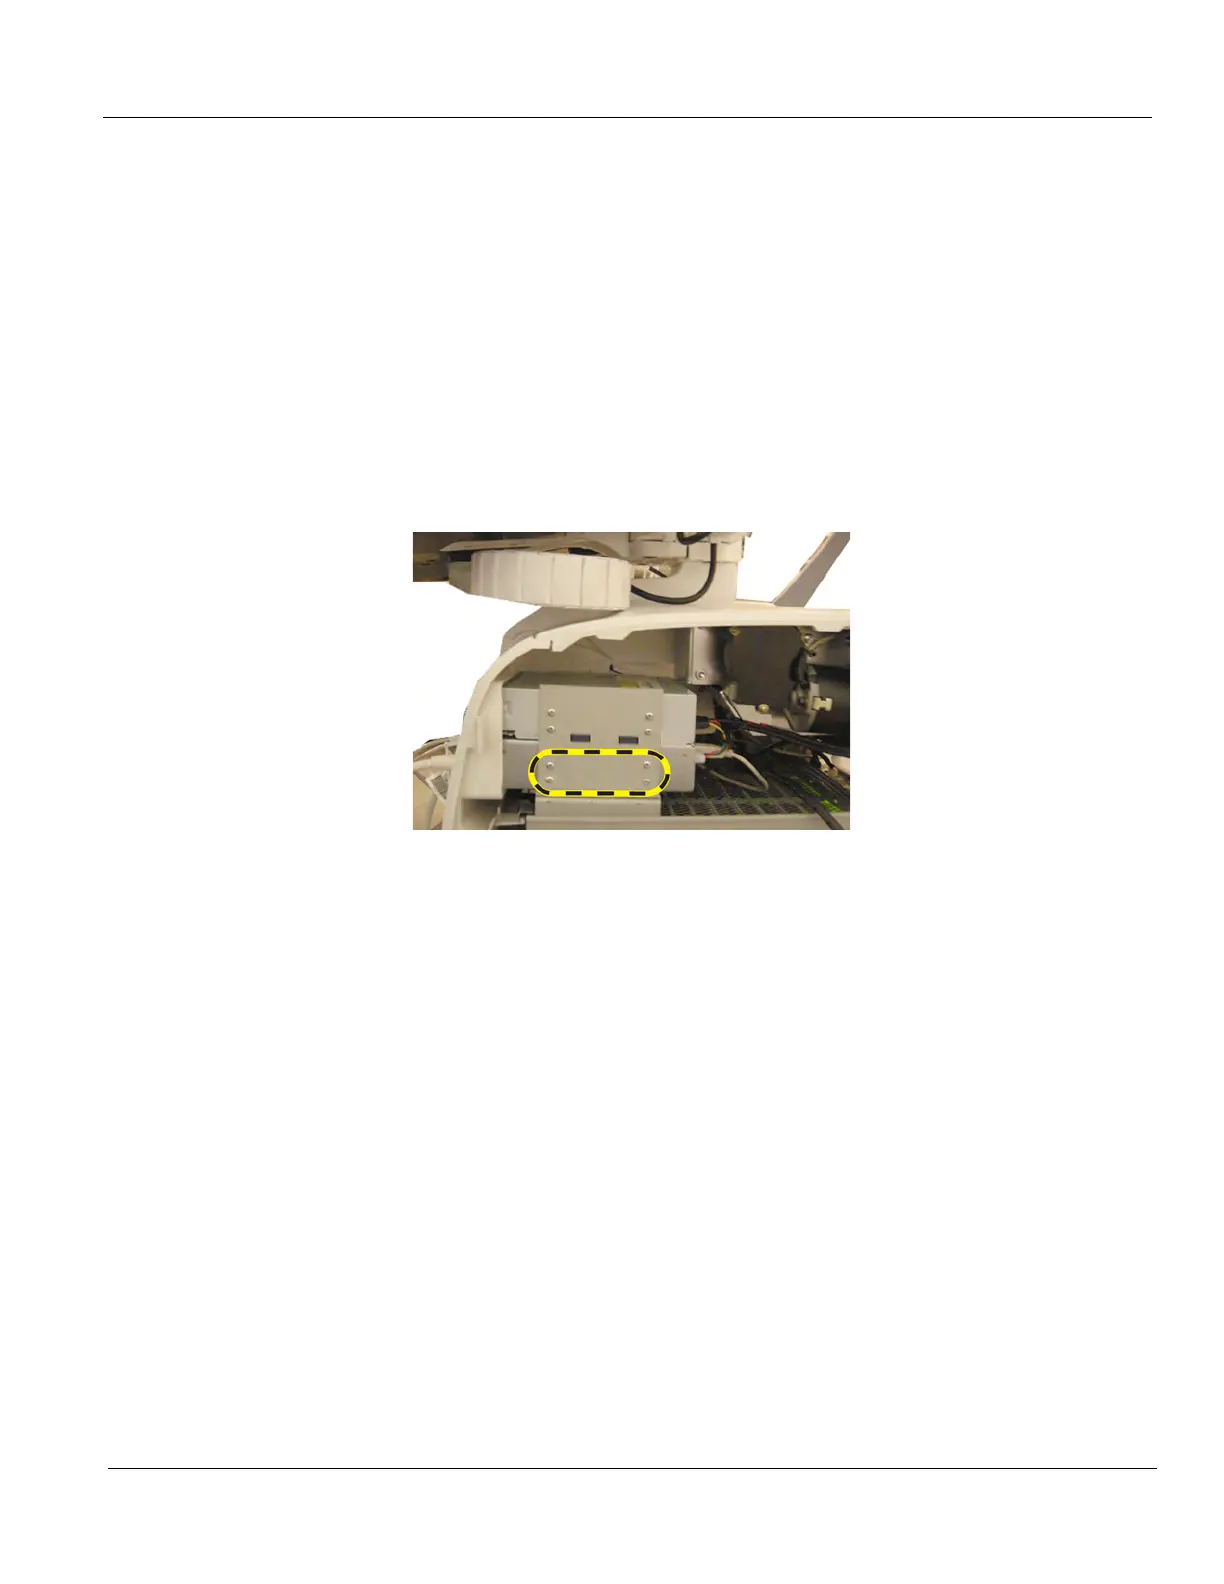
8-11-5-4 V Nav module removal
1.) Disconnect the cables to the rear of the V Nav module.
2.) Remove the four screws securing the right side of the V Nav module.
3.) Raise the Column Cover to access and remove the four screws securing the left side of the V Nav
module.
4.) Slide the V Nav module out the front of the system.
8-11-5-5 V Nav module installation
1.) Slide the V Nav module into position.
2.) Install the eight screws to secure the V Nav module.
3.) Connect the cables to the V Nav module.
4.) Install the DVD drive, if necessary.
5.) Return the Column Cover to proper position.
6.) Install the Covers.
7.) Perform Functional Checks. See: 8-11-5-6 - Calibration and adjustments,
8-11-5-7 - Verification and 8-11-5-8 "Functional Checks" on page 8-278.
Figure 8-68 V Nav Screw placement (right side view), located below
DVD Drive or DVD Storage Tray