Owner’s Manual for Power Zone Gateway on PZ 410 21
Installation and Operation
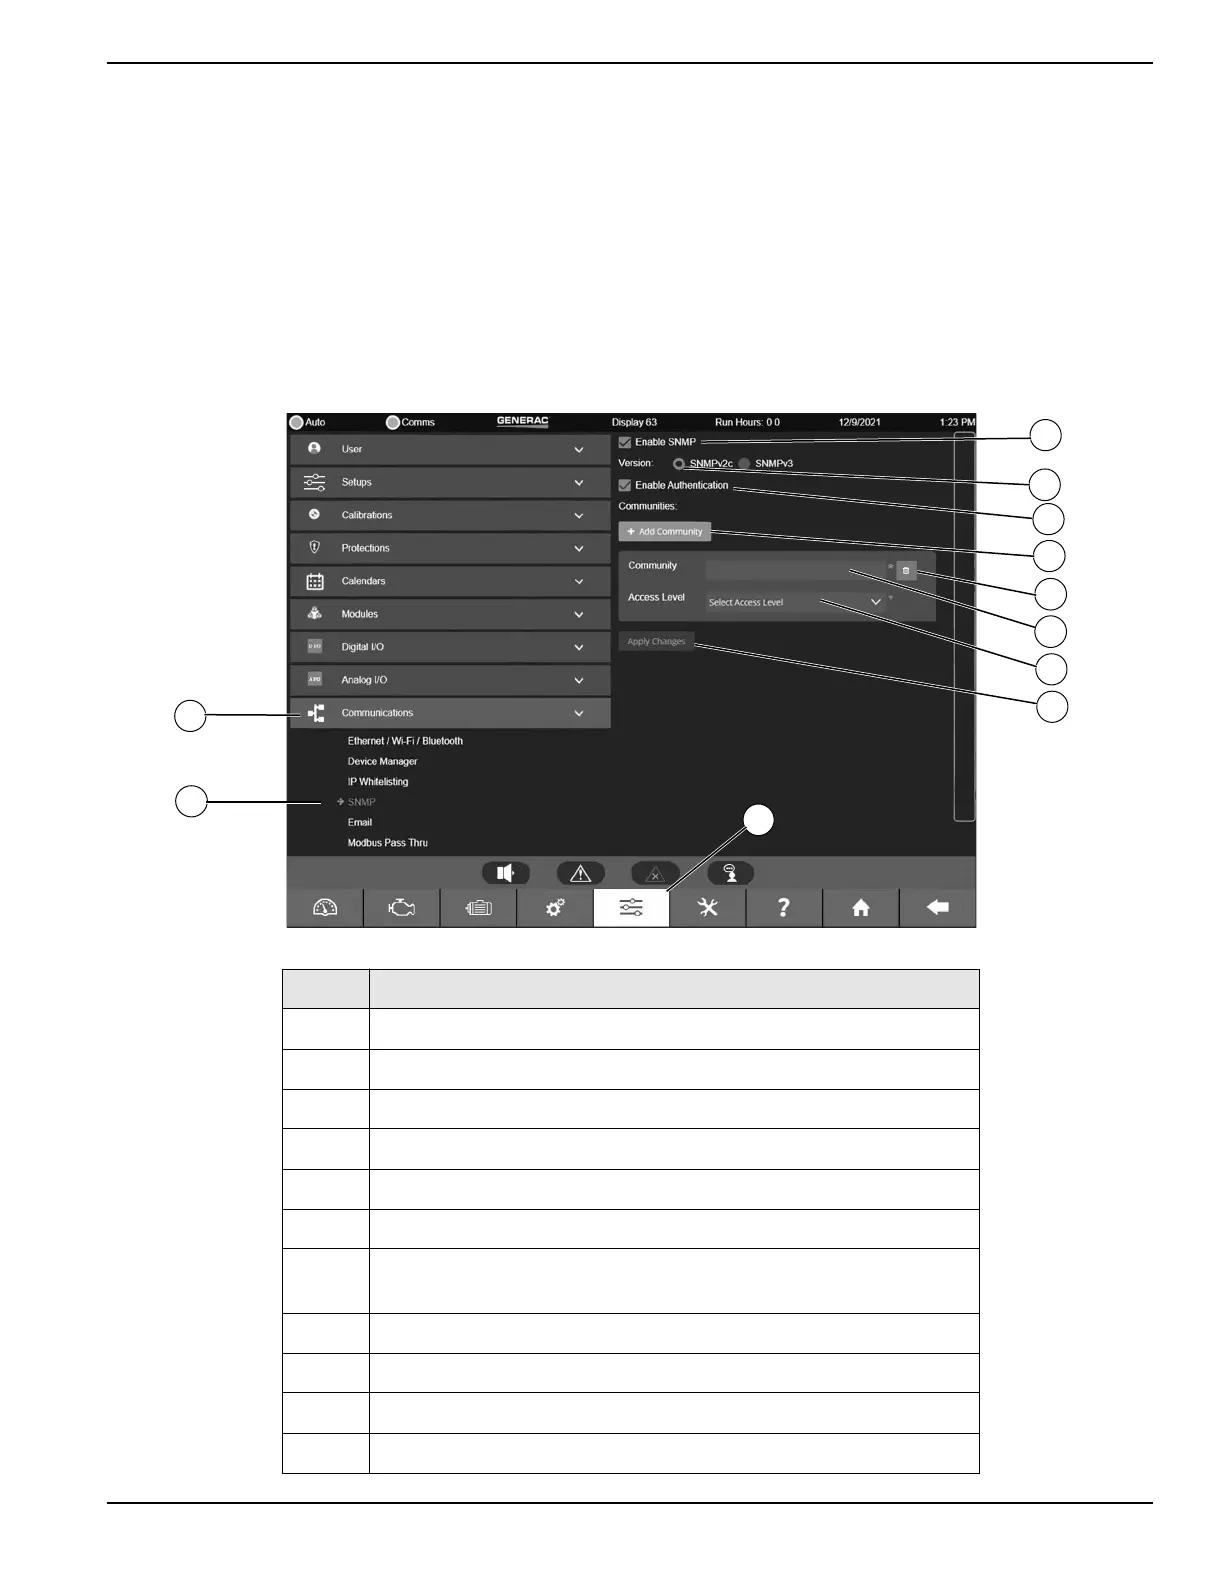
SNMP (Simple Network Management Protocol)
See Figure 3-37 and Figure 3-40. Navigate to SNMP by
clicking Setup (A), the Communications dropdown (B),
External Interfaces (C), pressing on Configure in Ether-
net Built In section, pressing on Configure in the SNMP
Section. The protocol SNMP is used by NOC (Network
Operations Center) or data center to monitor Power Zone
system.
NOTE: The screens differ depending on whether
SNMPv2c or SNMPv3 is selected. See Figure 3-37 and
Figure 3-38 for setup. See Figure 3-39 for SNMPv2C
and Figure 3-41 for SNMPv3 configuration.
1. Enable SNMP (D).
2. Set SNMP version to SNMPv2c (E).
3. Check the “Enable Authentication” checkbox (F).
4. Tap “Add Community” button (G).
5. Enter Community Name (J) and set access level
(K).
6. To delete an entry use the trash button on the right
side of the screen (H).
7. If multiple communities are being used, go to step
4 and repeat until all communities are entered.
8. Tap “Apply Changes” button (L) to save all settings.
Figure 3-36. SNMPv2c
Letter Setting Name
A Setup
B Communications Dropdown.
C Select SNMP.
D Enable SNMP.
E Select SNMP version SNMPv2c.
F Enable Authentication.
G
Add Community. Multiple Communities can be specified, each with
their own name and access level.
H Delete entry.
J Community name.
K Access Level (None, Read Only, Read Write).
L Save settings.
013859
A
B
C
D
E
F
G
H
J
K
L
 Loading...