Service and Repair Manual July 2019
Repair Procedures
30 S-40 XC • S-45 XC • S-40 TraX • S-45 TraX Part No. 1286829GT
1-8
How to Replace the Display
Controller (DISCON) Module
1 Push in the red Emergency Stop button to the
off position at both the ground and platform
controls.
2 Disconnect the negative terminal from the
start battery and auxiliary battery, if equipped.
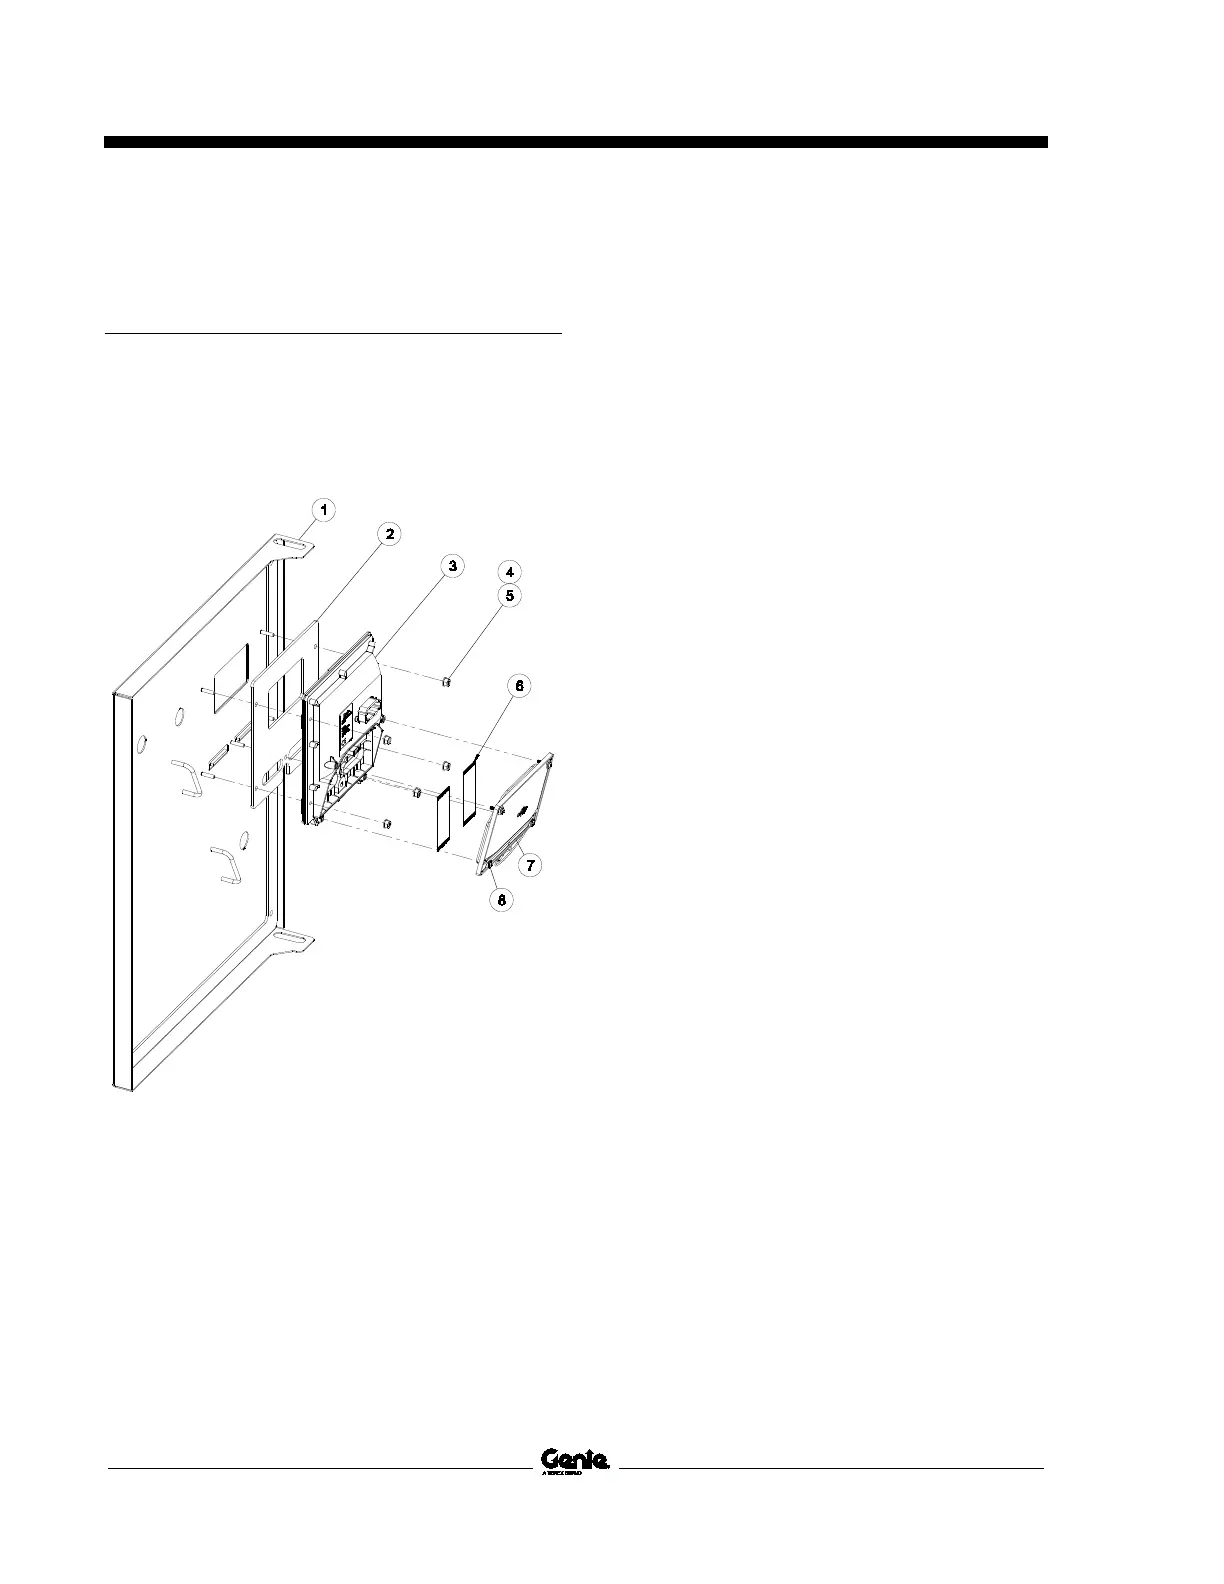
Illustration 1
1 ground box lid
2 DISCON gasket
3 DISCON
4 8/32 nylock nuts
5 #8 flat washers
6 ribbon cable
7 DISCON door
8 Torx head screws
3 Open the ground box lid (1) and disconnect
the wire harness going to the display controller
(DISCON).
4 Remove the DISCON door from the back by
loosening the four Torx head screws (8) and
remove the two ribbon cables (6) connecting
the ground box overlay to the DISCON.
Note the orientation of the cables for reassembly.
5 Remove the DISCON from the ground control
box lid by removing the five hex nuts and
washers (4, 5). Discard the nuts and washers.
Note the lanyard attachment point for reassembly.
6 Remove the old DISCON gasket (2) from the
ground box lid and clean the lid surface from
any dirt, oil or old adhesive residue. Use a
99% solution of isopropyl alcohol to clean the
surface. Allow the surface to completely dry.
Note: Both the ground box lid and new gasket must
be 70° F / 21° C or higher at the time of application.
Application of the new gasket at lower
temperatures is not recommended.
7 Peel the adhesive protective film from the
back of the new gasket. Carefully line up the
new gasket over the ground box lid, making
sure the cutouts for the LCD screen, ribbon
cables and mounting studs are centered and
lining up with the gasket. Apply the new gasket
to the ground box lid and work from the center
out to eliminate air bubbles and make sure all
the gasket edges are securely fixed.
Note: Once applied it is not recommended to lift the
gasket and attempt to reposition it.
8 Install the new DISCON onto the ground box
lid and fasten it using the new hex nuts and
washers. All five fastening points must be
used. Attach the DISCON door's lanyard to
the DISCON's mounting stud.
 Loading...