WindMaster and WindMaster Pro 1561-PS-0001. Issue 11 February 2017
________________________________________________________________________________________________________________________
50
10.2. Configuring WindMaster using a Terminal Program e.g. HyperTerminal.
Note – Other terminal emulators can be used to configure the WindMaster in a very similar way.
Setting up
1. Decide on an available Com port that you want to use.
2. Run Hyperterm.exe (Typically accessed via Start Programs Accessories Communications
Hyperterminal)
3. Create a New Connection (File New Connection)
4. Enter a Name (eg WindMaster) .
5. Change ‘Connect Using’ to ‘Direct to Com 1’ (or other Com port as required)
6. Adjust the Port settings to match WindMaster settings. WindMaster default settings are :
Bits per second 19200 Data bits 8 Parity None
Stop bits 1 Flow Control (Handshaking) None
Assuming the WindMaster has been correctly connected to the PC and a Power Supply, the opening menu will show the
WindMaster in Measurement mode and scroll continuous wind information data.
Entering Configuration mode
From Continuous mode *
From Polled mode * N
where N is the Unit identifier (a letter between A and Z)
The WindMaster responds with a CONFIGURATION MODE message, stops reporting wind measurements, and waits
for a command (as detailed below).
Returning to Measurement mode
Q ENTER
The WindMaster responds with wind measurements immediately when in Continuous mode,
or on receipt of a Poll signal when in Polled mode.
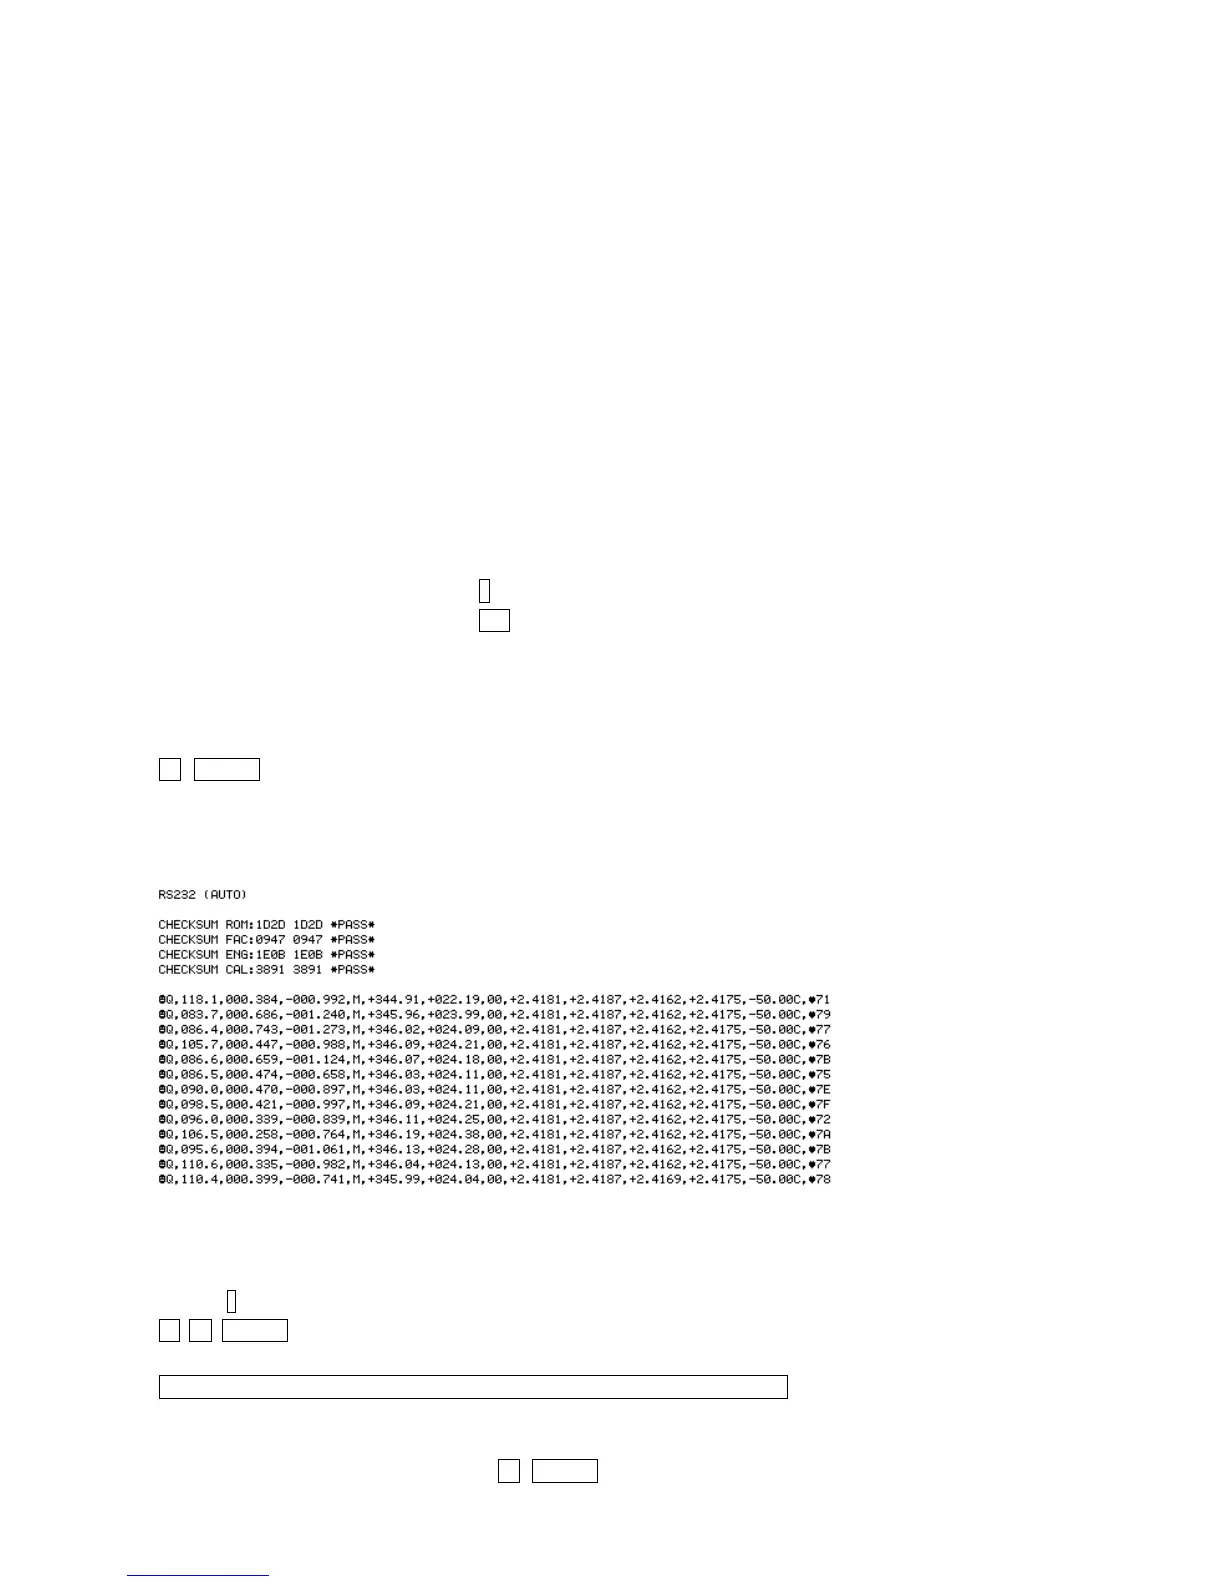
This will be followed by a checksum test and then continuous wind information is displayed in the example as follows
(polar, continuous, all options on).
Checking the configuration
We recommend that, as a standard procedure, you use this command prior to, and after, changing any settings. It shows
the current settings for most of the alterable settings.
*
D 3 ENTER
The WindMaster responds with the current default settings. These are shown below:
M2, U1, O1, L1, P1, B4, H1, NQ, E1, T1, S1, C2, A1, I1, J1, V1,X1, G0,K50
We suggest you note down the settings, so that you can easily return to them.
Return to measurement mode Q ENTER
 Loading...