Repair
28 3A8626C
.
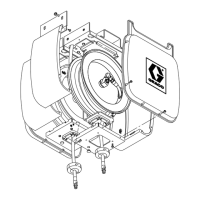
5. Disconnect the hose (B) from the swivel (C) (FIG.
26).
6. Install the hose stop (D) to the end of the
replacement hose. If the hose has a warning tag (F),
the hose stop (D) should be installed on the same
end as the warning tag (F) (F
IG. 26).
NOTE: If the hose is equipped with a spring guard, this
end must be on the same end as the hose stop.
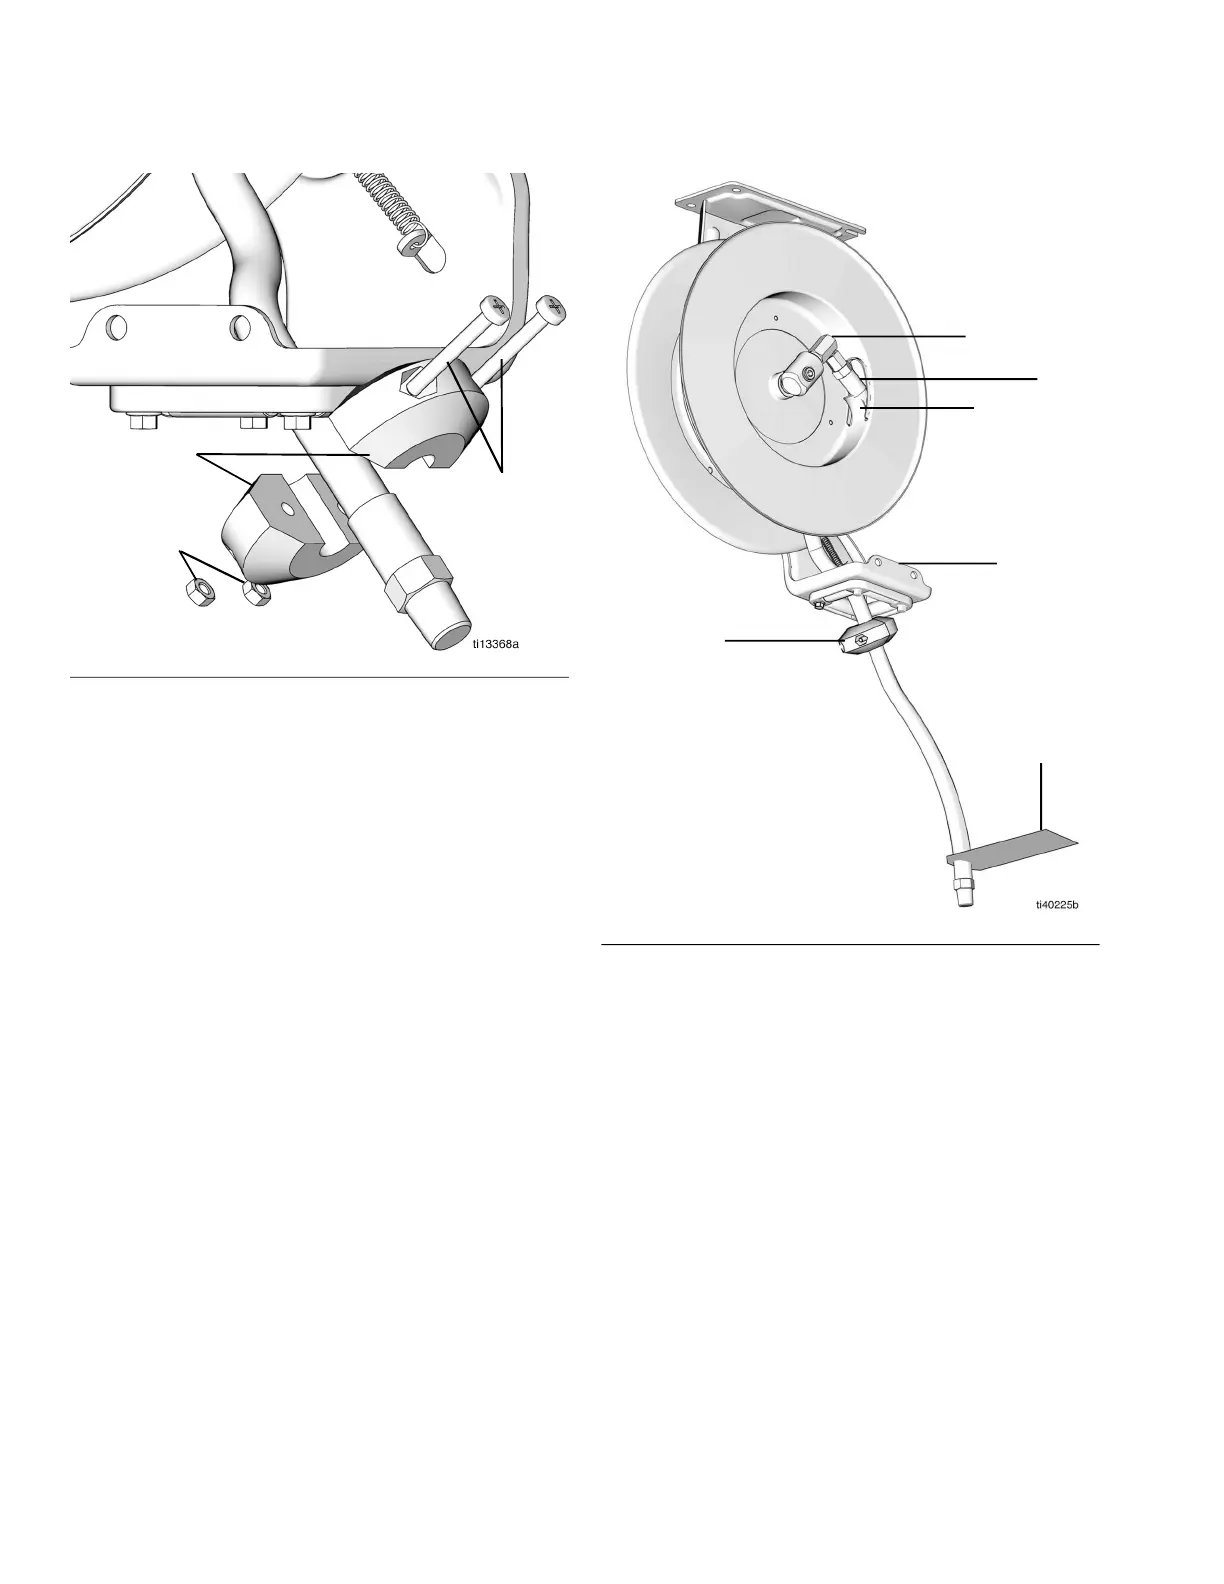
7. Insert screws through the hose stop and hand
tighten the nuts to hold the hose stop in place (F
IG.
25).
8. Run the end of the hose (B) through the hose guide
(G), and then through the hole (E) in the reel (F
IG.
26).
9. Attach the hose end (B) to the hose reel swivel (C).
Then carefully remove the C-clamp (D) (F
IG. 24,
page 27),
.
10. Pull the hose (B) hard enough to release the latch
and slowly allow the hose to retract.
11. If used, re-assemble the hose reel enclosure.
12. Flush the hose following the Flush the Equipment
instructions, page 9.
FIG. 25
Screw
Nuts
Hose Stop
Components
FIG. 26
C
B
F
D
G
E
Air/Water Reel, Oil Reel or Grease Reel