36
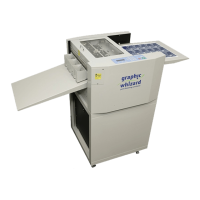
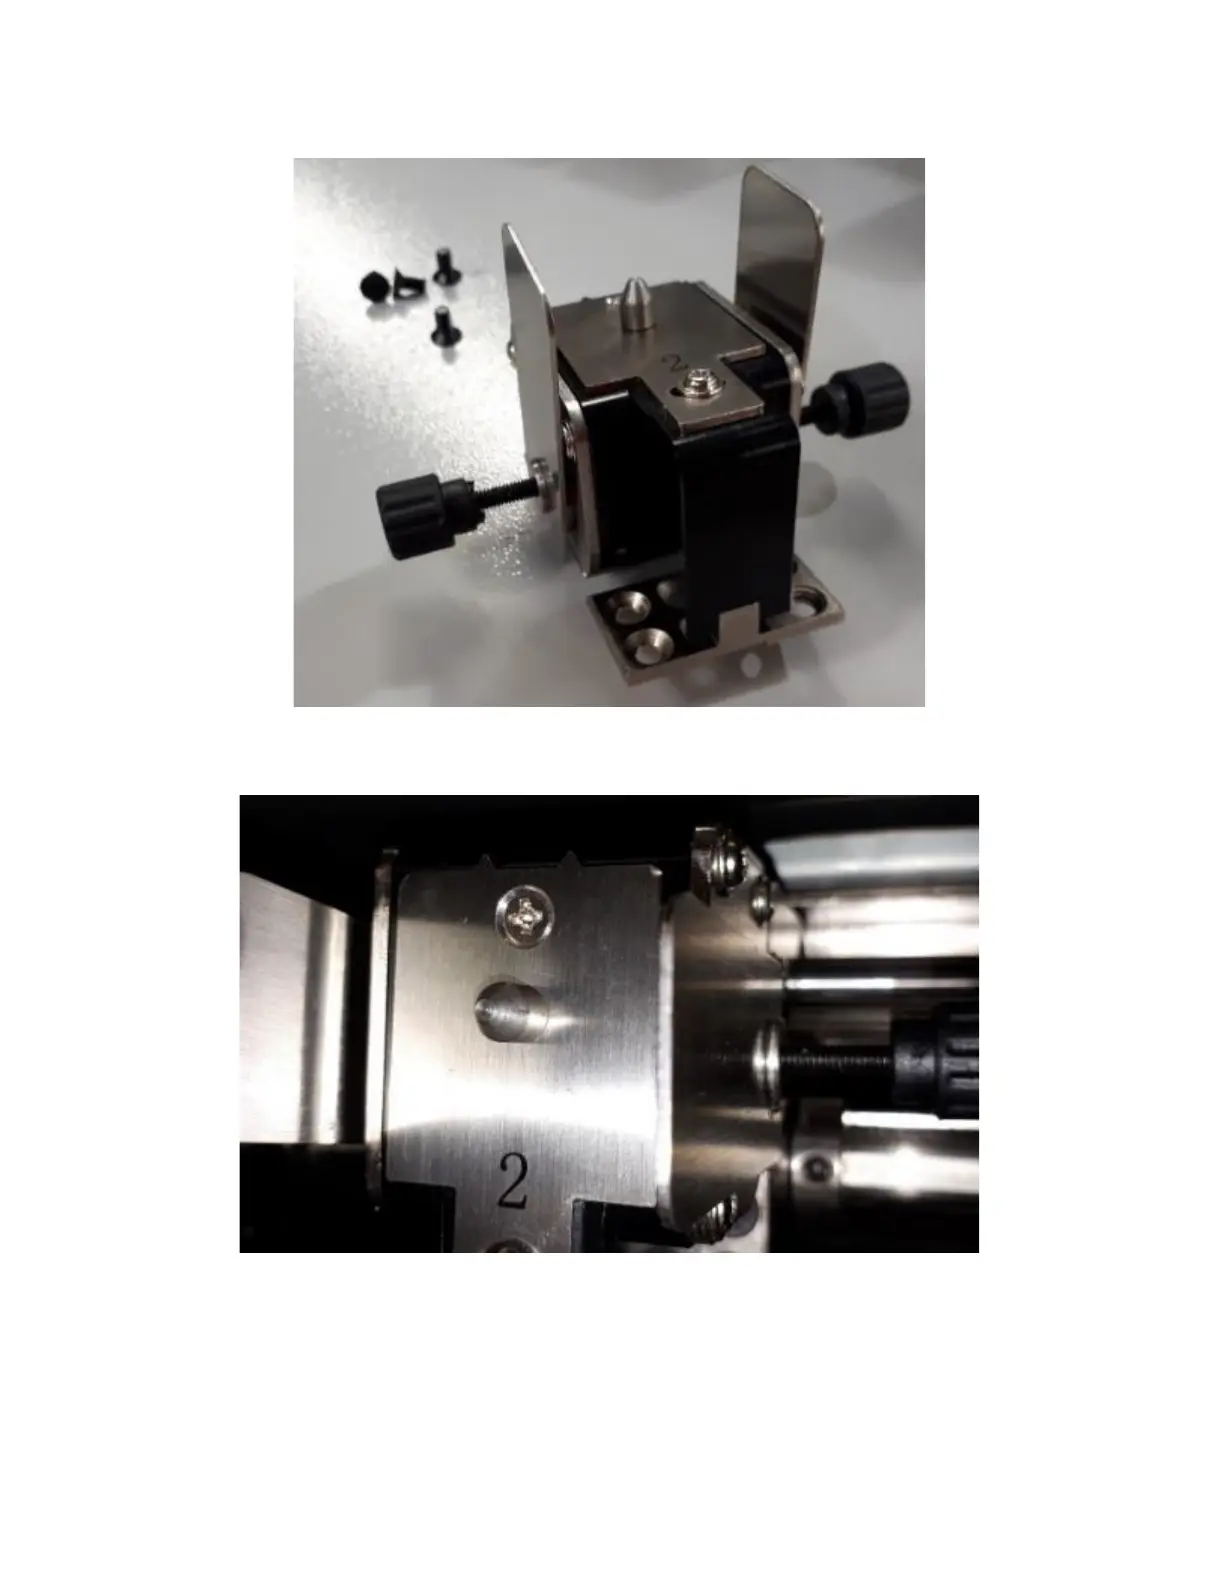
9. Insert the notched plates between the slitter removal shaft and bearings by pulling on the thumb screws.
The slitter blades are spring loaded.
10. The upper slitter blades rest outside of the lower blades. When installing, ensure the blades remain to
the outside by pinching the notched plates in or pulling on the thumb screws. Note: you may need to
move the other slitter assemblies to create room for the thumb screws.
11. Tighten the screws, keeping the tools in place to ensure the blades don’t shift out of position.
12. Run a test sheet. If the slit is jagged, loosen the screws and adjust the slitter blades by pulling on the thumb
screws.
13. Continue testing until the slitters produce a clean slit.
14. Remove the notched plates. Remove the thumb screws.
15. Test the 331SCC for clean slits.