35
5.8 Slitter Removal and Replacement
Complete the following steps to remove the slitters.
Note: this procedure is applicable for both the 331SCC manual and 331SCC Air
1. Power down the 331SCC. This is for safety.
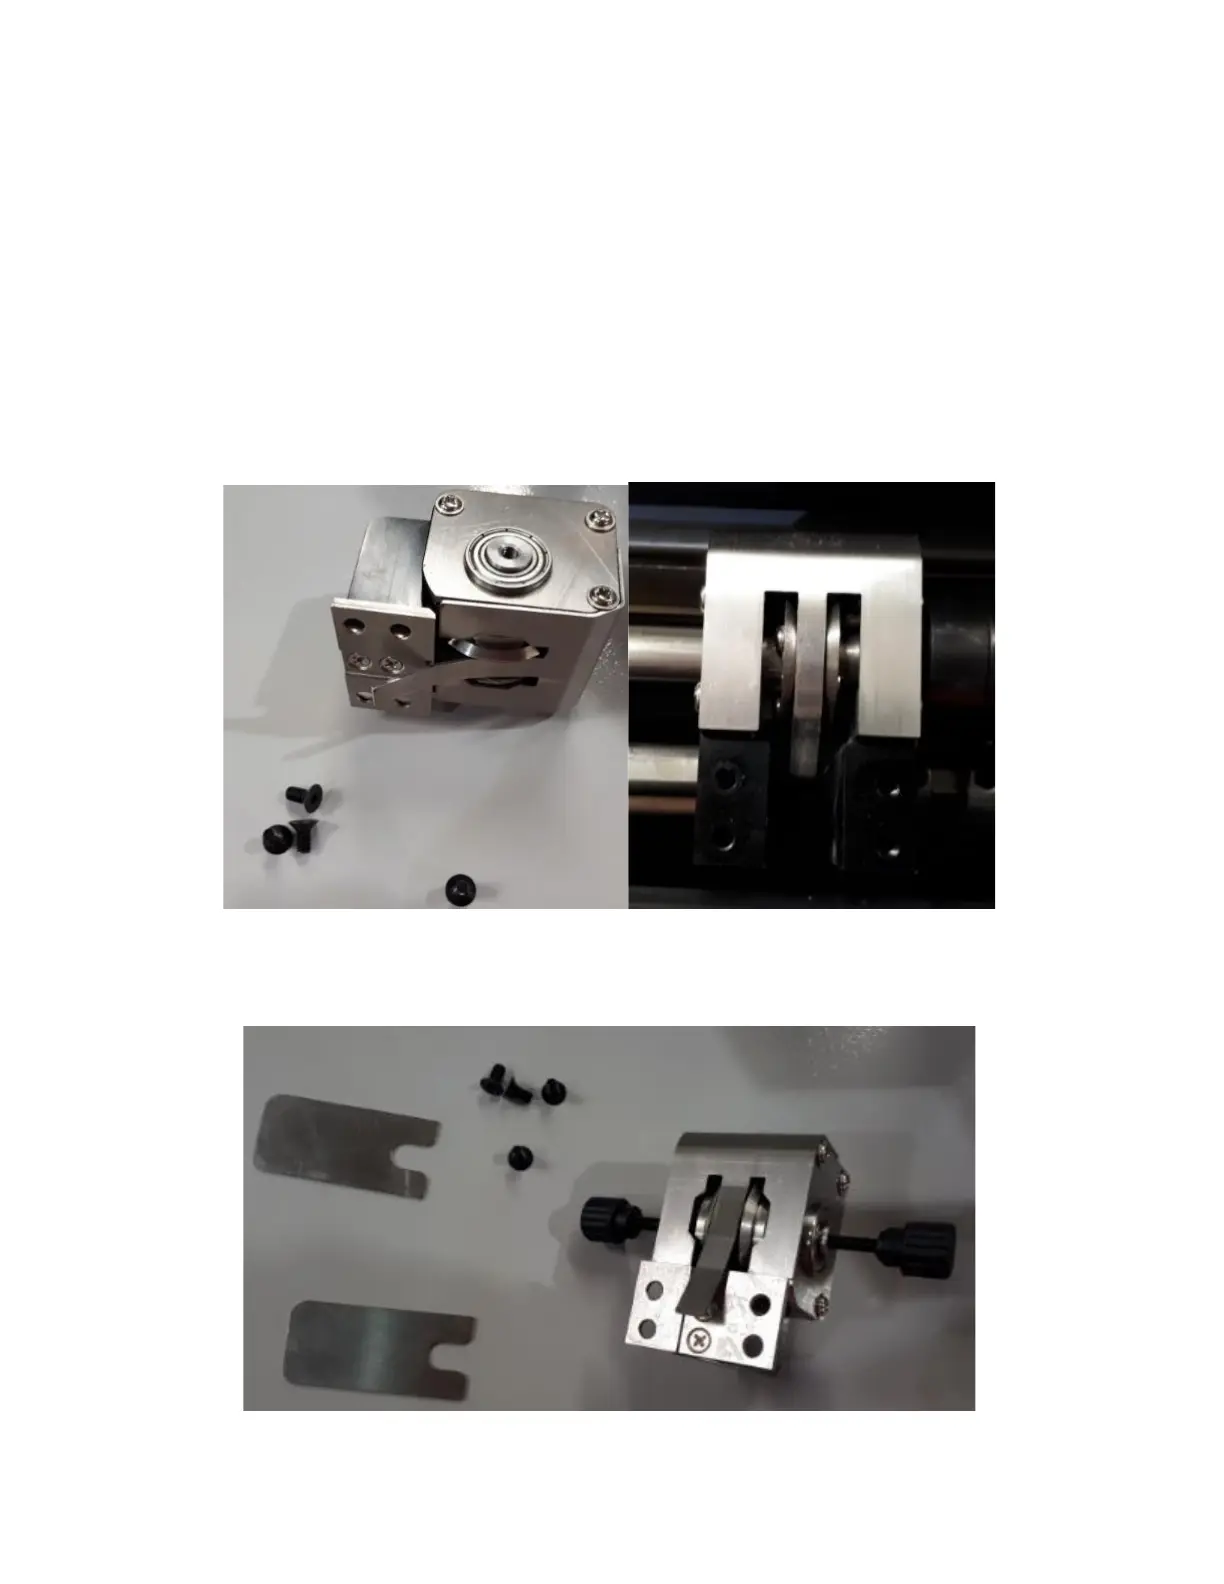
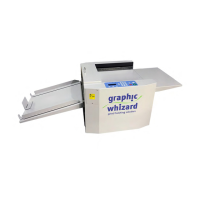
2. Locate the slitter removal tools that were shipped with the 331SCC. There should be two thumb screws
and two notched plates.
3. If installed, remove the template. You now have access to the slitter assemblies.
4. Loosen the two countersunk screws, if removing slitter assembly 1 or 4, or four screws if removing sitter 2
or 3, that secure the upper slitter assemblies to the lower assembly.
5. Carefully lift the slitter assembly.
6. Clean out the upper and lower assemblies.
7. Skip to Slitter blade removal if removing blades. This covers the lower slitter assembly removal procedure.
8. When all dust and debris has been removed from the upper and lower assemblies, install the thumb screws
in the center of the upper slitter assembly.