42
6.2 Image Compensation
Image compensation helps correct image shift that might have occurred during printing.
Cut Shift Correction
If the job has a registration mark, ensure the mark reader is set to On and the position of the registration mark has
been programmed into the job. Run a test using the register mark and check the image on the cards. The image
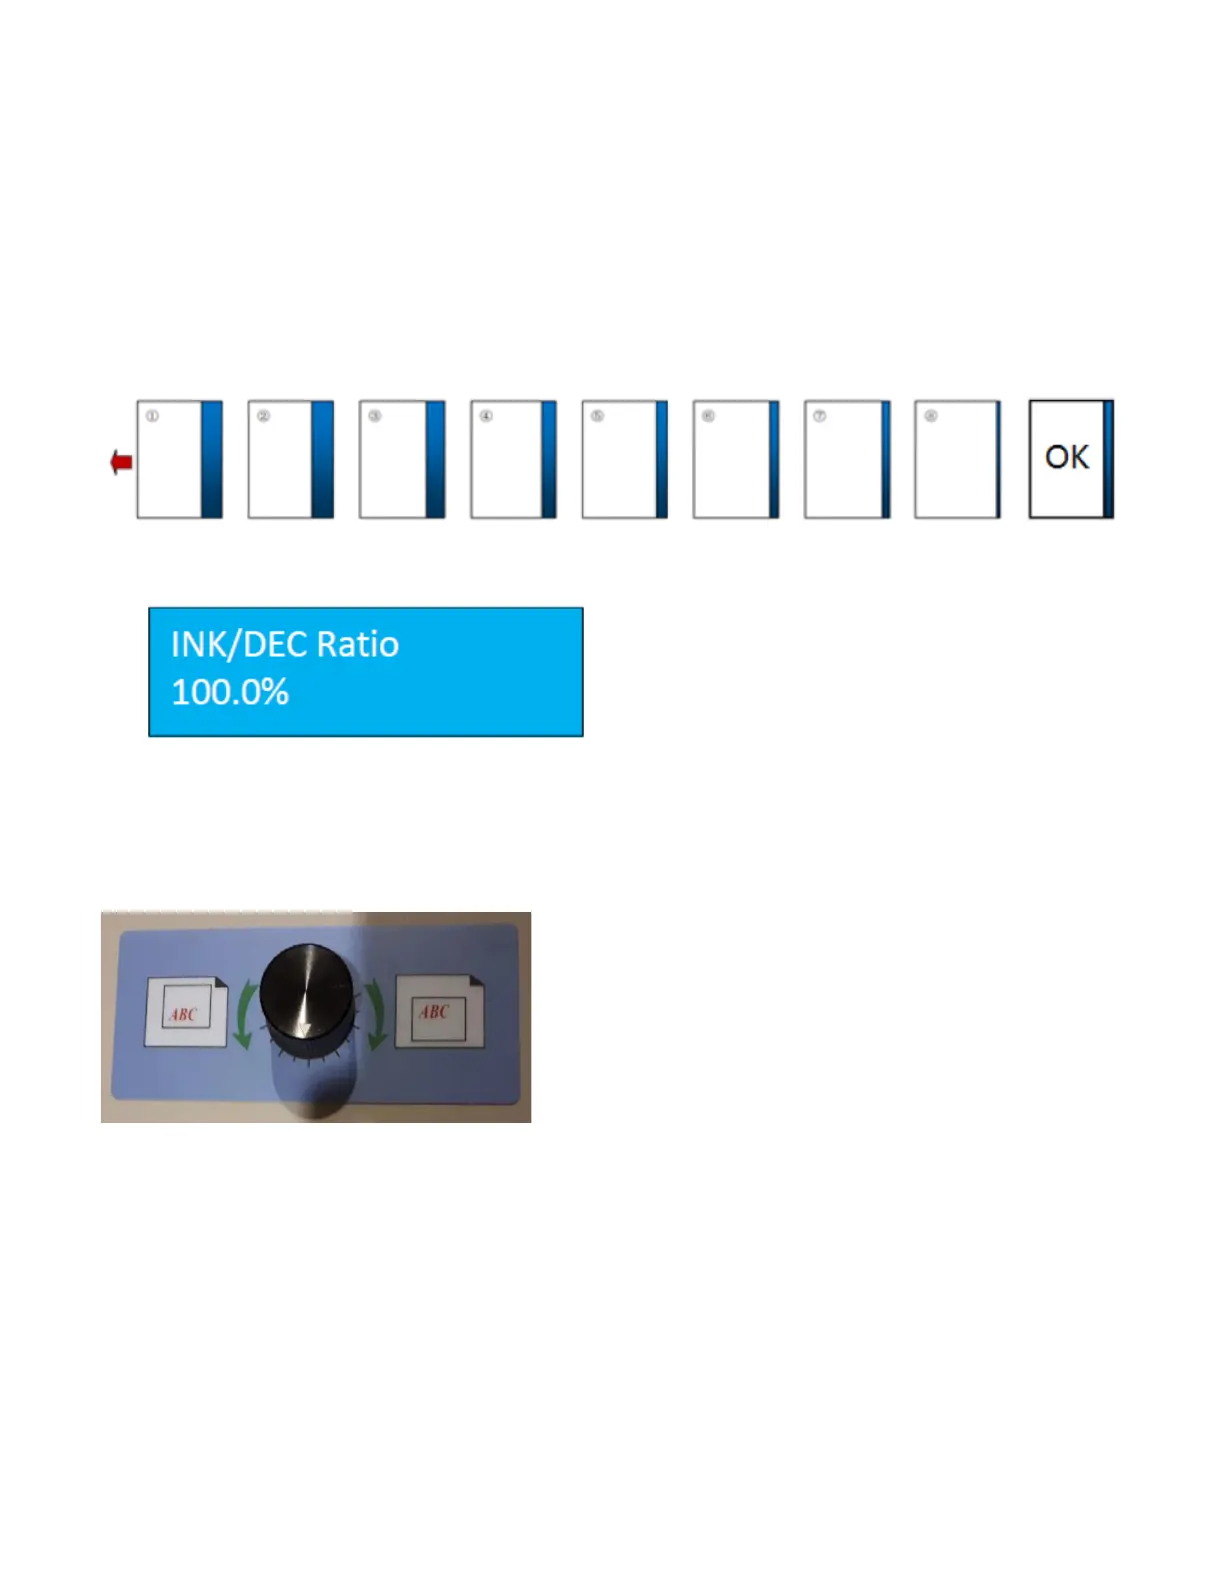
below shows an example of image shift.
Press the Mode button until INK/DEC Ratio is displayed. If
no adjustment has been made, the value will be 100%.
Increase or decrease the value by pressing the forward
and backward buttons. The value will change by 0.1% with
each button press. Run a test with each adjustment. All
changes will be saved with a power reset.
Manual Side to Side Adjustment
If the image of the finished job is not centered or requires left
to right adjustment, the PT 331SCC has a manual side to side
adjustment feature.
Before adjusting, ensure locking collars are secured on either
side of the slitter by tightening the set screws. Run a test sheet.
Adjust the slitter position by turning the adjustment knob left or
right, in the direction of the required adjustment. Run test
sheets until the image is centered.