Disassembly
Removing the digital
Step 1
board
Remove the PC104 board using the procedure provided earlier in this chapter.
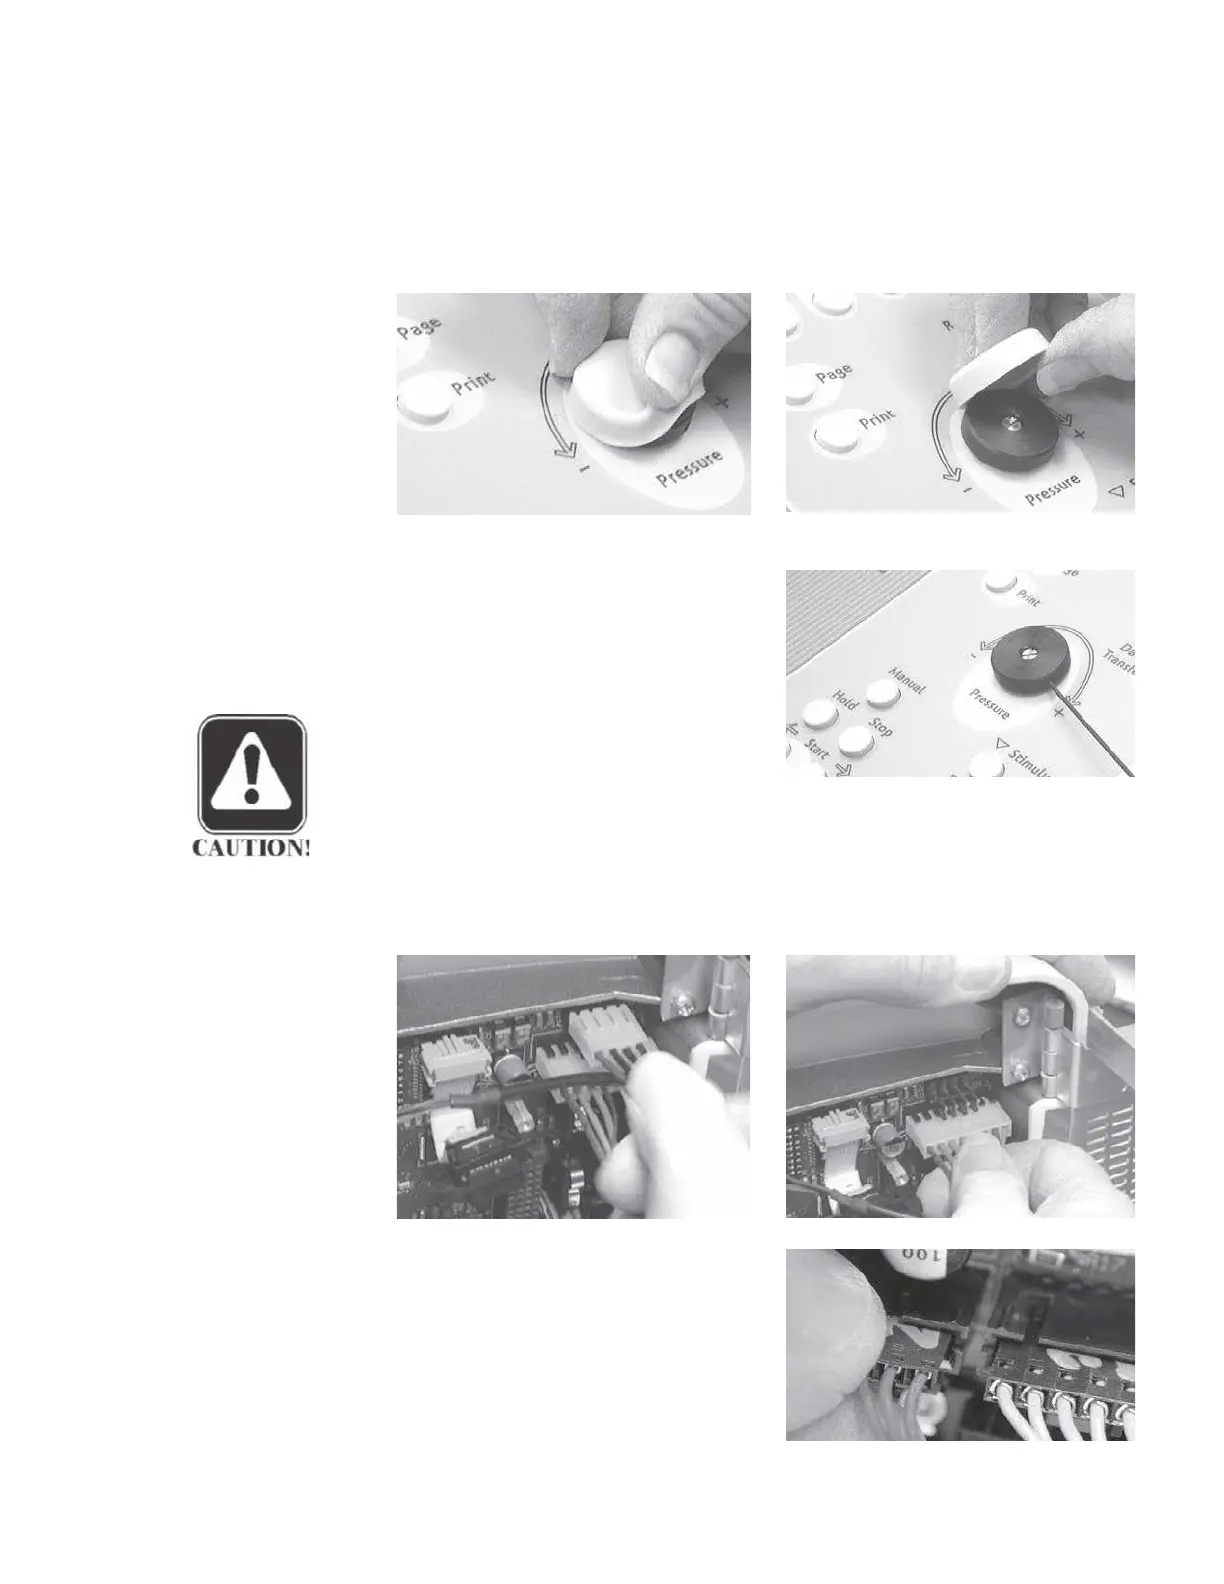
Step 2
Remove the rubber pressure adjustment knob cover by rubbing the knob cover
at the edge of the knob.
Step 3
Remove the pressure adjustment knob
using a 1/16" allen wrench. Loosen
the two setscrews and lift the knob off
the panel.
CAUTION
Verify that there is clearance be-
tween the bottom of the knob and
the panel surface when reinstalling
and tightening the knob to avoid scratching the panel.
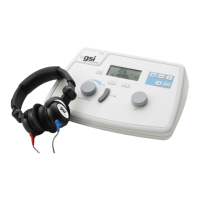
Step 4
Disconnect the 4-wire and 8-wire analog board cables.
Step 5
Disconnect the six pump assembly
cables by disengaging each locked
connector and pulling the connectors
straight away from the board.
GSI TympStar Version 1 and Version 2 Service Manual
5 - 17