6-2 GTECH Technical Training and Support Services
AccuTherm® Ultra Firmware Install Procedure
1. Connect the printer data cable to printer and
USB port in PC.
2. Connect the power cable to printer (do not
connect
to AC power yet).
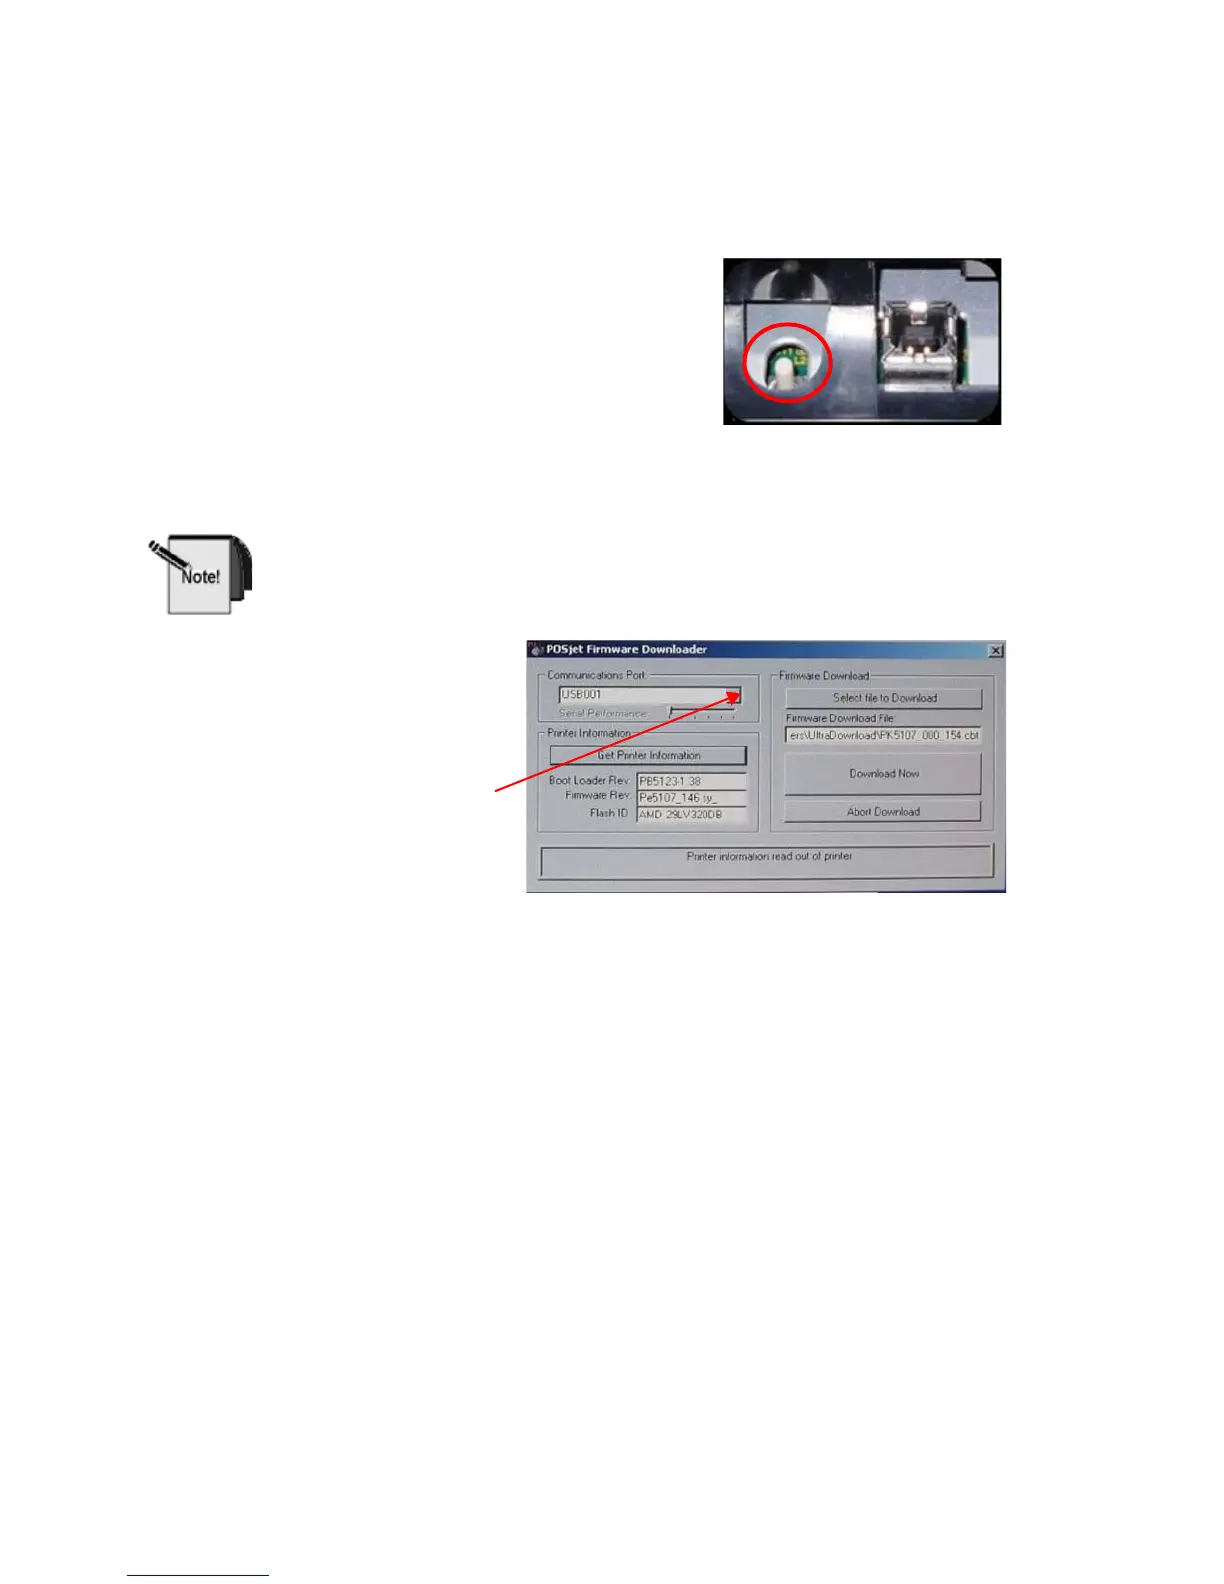
3. Press and hold the diagnostics button while
ap
plying power to printer.
4. The LED on the front of printer will flash
slowly
. Release the diagnostics button
(printer is in download mode (Transact boot loader)).
5. The USB Link is active and will communicate with the PC.
You must have the printer connected before starting the download
program. Otherwise, the download program will not see the USB port.
6. Run Download.exe.
7. Select the USB001
port or the active
USB port from the
drop-down menu.
8. Click “Get Printer Information” to verify that you can communicate with the
printer.
9. To select firmware version:
a. click the “Select file to download” button.
b. Open the file containing the files you exported to the PC.
c. Double click PK5107_000_162Full.cbt file and select “Download Now”.
DO NOT INTERRUPT THE DOWNLOAD
The firmware file will be transferred to the pr
inter. It is self verifying and will not
be activated if it is incorrect. The download program is not aware of the
verification process and assumes it loaded correctly.
You MUST wait at least 10 seconds after the download program says it’s
done as the printer takes 5 or 10 more seconds to finish writing the update to
flash. The easiest way to tell when the printer is done is to press the “Get
Printer Information” button after the download and when the printer
responds it’s done.