Trophy58 | Service instructions 58 | Service instructions
Replacing the tiller PCB
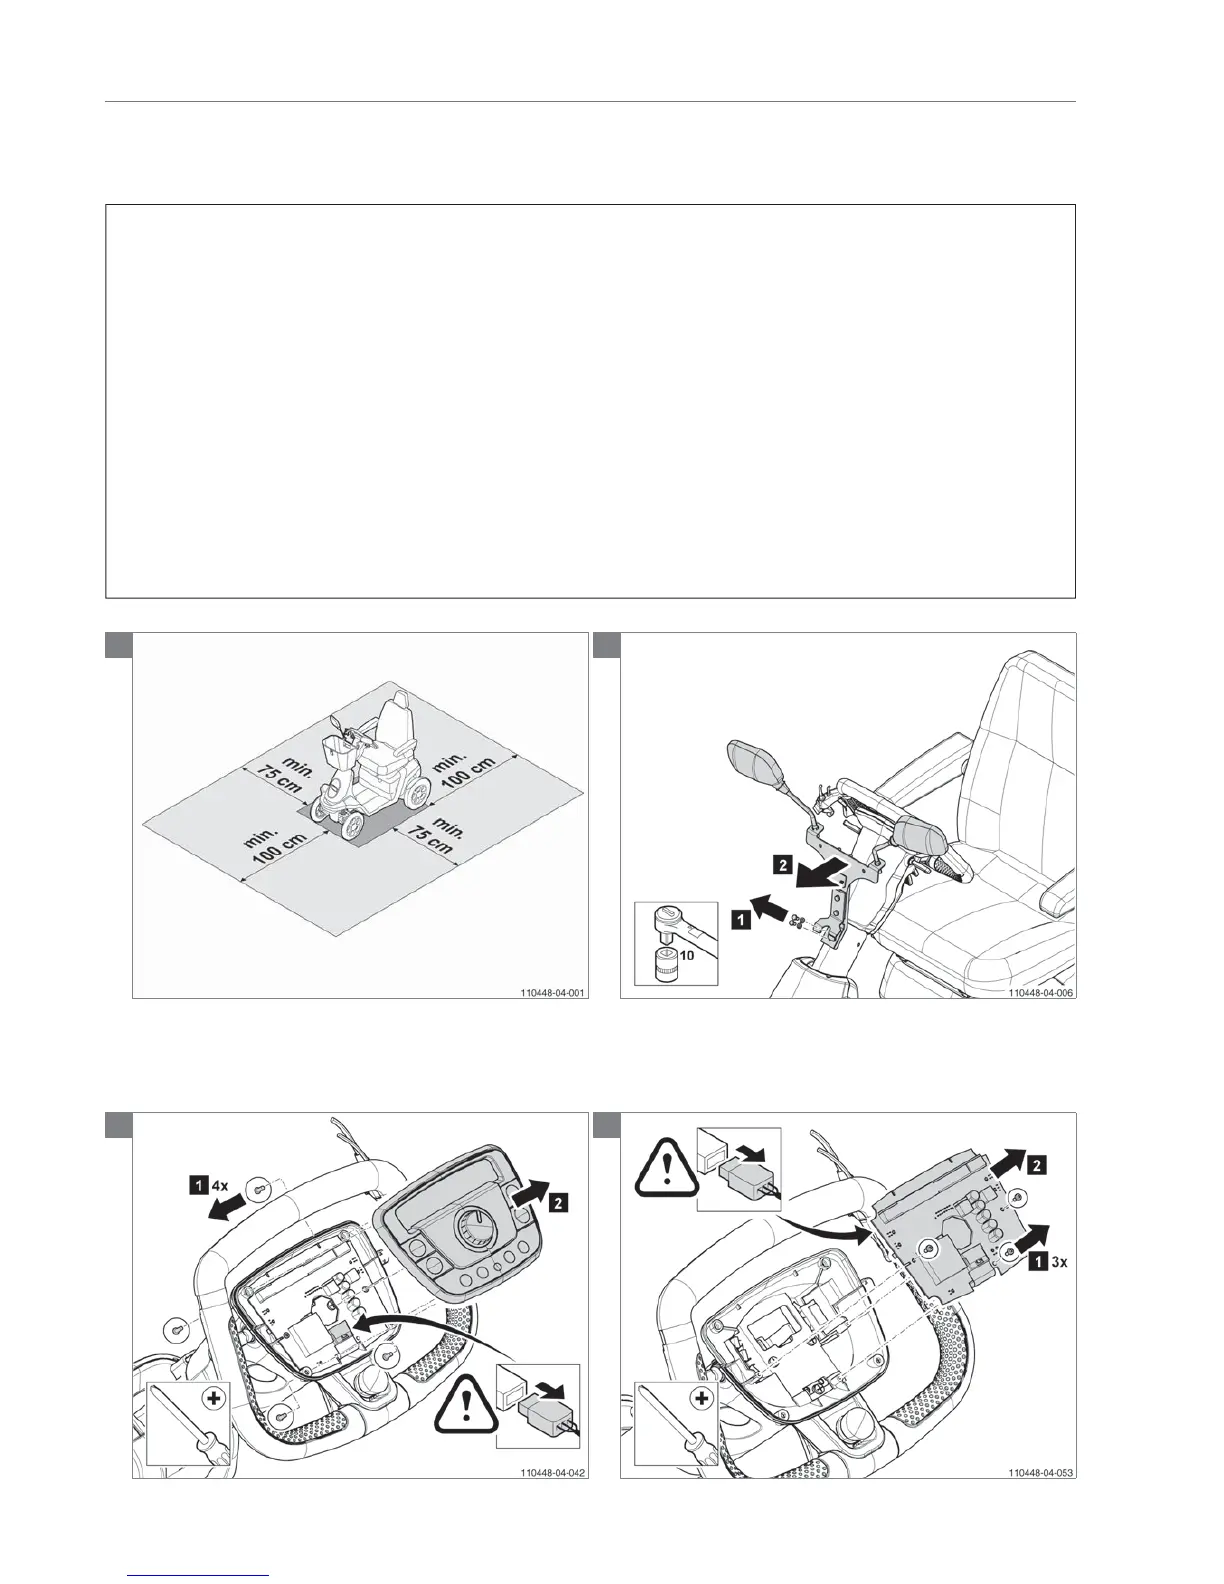
Preparation
• Switch off the scooter with the ignition key.
• Disconnect the batteries.
Instructions
The following operations are required to replace the tiller
PCB:
Note! Suitable work area required!
• Remove the basket and the mounting bracket for the
mirrors.
• Remove the two bolts and remove the front tiller cover.
• Remove the tyrap
• Remove the nut, the four Ejot screws and the
dashboard.
• Disconnect all connectors from the tiller PCB.
• Remove the three Ejot screws to remove the tiller PCB.
• Mount the new tiller PCB.
• Rebuild the scooter in the reverse order.
Relevant article numbers
• 9000496 PCB console for original electronics (ID-no <
QT02400)
• 9008789 Tiller PCB Basic for advanced electronics (ID-
no > QT02400)
• 9008791 Tiller PCB Dual control for advanced
electronics (ID-no > QT02400)
• 9008790 Tiller PCB Full option for advanced electronics
(ID-no > QT02400)
Tools used
• Socket, 10 mm
• Screwdriver, crosshead
Notice
• Make sure the scooter is switched off.
1
2
3
4
 Loading...