13
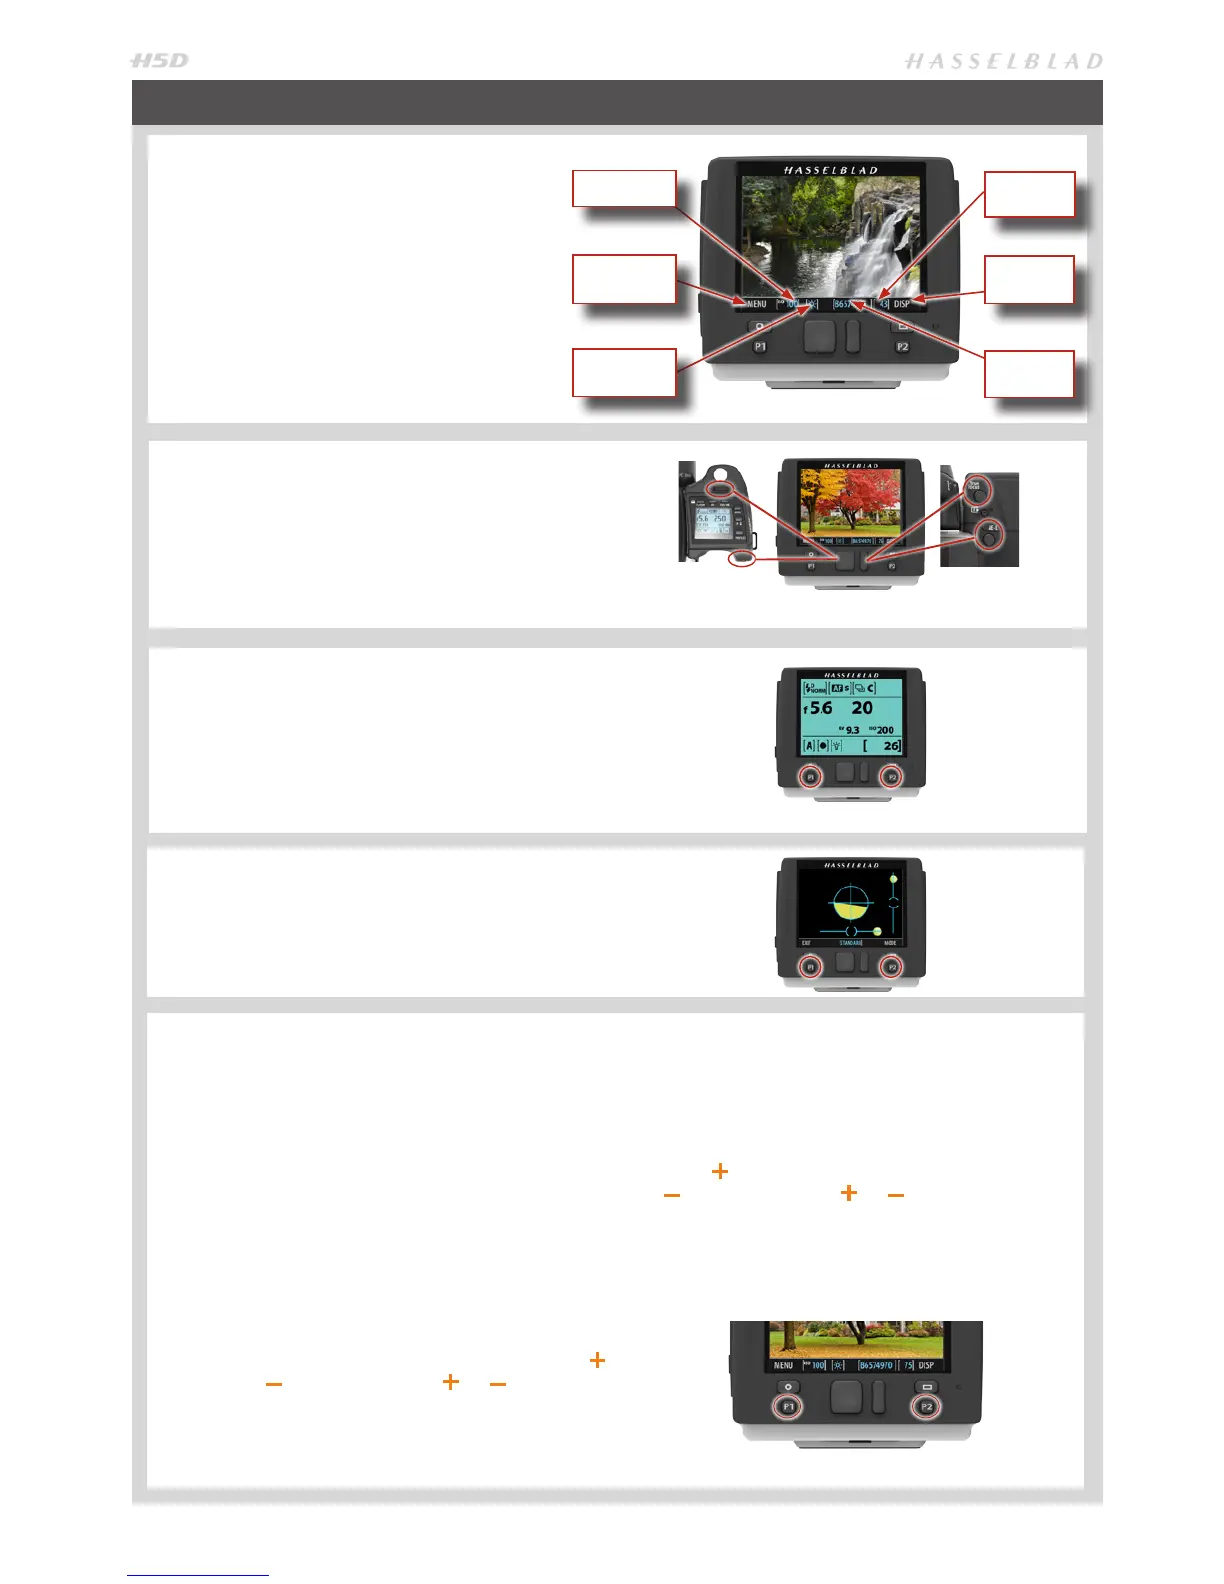
When shooting, the sensor unit can display the
information most often required for a quick
settings check. The unit’s buttons, grip scroll
wheels and camera buttons are used to navigate
the main menu and change settings.
The display can show all saved captures on a CF
card for browsing and enlarge them for detailed
inspection.
When shooting, you can control the amount of
information visible together with the current
preview by choosing various modes
SENSOR UNIT DISPLAY AND CONTROLS − OVERVIEW
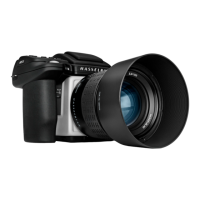
BUTTONS AND SCROLL WHEELS
In Browse mode, the scroll wheels and True Focus and AE-L
buttons on the grip duplicate the actions of the Navigation
and Zoom /selection buttons on the sensor unit.
Activate Browse mode by clicking on the Navigation button,
the Zoom button or one of the P buttons (when assigned to
Browse activation).
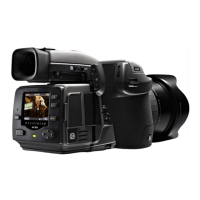
GRIP INFORMATION
Certain grip information (such as: aperture setting, shutter
speed, ash indication, focus setting, drive, EV, battery status,
exposure method, capture counter, ISO and white balance) can
simultaneously be displayed on the sensor unit. This feature is
activated by pressing one of the P buttons (when assigned to
Info Screen activation).
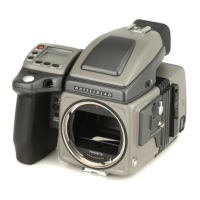
SPIRIT LEVEL
Spirit levels can be displayed on the sensor unit (a horizontal
spirit level is also visible in the viewnder simultaneously).
This feature is activated by pressing a P1 / P2 / Custom Button
(when assigned to Spirit Level activation).
P1 & P2 BUTTONS
The P1 and P2 buttons on the sensor unit are customizable
buttons that rapidly access a variety of functions, which are:
Delete image • Format card • Info screen • Spirit level • Focus
conrm • Browse mode • Mark Overexposure • Live View (50c
/ 50cMS / 200cMS models only)
The buttons are easy to reassign either on the sensor unit
itself or by way of the Camera Conguration tool in Phocus.
P1 & P2 BUTTON ASSIGNATION ON SENSOR UNIT
(TWO METHODS)
1. Press MENU.
2. Press P1 button or P2 according to choice.
3. Step through the options by pressing the True Focus (
) or AE-L (
) buttons or ZOOM (
or
) button.
4. Save the selection option by pressing EXIT (Menu button).
Button
function
ISO setting
White
balance
Button
function
Capture
counter
File name
or
1. Press MENU > SETTINGS > CUSTOM OPTIONS.
2. Select P1 button or P2 according to choice.
3. Step through the available options by pressing the True
Focus ( ) or AE-L
(
) buttons or ZOOM (
or
) button.
4. Save the selection option by pressing EXIT (Menu button).
The P1 and P2 buttons also serve as WiFi connection control
buttons (50cWiFi model only).