66
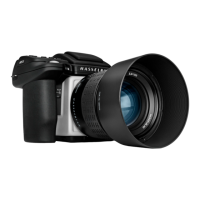
CONNECT TO AN EXISTING NETWORK (CLIENT MODE) (H5D-50c Wi-Fi model only)
1. Enter the Wi-Fi menu.
2. If Mode is “Client” you can skip steps 2 to 4.
3. If Mode is “Direct (AP)” please make sure Wi-Fi is
set to OFF. When changing from ON to OFF, a quick
re-start will take place. The menu will be entered auto-
matically.
4. Change Wi-Fi mode to CLIENT.
5. Set Wi-Fi to ON.
6. If you have moved to a new location, you willl need to
search for new networks using the “Scan” menu item.
This will retrieve a list a available networks. This step
can be skipped if you are using a previously connected
network. The Scan process will run automatically the
rst time the camera is used in Client mode.
7. Select the desired network from the list in “Network”.
If a password is required, enter that according to the
description on page 67.
8. Change “Connect” to “YES”
9. Exit from the menu.
10. If the connection is working, the Wi-Fi icon on the
rear display will be green. If it is red, please check the
entered password. The password will be visible until
the camera is turned o or re-started. After a restart
you will only see “*****” in the password menu.
11. Exit from the menu.
12. Connect your iPhone/iPad to the network created by
the camera. (Select network in the Wi-Fi setting of the
iOS menu). Then proceed as described on page 68.
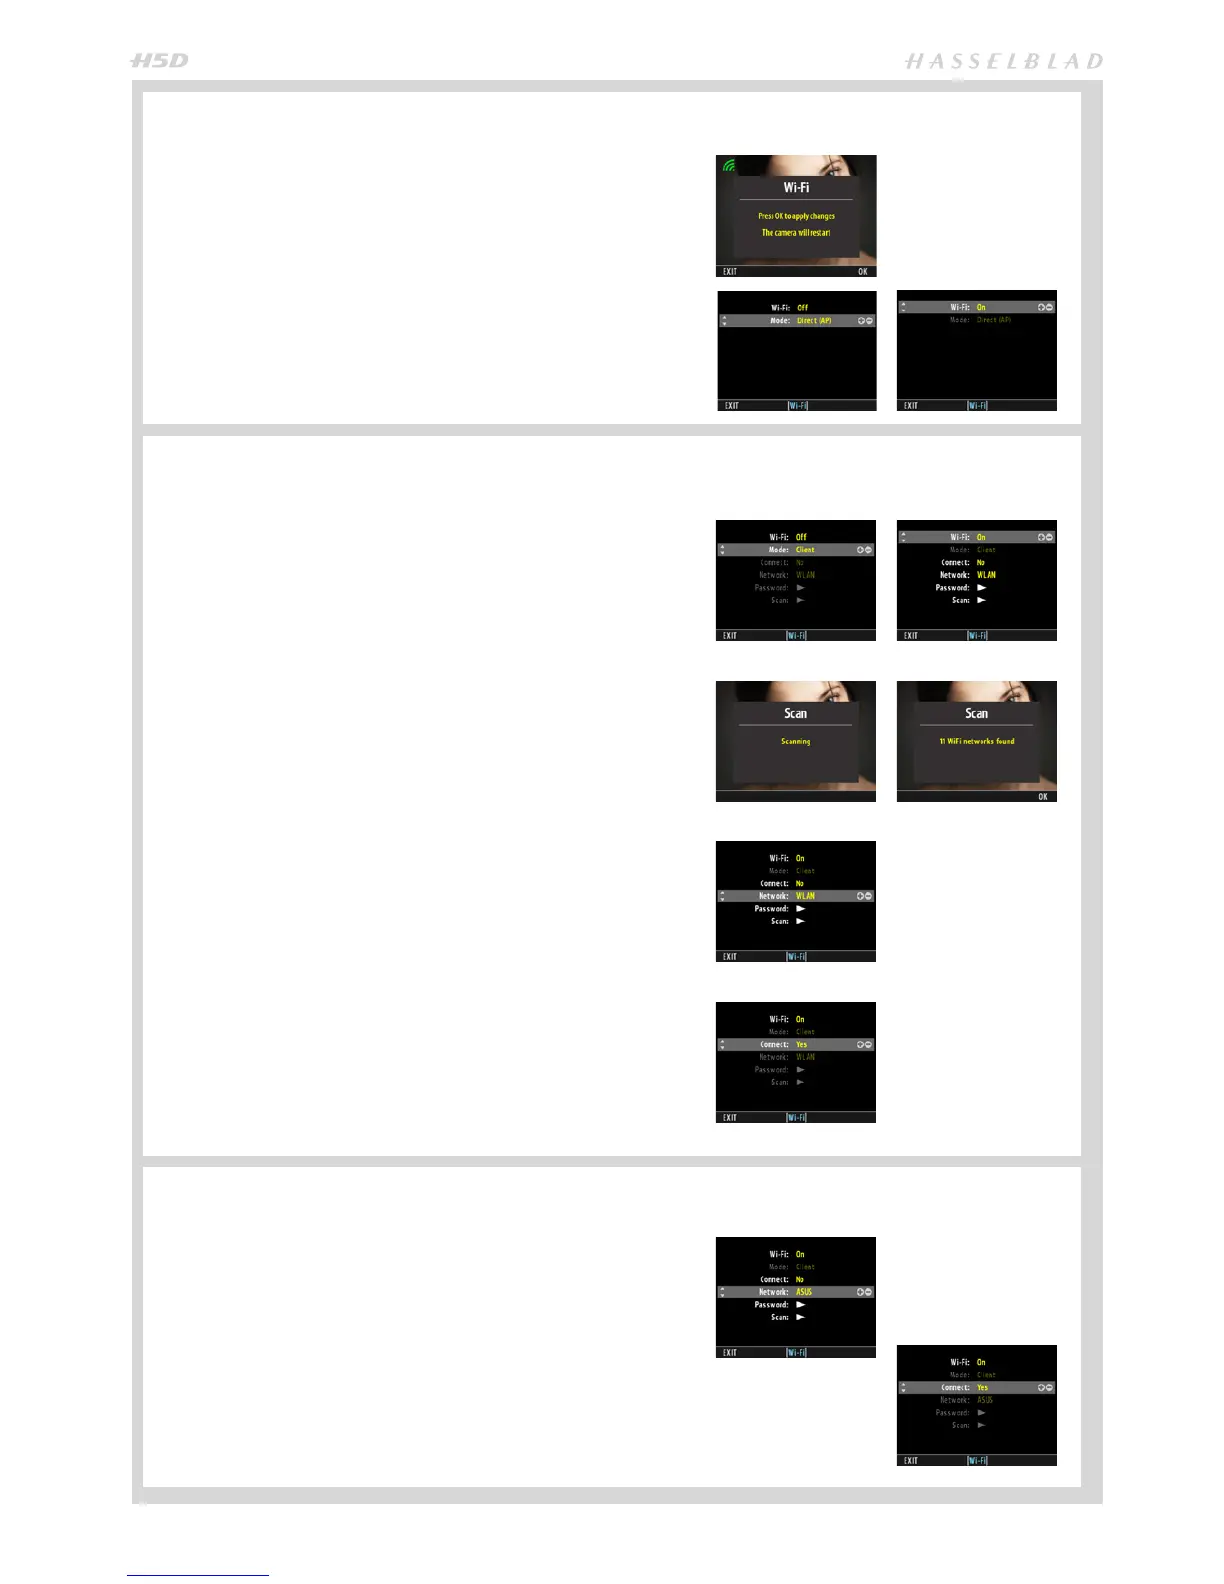
CONNECT DIRECTLY TO AN IPHONE/IPAD (DIRECT (AP) MODE) (H5D-50c Wi-Fi model only)
CHANGE TO A DIFFERENT CLIENT NETWORK (H5D-50c Wi-Fi model only)
1. Enter the Wi-Fi menu.
2. Make sure Wi-Fi is set to OFF. When changed from
ON to OFF, a quick re-start will take place. The menu
will be entered automatically.
3. Change Wi-Fi mode to Direct (AP).
4. Set Wi-Fi to ON.
5. Exit from the menu.
6. Connect your iPhone/iPad to the network created by
the camera. (Select the camera network in the Wi-Fi
setting of the iOS menu). Then proceed as described
on page 68.
1. Enter the Wi-Fi menu.
2. Set “Connect” to No.
3. Select a dierent network in the “Network” menu
item. If required perform a Scan and enter a new
password.
4. Set “Connect” to Yes.
5. Exit from the menu.
6. Connect your iPhone/iPad to the network created by
the camera. (Select network in the Wi-Fi setting of the
iOS menu). Then proceed as described on page 68.