29
(4.6.1) Footswitches
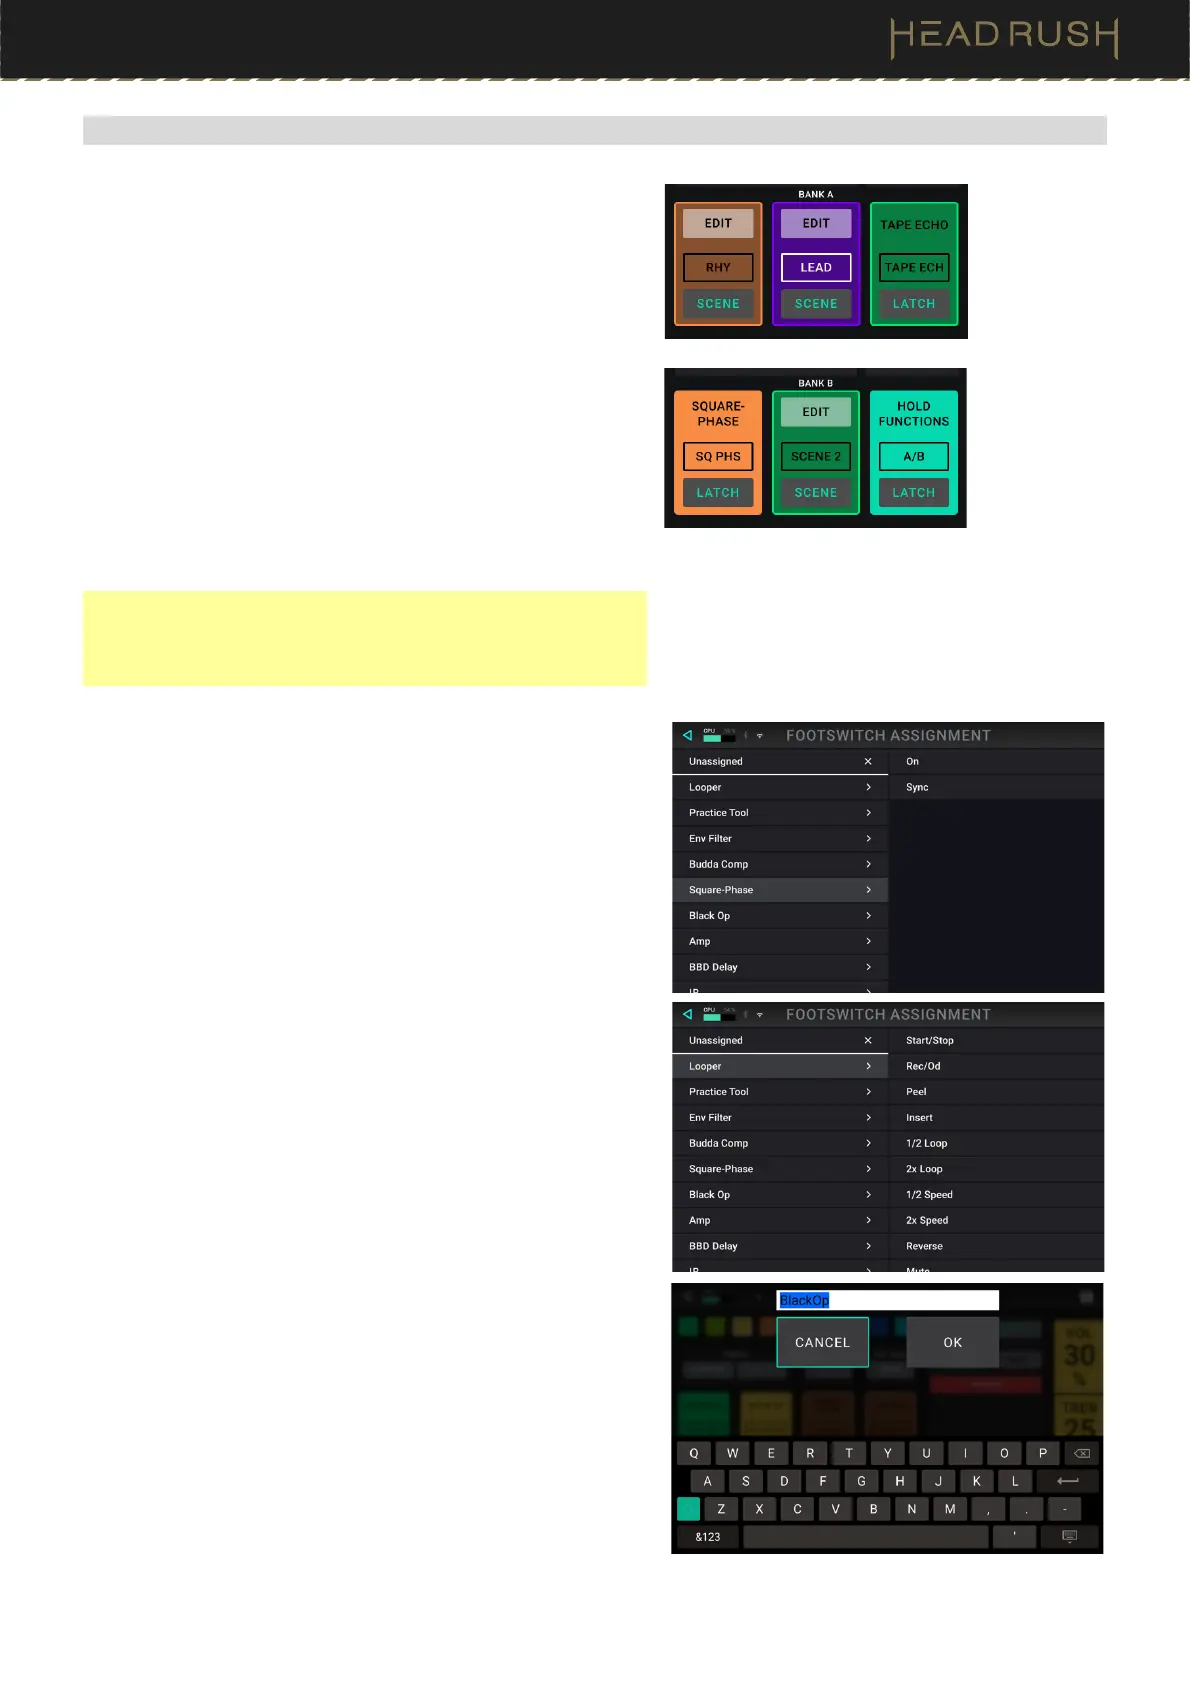
The three boxes in the lower-left corner represent the three
footswitches of Flex Prime. You can assign any switch-based
parameters (ones with only two states) to any of the
footswitches—regardless of their location in the signal chain.
You can also assign controls from the Looper, Metronome, and
Practice Tool features to a footswitch within a rig for easier
access.
There are two banks of three footswitches that can be assigned
on Flex Prime, effectively giving you six assignable footswitches
per rig. You can access the second bank in each rig by
reassigning the footswitch 3 Hold function to Bank A/B
instead of Tuner. When you enter the Hardware Assign menu,
the currently selected bank will be shown for editing. If you have
footswitch 3 assigned to Bank A/B, you can hold it to alternate
between the two banks for editing while in the Hardware Assign
menu.
Note: Accessing Bank B via hold is only possible when the
Footswitch Function setting in the (4.18.1) Global Settings >
General menu is set to On Release. Hold functions are not
accessible when this is set to On Press.
To assign a parameter to a footswitch:
1. Tap a box. indicates an empty box.
2. In the list that appears, tap the block or feature with the
parameter or control that you want to assign.
3. In the list that appears, tap the parameter you want to
assign. Usually, the parameter will simply be On (to activate
or deactivate it).
Tap Unassigned to unassign that footswitch.
4. On the Hardware Assign screen, tap Toggle/Hold/Scene
for that footswitch to cycle through the available options:
When set to Toggle, each press will turn the block on or
off.
When set to Hold, pressing and holding the footswitch will
activate it, and releasing the footswitch will deactivate it.
This will also disable the footswitch’s default hold functionality
(for example, entering the Looper for footswitch 2).
When set to Scene, each press will turn a scene on or off.
A scene is a collection of “linked” blocks in the rig—all of
which will simultaneously turn on or off when you press that
scene’s footswitch. See the (4.6.2) Scenes section to learn
about this feature.
To swap two assignments, tap and drag one of them over the
other, and then release it.
To edit the text displayed above the footswitch, tap the text
in the box below the block’s name, use the virtual keyboard
that appears to enter a name, and then tap OK.