î Reverse the removal procedure
- Torque link nut torque: 2.2 kgf-m
- Axle nut torque: 6.8 kgf-m.
î After installing the wheel, apply the brake
several times and check for free wheel
rotation when released.
î Adjust the brake (page 43).
Installation
Always replace used split pins with new ones.
CAUTION
Disc type
Refer safety precautions on (page 29).
î Support the motorcycle securely on the
main stand and raise the rear wheel off the
ground.
REAR WHEEL REMOVAL
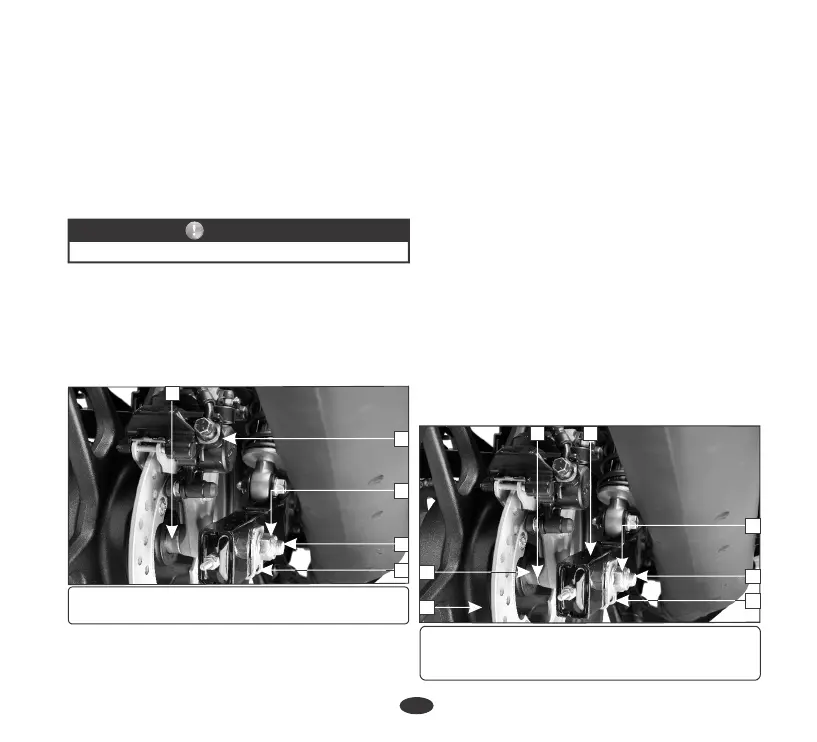
1
3
4
5
2
TORQUE : 6.8 kgf-m
î Insert the disc (2) between the pads in the
caliper assembly. When installing the wheel,
carefully fit the brake disc between the brake
pads to avoid damage to the pads.
î Move the caliper assembly (5) upwards.
î Tilt the motorcycle and position the rear
wheel between the swingarm.
î Install the side collar (1) to the right side of
the wheel hub.
î Slide the wheel out from left side.
î Insert the axle (5) from the left side through
the swingarm, wheel hub, collar and rear
caliper holder .
î Install the washer (6) and tighten the rear
axle nut (7) to the specified torque.
REAR WHEEL INSTALLATION
î Align the rear caliper holder (3) with the
swingarm (4).
(1) Rear axle nut (2) Washer (3) Axle
(4) Collar (5) Caliper assembly
î Remove the rear axle nut (1) and washer (2).
î Remove the axle (3) and the right side
collar (4).
1
2
3 4
7
5
6
(1) Side collar (2) Disc (3) Rear caliper holder
(4) Swingarm (5) Axle (6) Washer
(7) Rear axle nut
51