AB1206en_SARev.: 06 / 11.2023
Removing the hub
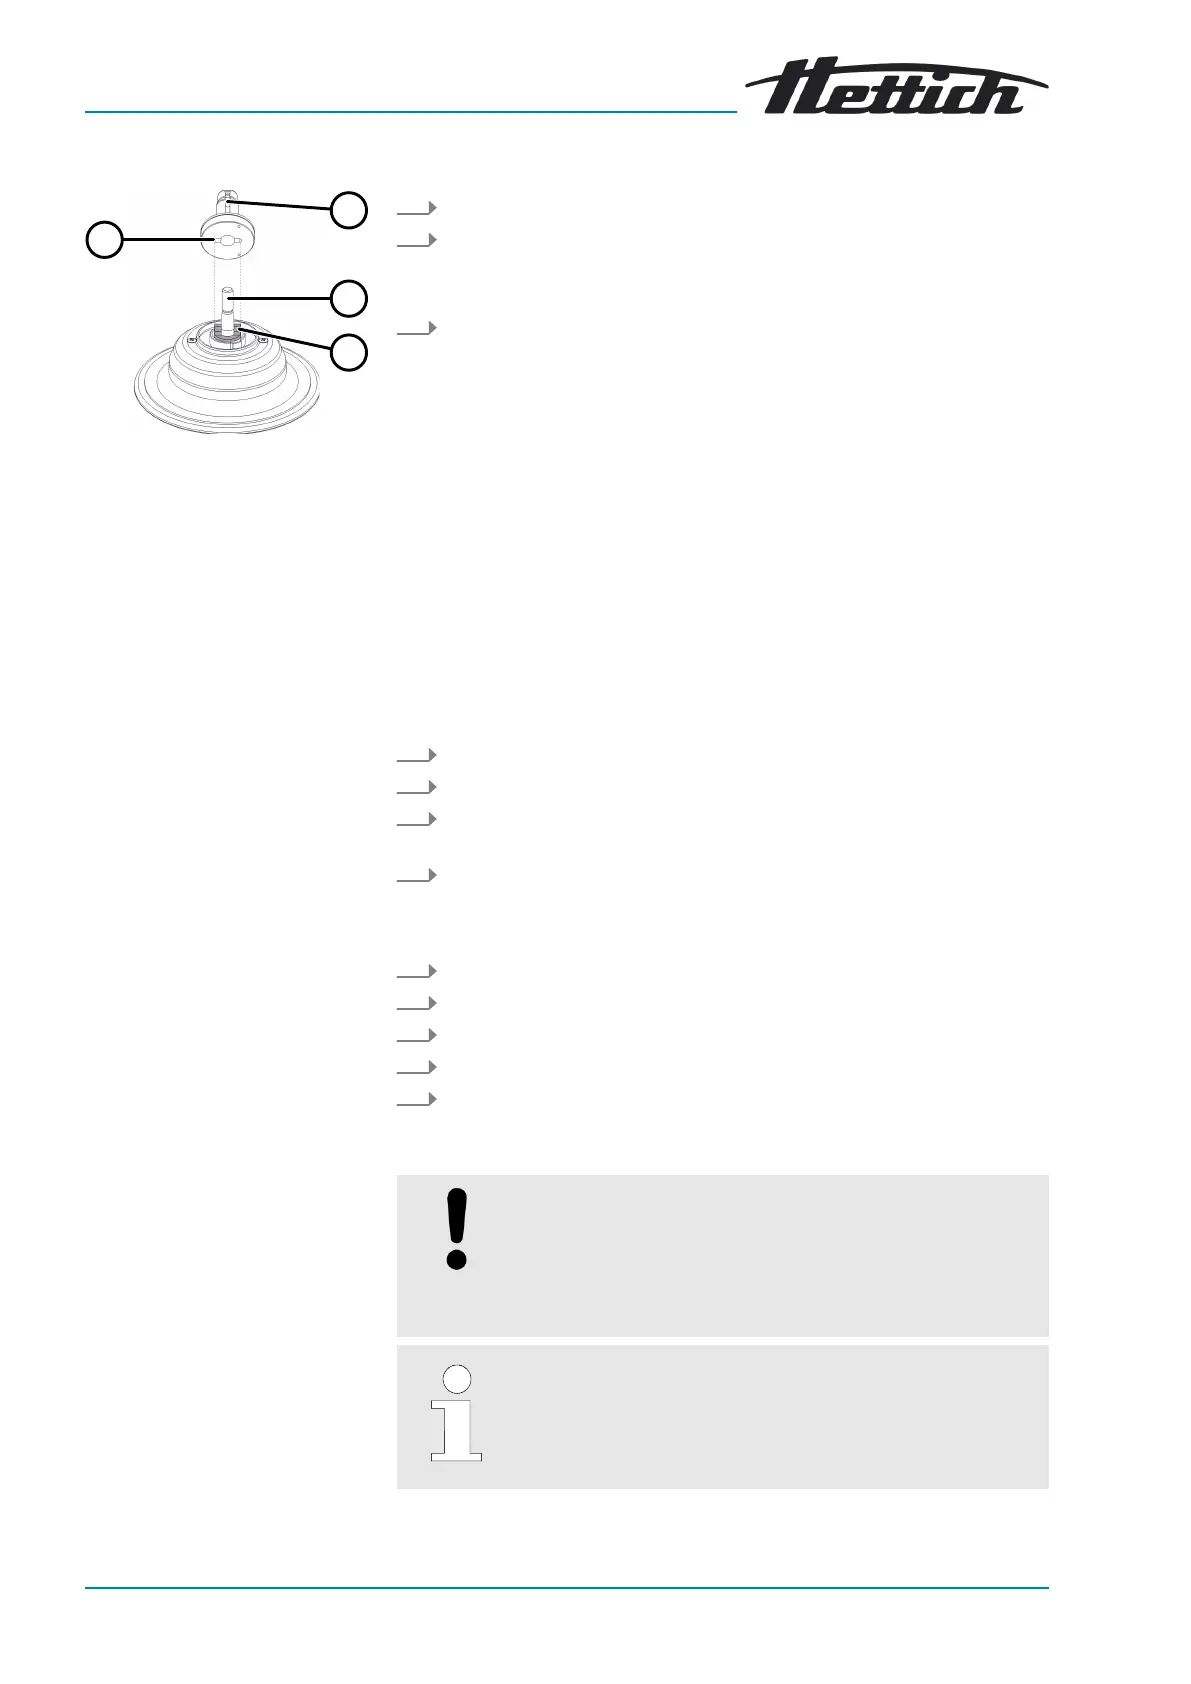
Fig. 17: Hub installation and
removal
1 Hub
2 Motor shaft
3 Driver
4 Groove
Installing the rotor without a
clamping nut
Installing the hub
Installing the rotor
Inserting buckets
1. Open the lid.
2. Unscrew the clamping nut.
🡆 After passing the working point for lifting the rotor, the hub (
1
)
detaches from the cone of the motor (
2
).
3. Remove the hub.
Personnel:
■ Trained user
1.
Open the lid.
2.
Clean the motor shaft (
2
) and rotor hole.
3.
Lightly grease the motor shaft (
2
), see ⮫
Chapter 8.2 ‘Cleaning and
disinfection instructions’ on page 31
.
4.
Place the hub (
1
) vertically on the motor shaft (
2
).
The driver (
3
) of the motor shaft must be in the groove (
4
) of the hub.
Check that the hub is rmly seated.
5.
Hand-tighten the clamping nut of the hub using the supplied hex key.
6.
Check that the hub is rmly seated.
1.
Clean the hub (
2
).
2.
Lift the rotor by the rotary handle and place it vertically on the hub (
2
).
3.
Push the rotor down as far as it will go.
6.3
Inserting and removing buckets
NOTICE
Damage to the device due to imbalances caused by incor-
rect loading of the rotor.
− Load all swing-out rotor locations with the same
buckets.
Buckets marked with the number of the rotor location may
only be used there.
Buckets marked with a set number may only be used
together.