Instrument operations and notes
5 Enter the PIN of the user who
registered the schedule and
press the [Enter] button.
The selected schedule is deleted from the schedule list.
Press the CUSTOM tab, the [X] button, the Run screen tab
or the MENU tab.
3) Method for changing centrifuge schedules
To change a schedule, first delete the schedule according to the procedure described in "2)
Method for canceling centrifuge schedules," then reregister it on the desired date as described in
"1) Method for registering centrifuge schedules."
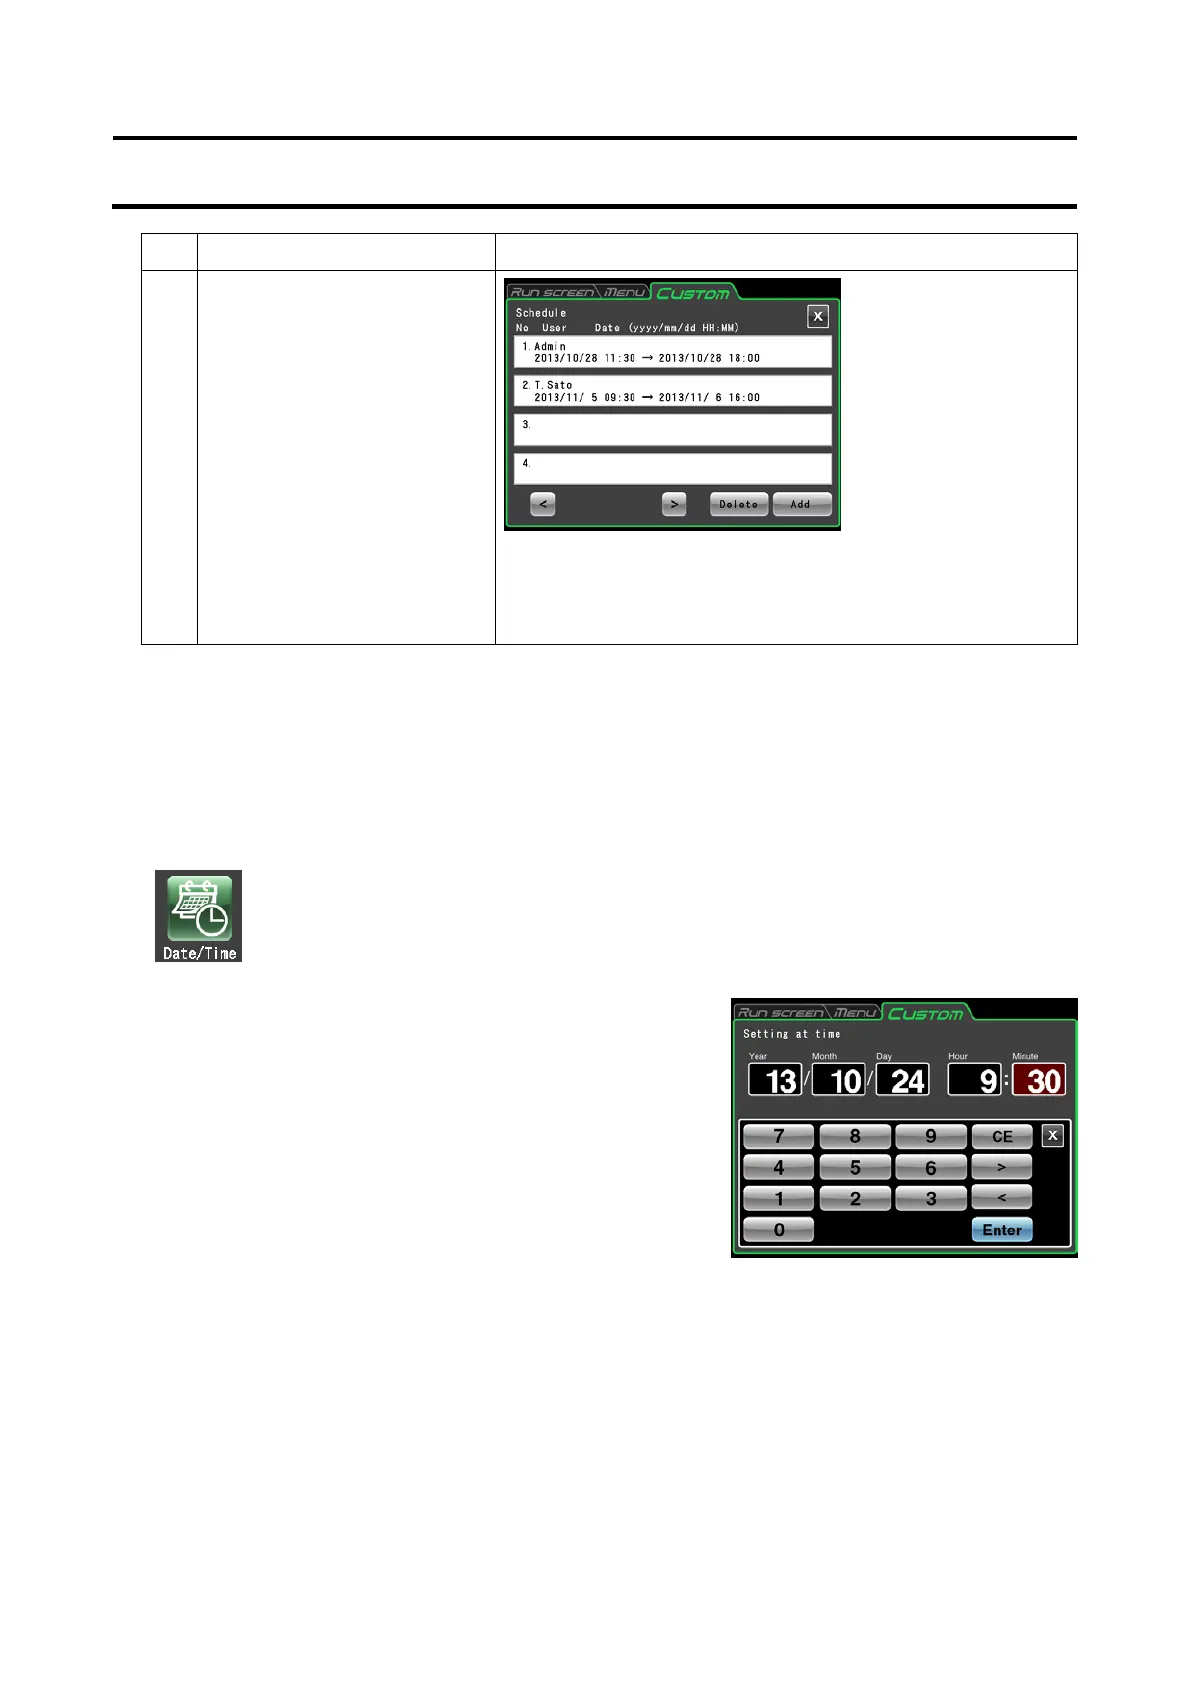
(7) Date/time setting
Press the field of the item you want to set. The selected field
is displayed in red. Confirming that the field of the item you
want to set is red, use the on-screen keypad to enter the
current date and time.
Instead of pressing a field, you can use the [<] and [>]
buttons on the on-screen keypad to move the red area.
Press the [Enter] button when all entries have been made.
The CUSTOM screen reappears.
Use this function to adjust the time of the
internal clock. RTC operation requires an
accurate time setting.
Fig. 3-4-5 (7) Time setting screen
●
screen appears.
3-78
 Loading...