9 Servicing
RCD-(0.8-6.0)FSN3 - 2-way cassette
SMGB0099 rev.0 - 12/2016
272
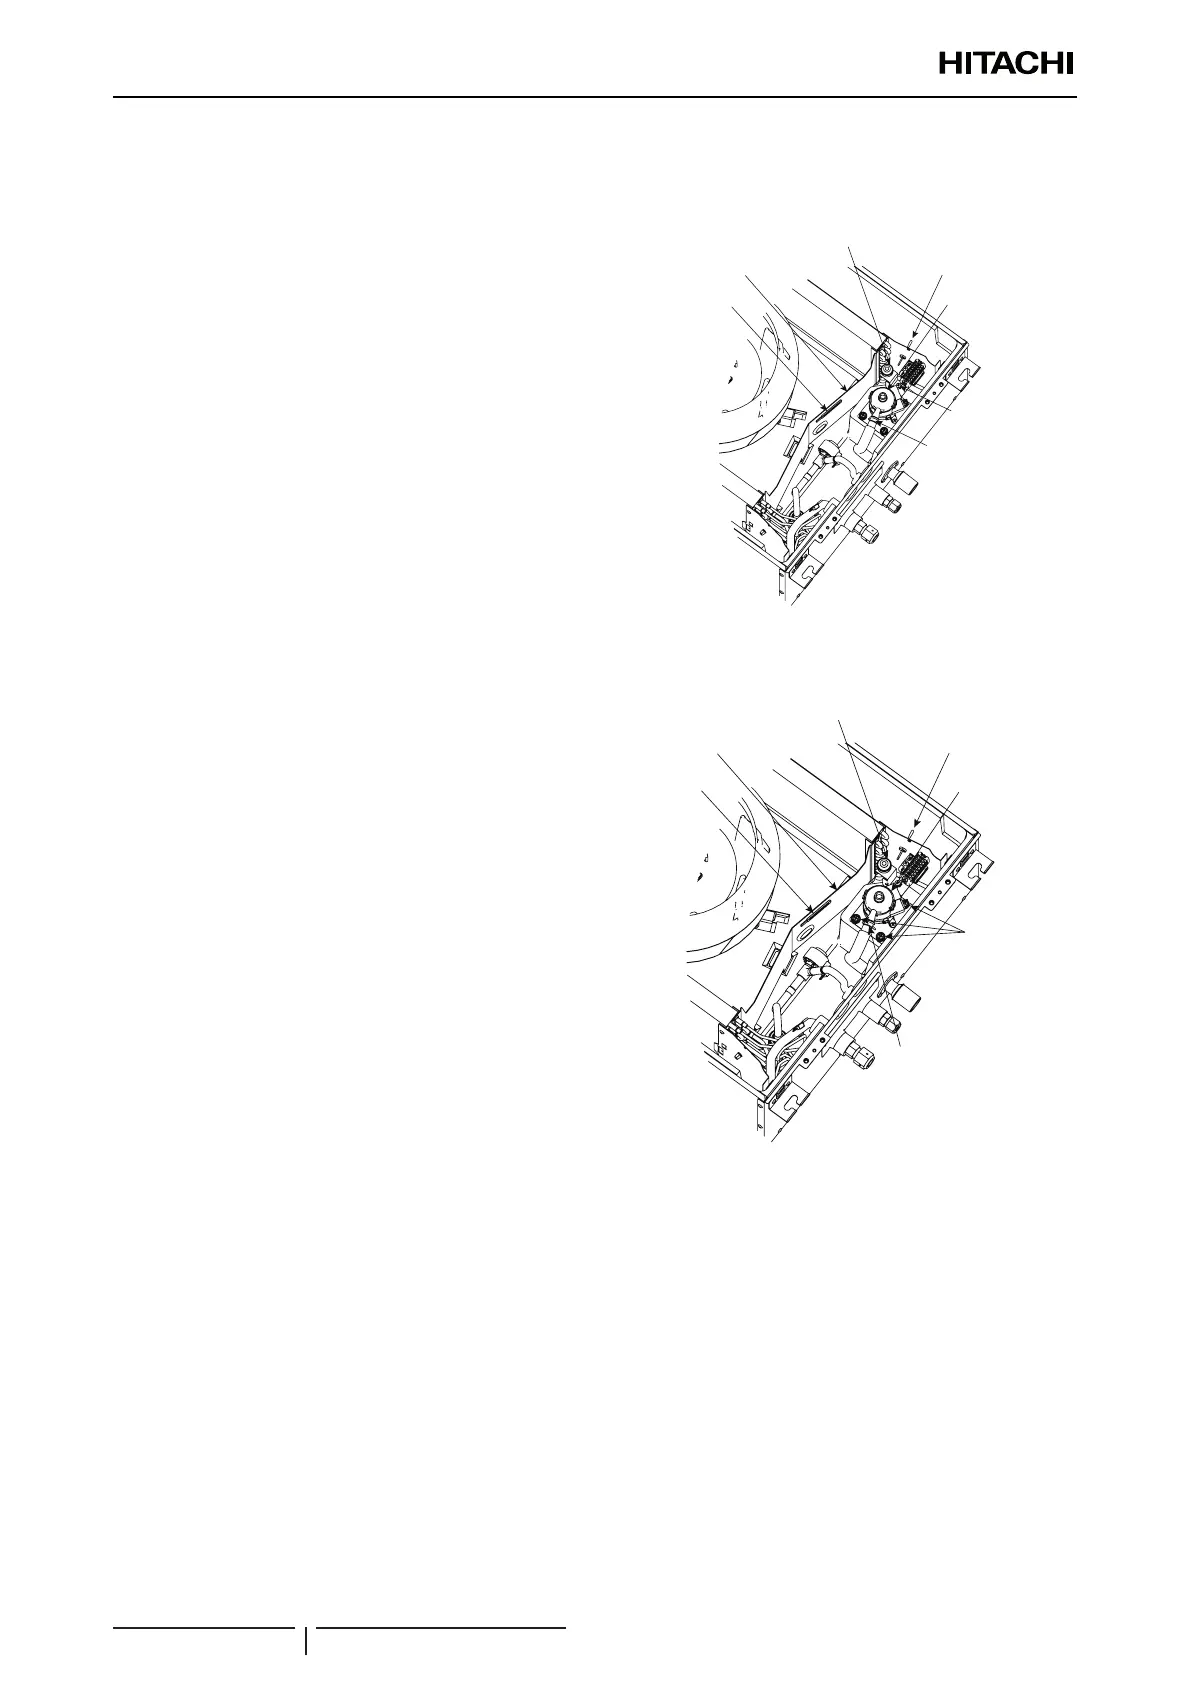
9.3.6 Removal of the oat switch
1 Remove the Drain pan, as explained in “9.3.8 Removal of the
drain pan”
2 Remove the lead wires for the Drain up mechanism, the Float
switch and the Outlet air thermistor, as explained in “9.3.6
Removal of the oat switch”
3 Remove the Float switch lead wire from the core clamp at the
evaporator partition plate.
4 Cut the plastic cord bands gathering the lead wires of
the Float switch, the drain mechanism and the Outlet air
thermistor.
5 Remove the Float switch by removing the xing screws of the
Float switch xing plate and remove the Float switch.
? NOTE
• for the reassembling, proceed in the reverse way than disassembling.
• The torque value of the resin nut is 0.3 - 0.4 Nm. If the torque value is
higher, the nut will be damaged.
Float switch
Evaporator
partition plate
Code clamp
Outlet air thermistor
Drain-up mechanism
Screw
Plastic cord band
9.3.7 Removal of the drain mechanism
1 Remove the drain pan according to the item “9.1.6
Removing Drain Pan”.
2 Remove the drain-up mechanism lead wire from the
code clamp attached to the evaporator partition plate.
3 Cut the clamping band gathering the lead wires for drain-
up mechanism, oat switch and outlet air thermistor.
4 Spread out the plastic band for drain hose the remove
the drain hose from drain-up mechanism.
5 Remove three xing screws for the drain-up mechanism.
Make sure to hold the drain-up mechanism by hand so
that it will not fall off.
6 Then remove the drain-up mechanism.
Float switch
Evaporator
partition plate
Code clamp
Outlet air thermistor
Drain-up mechanism
Screw
Plastic cord band
9.3.8 Removal of the drain pan
1 Remove the air panel according to the item “9.1.4 Removing turbo fan and fan motor”.
2 Remove the screw then remove the wire cover.
3 Remove the electrical box cover according to the item “9.1.2 Removing Electrical Box Cover”.
Disconnect the connectors of the gas pipe thermistor, the liquid pipe thermistor, the expansion valve and the fan
motor.
4 Remove the bell-mouth according to the item “9.1.4 Removing turbo fan and fan motor”.
5 Draining:
a. Pull out the rubber plug from the drain pan, and drain the water remaining in the drain pan. Although silicon
sealant is applied over the rubber plug, the rubber plug can be removed by pulling the bottom side.
? NOTE
Be careful not to damage the rubber plug with a cutter knife.
b. Check any clogging in the drain hole.
6 Removing Drain Pan
 Loading...

