2 Unit installation
RCIM - 4-way cassette (compact)
SMGB0099 rev.0 - 12/2016
31
2
2.2.4 Air panel installation
! CAUTION
Take care while the air panel is unpacked and protect it by placing it on insulating or soft material so as not to scratch the sealant insulation.
? NOTE
• Do not move the louver by hand as it may cause a damage to the louver mechanism.
• Do not apply an excessive force to the air outlet part to prevent any breakage.
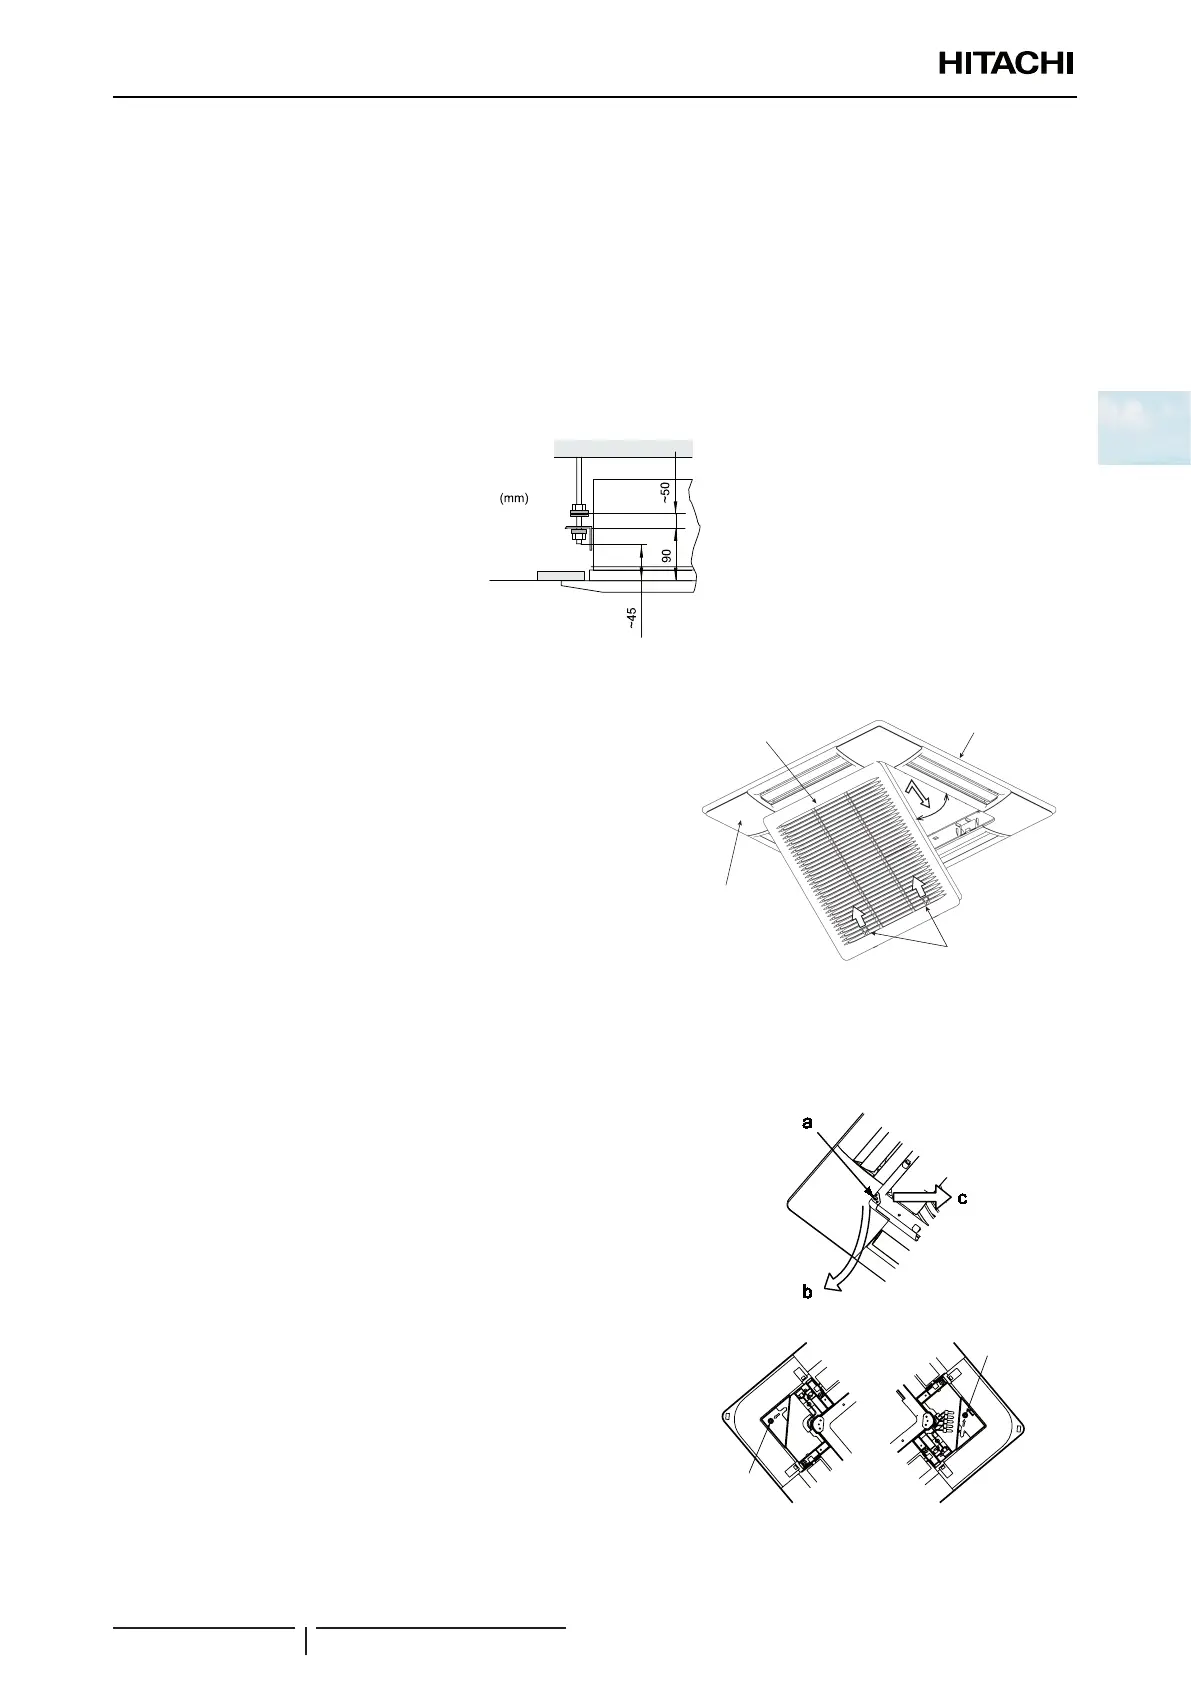
Location of the suspension brackets
Make sure the suspension brackets on the indoor unit are approximately 90 mm in height above the false ceiling.
Remove the air inlet grille from the air panel
Remove the Air inlet grille from the air panel:
1 While pushing both ends of knobs at the air inlet grille (as shown
in the illustration), open the air inlet griller until an angle of
aproximately 45º in relation to the air panel surface.
2 Lift the grille while keeping it tilted.
? NOTE
Although the Air inlet griller can be opened until an angle up to 90º from the
Air panel surface, it can not be removed.
45°
Air panel
Knobs
Corner pocket
cover (x4)
Air inlet grille
! CAUTION
Do not allow the grille to swing freely or the securing mechanism will break.
Air panel installation
1 Remove the screw located next to mark -a-.
2 Press the securing tabs in the direction of the arrow -b-.
3 Remove the corner cover by pulling it in direction -c-.
Thread the long screw to secure the air panel temporarily.
Adjust the corner of the indoor unit at the refrigerant connection part
to the position marked as PIPE SIDE.
Attach the air panel to the long screw (2 position) so that it can be
temporarily tted and adjusted.
Long
screw
Long
screw
 Loading...

