Installing Your Array 3–15
Hitachi Simple Modular Storage 100 User’s Guide
•
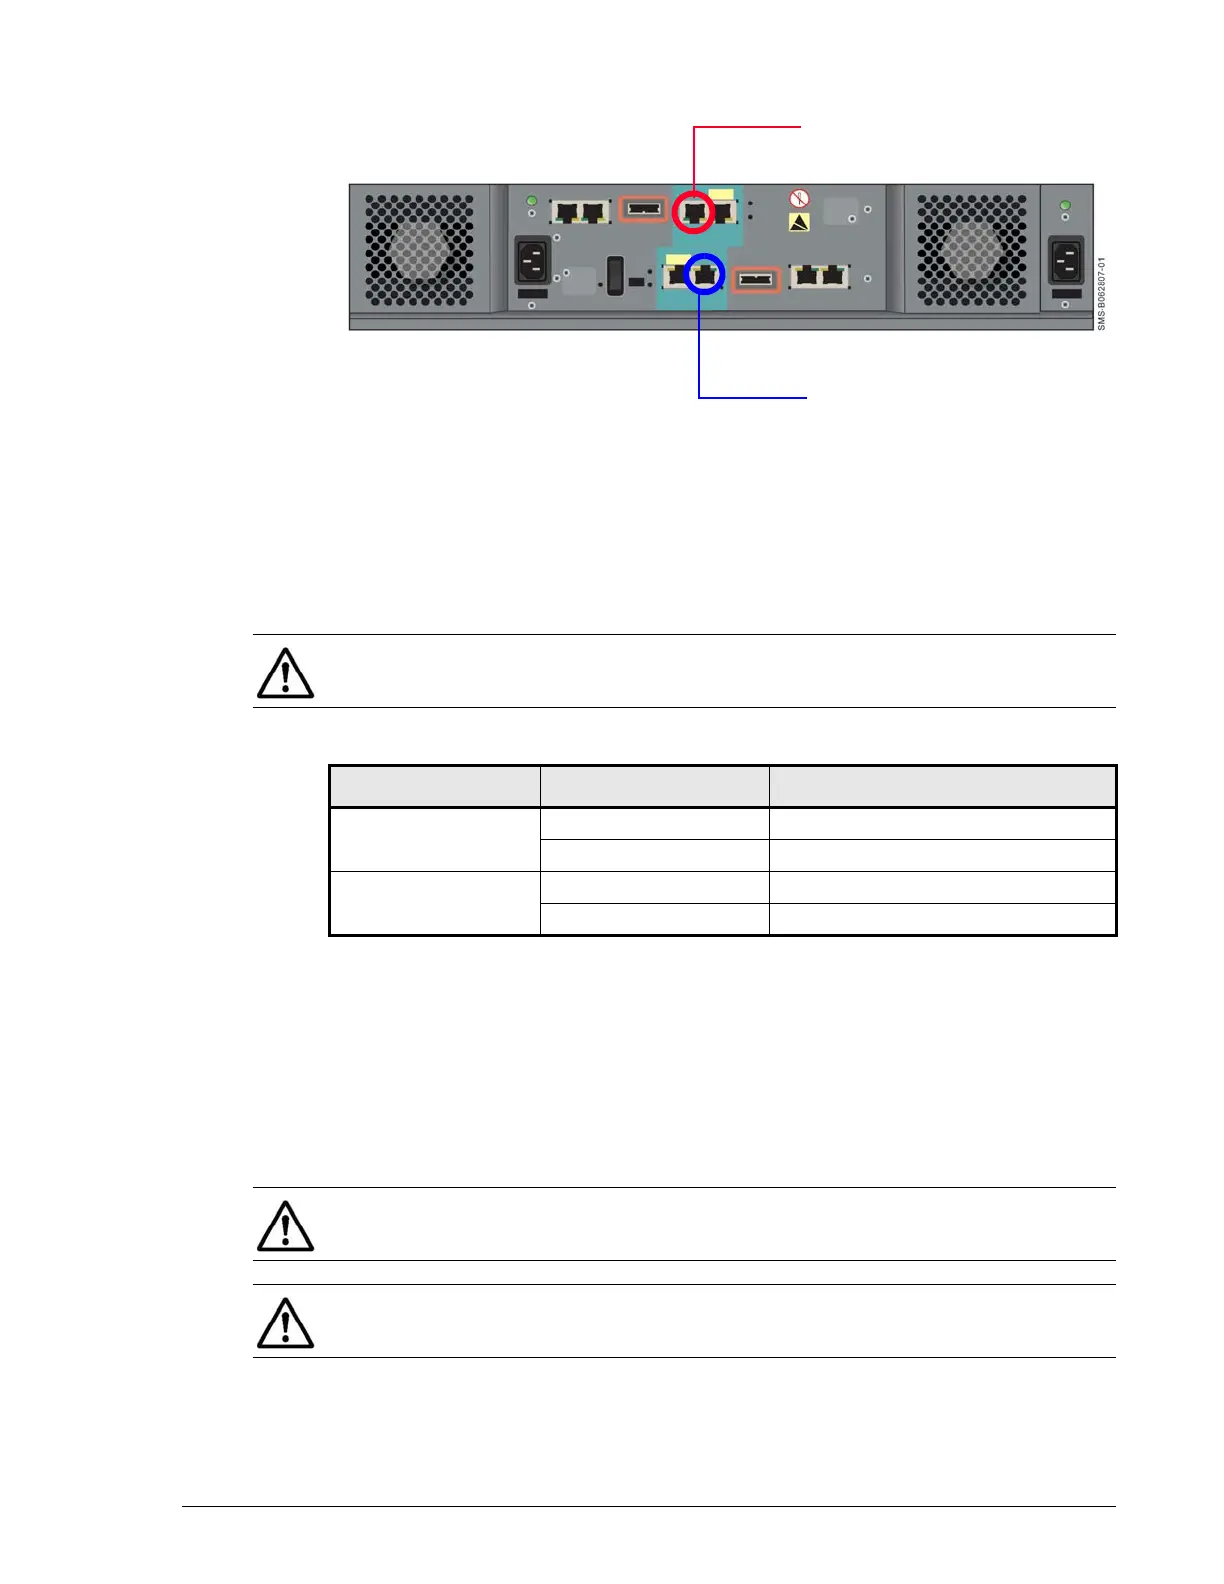
Figure 3-6: Management Ports
Connecting to the iSCSI Gigabit Ethernet Data Ports
The following procedure describes how to connect the iSCSI Gigabit
Ethernet data ports to your storage network or server. The default IP
addresses for the iSCSI data ports are shown in Table 3-3. These settings
can be changed using the Storage Navigator Modular 2 software.
1. On the back panel, insert one end of an Ethernet cable into an iSCSI data
port (either PORT A or PORT B) on the back of your Hitachi Simple
Modular Storage 100 (see Figure 3-7 on page 3-16 and Figure 3-8 on
page 3-16). Connect the other end of the cable to your host system or
switch.
2. To connect additional iSCSI data ports to your storage network, repeat
step 1 using another Ethernet cable and another available iSCSI data
port.
•
•
Management Port on CTL1
Management Port on CTL0
NOTE: If your Hitachi Simple Modular Storage 100 has one controller,
ignore the IP addresses for on CTL1 in Table 3-3.
Table 3-3: Default iSCSI Data Port IP Addresses
Controller iSCSI Data Port IP Address
Controller 0 Port A 192.168.0.200
Port B 192.168.0.201
Controller 1 Port A 192.168.0.208
Port B 192.168.0.209
NOTE: If your Hitachi Simple Modular Storage 100 has one controller,
ignore the iSCSI data ports on CTL1 in Figure 3-7 on page 3-16.
NOTE: The IP address for your server(s) console must be on the same IP
subnetwork (192.168.0.x) as the iSCSI data ports.