26 27
Scan Mode
In Scan Mode the transmitter and receiver will scan all available channels every time you turn it on.
It will then choose the cleanest frequencies to use. Scan Mode is preferable to use when ying in a
crowded 2.4GHz environment.
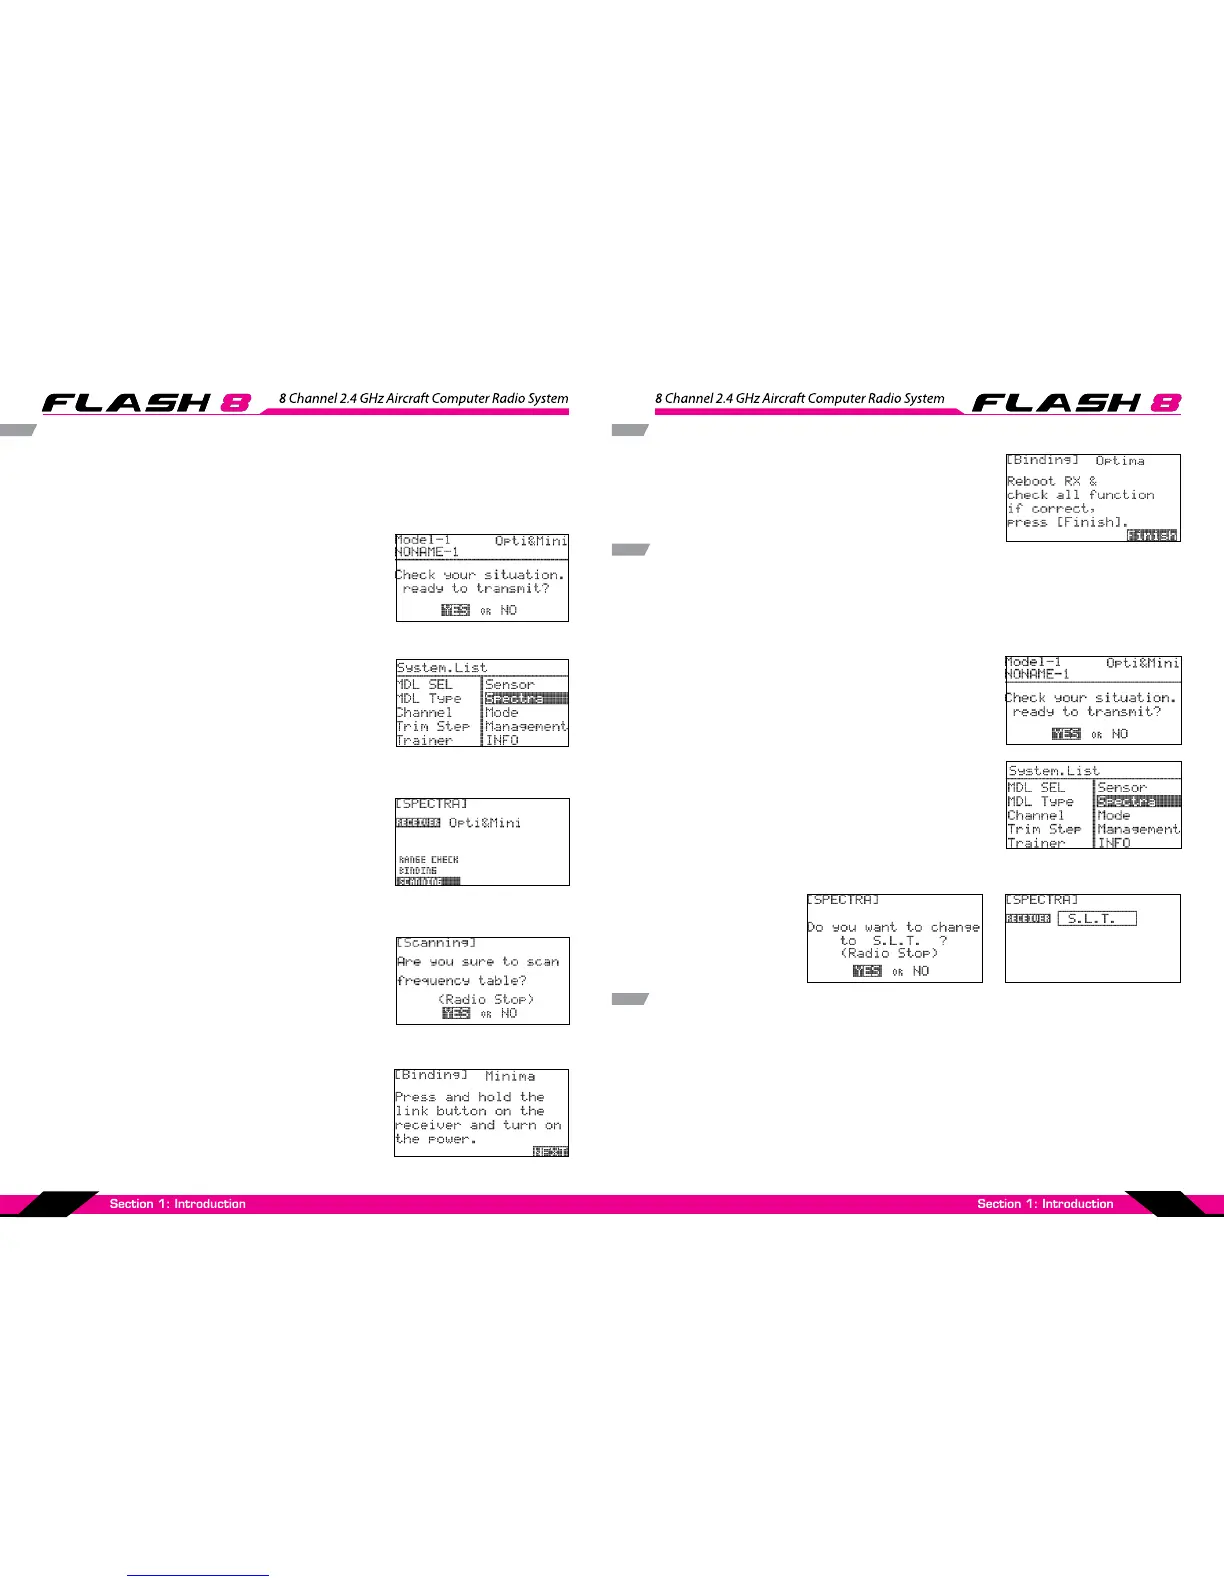
1. Turn on the transmitter and select “yes” to the “Ready to
Transmit” prompt by pressing the jog dial.
2. Press the jog dial and back button simultaneously to enter the
System Menu list. From here scroll to the SPECTRA function
and press the jog dial to enter the Spectra setup menu.
3. Scroll to the Scanning selection and push the jog dial to enter
the Scanning function.
4. If you are sure you want to proceed with the Scanning select
“Yes” and press the jog dial to continue.
5. If Scan Mode link is successful you will be prompted to reboot
the receiver.
SLT Technology
In addition to our proprietary AFHSS technology the FLASH 8 has the ability to transmit using Secure Link
Technology (SLT). This allows you to y the numerous Tx-Ready models available on the market. For more
information visit Tx-Ready.com for models utilizing this technology. Follow these instructions to utilize
SLT with your FLASH 8.
Scan Mode
6. Check to see that all functions are operating correctly. If they
do, press Finish. You now have successfully bound your
receiver in scan mode.
1. Turn on the transmitter and select “yes” to the “Ready to
Transmit” prompt by pressing the jog dial.
2. Press the jog dial and back button simultaneously to enter the
System Menu list. From here scroll to the SPECTRA function
and press the jog dial to enter the Spectra setup menu.
3. Press the jog dial to activate the receiver selection and scroll
to the “SLT” receiver.
SLT Binding
The following procedure is for binding typical SLT receivers to the FLASH 8. These methods may vary
from manufacturer to manufacturer. Check your receiver manual for any variances to these instructions.
1. Turn on the Flash transmitter and when prompted to transmit choose YES.
2. Apply power to the Receiver.
3. If the receiver LED ashes once and then stays on, the receiver is already linked to the transmitter and
you can skip to the next section. Otherwise, insert a small diameter screwdriver into the hole marked
“LINK” or “BIND” on the receiver and press the button until the LED on the receiver glows red and then
turns o after about one second.
4. Release the “LINK” or “BIND” button.