40 41
Your helicopter’s manual will indicate the type of swashplate on your model.
5. Select the Swash type that your helicopter has and press the jog dial to conrm your selection.
6. Press the back button to return to the system menu.
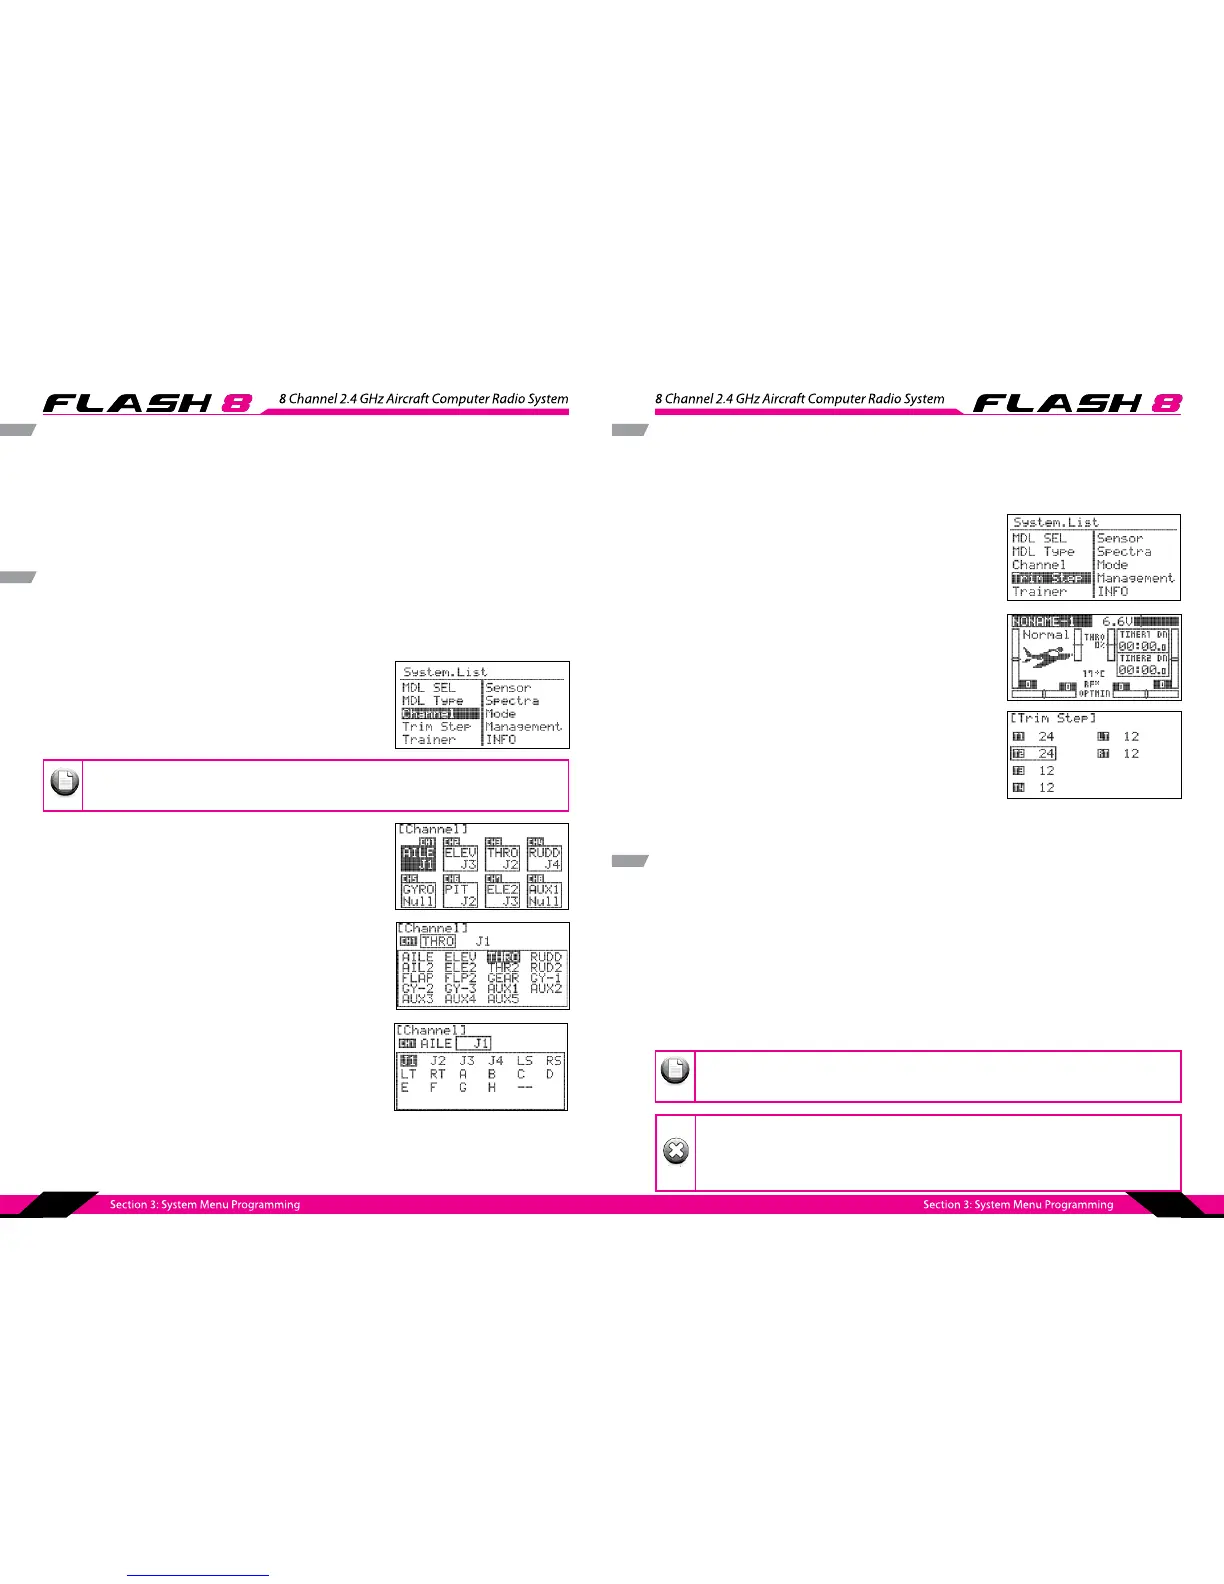
Channel Selection Menu
The Channel menu allows you to choose the function (AILE, THRO, RUDD, etc.) and control input method
(joystick, switch, slider, etc) for each channel. This programming function permits a high level of creativity
in the way you can customize the FLASH 8 to suit your personal ying style.
1. From the System Menu scroll to CHANNEL and press the jog
dial to enter the Channel selection menu.
2. To assign a channel to a specic function, scroll to highlight
the channel you want to assign and press the jog dial to enter
the menu.
3. Scroll to the channel function eld (AILE, ELEV, etc.) and press
the jog dial to activate the selection menu.
4. Scroll through the choices to select the desired function of
that channel and press the jog dial to conrm your selection
5. To assign a channel to a specic transmitter control, scroll
to the input device eld (J1, LS, etc.) and press the jog dial to
activate the selection menu.
6. Scroll through the choices to select the desired transmitter
control you want to use for that channel and press the jog dial
to conrm your selection.
7. Use the back button to exit the Channel Function/Control selection menu.
Default channel assignments are based on the Model Type, Wing, Tail and Swash type setups.
However you can assign any channel to any function or transmitter control.
Note
Trim Step
The Trim Step screen is utilized to change the amount of movement seen on the servos with each
adjustment, or “beep” of the gimbal trim levers. Larger values equate to greater servo movement with
each trim adjustment.
1. From the System Menu scroll to TRIM STEP and press the jog
dial to enter the Trim Step Menu.
2. Scroll to the trim you want to adjust and push the jog dial to
activate the adjustment. Use the jog dial to change the value
and press it to conrm your entry. Trim Step adjustment
values are from 1~200.
3. Use the back button to exit the Trim Step Menu.
Trainer
The FLASH 8 can be paired with another Hitec transmitter to create a master/slave setup that is useful
when instructing student pilots. The FLASH 8 can be used to help teach students how to y utilizing the
various trainer functions of the transmitter.
Utilizing the various trainer functions of the FLASH 8, you can:
- Select which controls (RUDD, THRO, AIL, ect.) the student will command.
- Use the mix feature to give the student a percentage of the control throw while the master has the
remainder.
In addition to training, you can also use the FLASH 8’s pass-through function to control head tracking
devices for First Person View ying.
The FLASH 8 is compatible with all other Hitec transmitter products using the 3.2mm
stereo plug.
When using the FLASH 8 in trainer mode, the following items must be veried before ying:
- The master radio must be programmed with the model to be own.
- The slave or student transmitter must have the proper servo reverse and trim settings to match
the master transmitter.
4. Press the back button return to the system menu.
Note
Warnin