38 39
Model Type GLID Menu Programming cont.
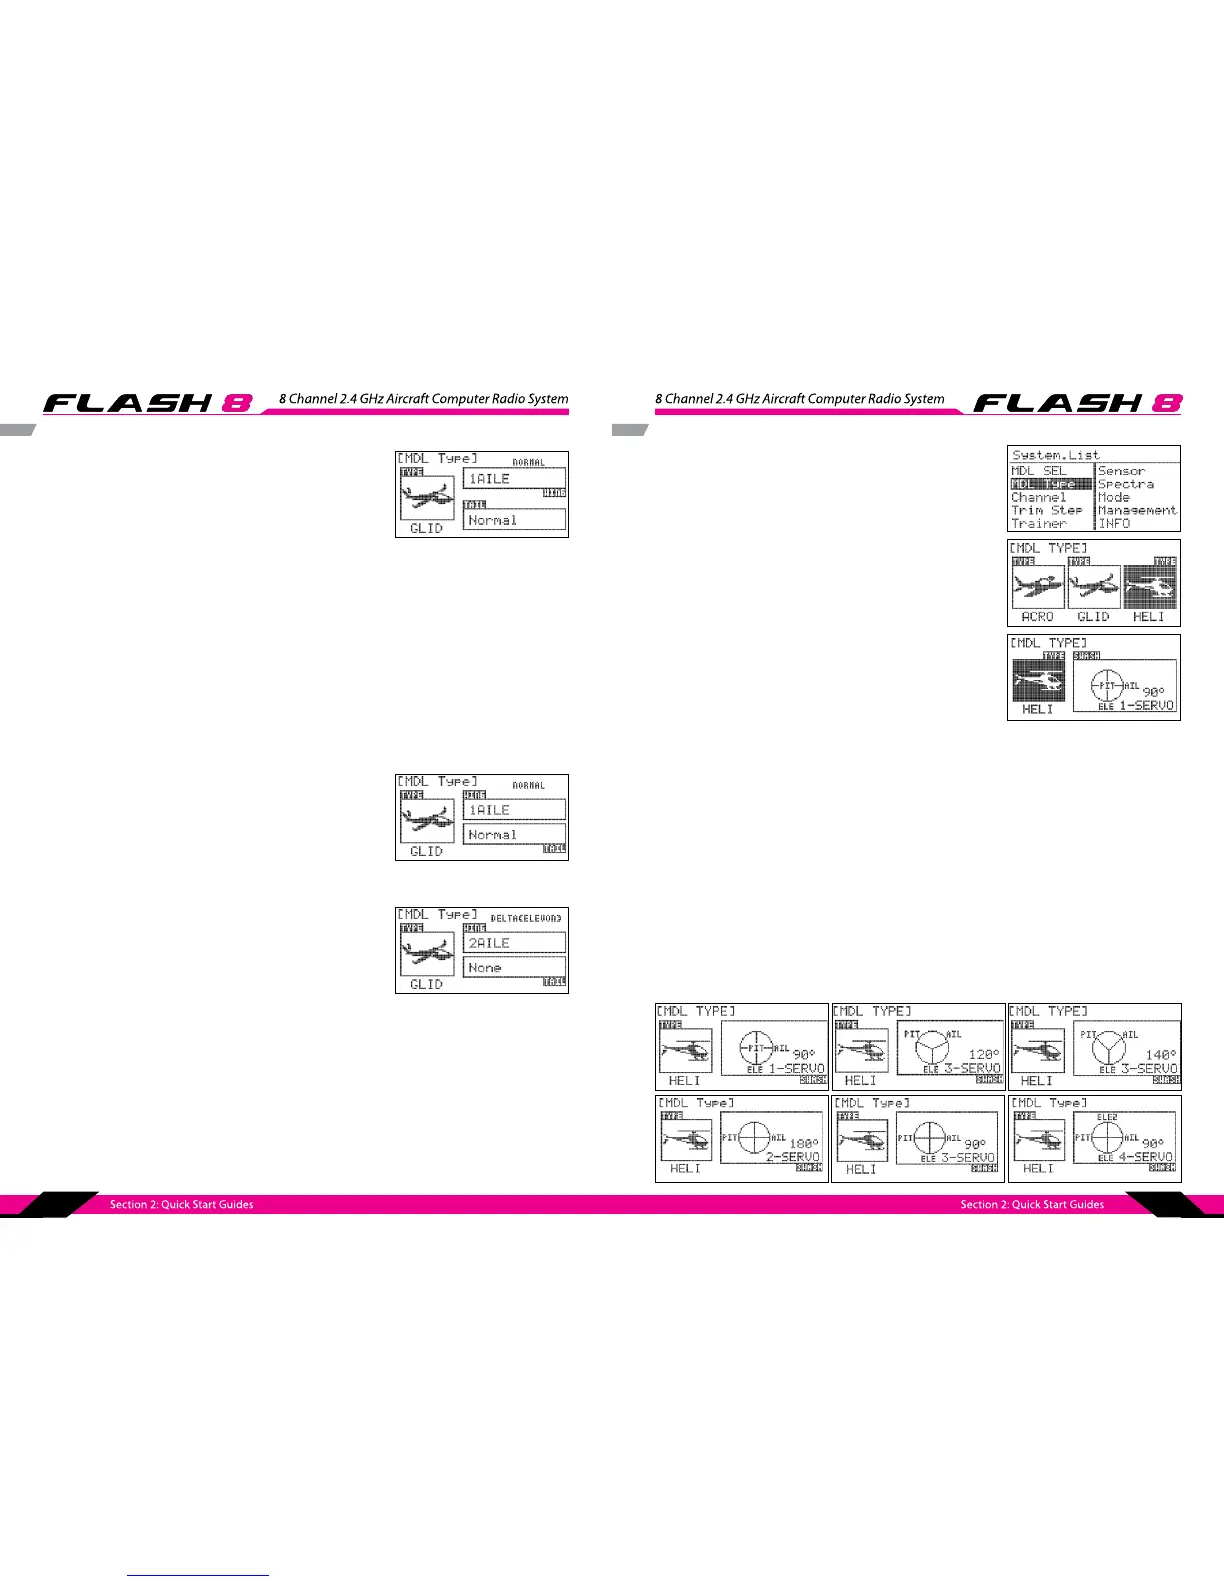
6. Scroll to the Tail selection menu and press the jog dial to activate
the selections and scroll through the choices. The choices for tail
type are dependent on the type of wing you selected.
The tail types you may choose with the basic GLID wing types are:
NORMAL:
Rudder is located on a vertical stabilizer and elevator is on a horizon
stabilizer.
V-TAIL:
Two control surfaces in a V-conguration operate together providing
both yaw (rudder) and pitch
(elevator) contro.
Ailevator:
Each half of the elevator is controlled by a dedicated servo to provide
pitch (elevator), and roll (aileron) control.
The tail types you may choose with delta wing types are:
None: For Delta Wing Models without a rudder.
1Servo: For Delta Wing Models with a single rudder servo.
2Servo: For Delta Wing Models with dual rudder servos.
4. Once in the GLID setup menu you will set your wing and tail
choices. Scroll to the wing selection and press the jog dial to
activate the selections and scroll through the choices.
The choices for Normal GLID wing type are:
Additionally there are setups for Delta wing type models (Elevon):
2AILE
2AILE+1FLAP
2AILE+2FLAP
5. Once you have selected you wing type, press the jog dial to conrm your selection.
7. Select the tail type that your model has and press the jog dial to conrm your selection.
8. Press the back button to return to the system menu.
1AILE – Single aileron servo
1AILE+1FLAP – Single aileron servo and single ap servo
1AILE+2FLAP - Single aileron servo channel and two ap servos
2AILE – Two aileron servos
2AILE+1FLAP - Two aileron servos and one ap servo
2AIL+2FLAP - Two aileron servos and two ap servos
Model Type HELI Menu Programming
1. From the System Menu select MDL TYPE.
2. Press the jog dial once to enter the Model Type Selection
Menu and scroll to HELI.
3. Press the jog dial once to enter the HELI setup menu. to enter
the HELI setup menu.
4. In the HELI menu you will set the swash type. Scroll to highlight “SWASH” and press the jog dial to
activate the menu.
There are three types of Swash types to choose from:
90° 1 servo : The three swash servos are congured 90° apart, and each servo provides
independent control of collective, pitch, or roll.
120° 3 servos : The three swash servos are congured 120° apart, and all servos operate in unison
to control collective, pitch, and roll.
140° 3 servos: The three swash servos are congured 140° apart, and all servos operate in unison
to control collective, pitch, and roll.
180° 2 Servo : Incase of when the swash is formed in 90degress angle and two servos control the
mixing of aileron and pitch
90° 3 Servo : Incase of when the swash is formed in 90degress angle and three servos control the
mixing of aileron, elevator, and pitch.
90° 4 Servo : Incase of when the swash is formed in 90degress angle and four servos control the mixing of
aileron, elevator, and pitch.