28 29
The following information is designed to guide you through a simple setup of a standard sport plane or
unpowered glider. The operations shown during this exercise will help you understand many of the basic
programming steps used by the FLASH 8.
Channel Assignments for a Simple Powered Plane with One or Two Aileron Servos:
Channel 1 - Aileron
Channel 2 - Elevator
Channel 3 - Throttle
Channel 4 - Rudder
Channel 5 - Aileron #2 (if used)
Channel Assignments for a Simple Un-Powered Glider:
Channel 1 - Aileron (plug rudder or aileron servo in Ch. #1)
Channel 2 – Elevator
This exercise assumes two things:
1. That you have already installed the servos in your aircraft.
2. You have bound (linked) the receiver to your transmitter.
Airplane Quick Start Guide
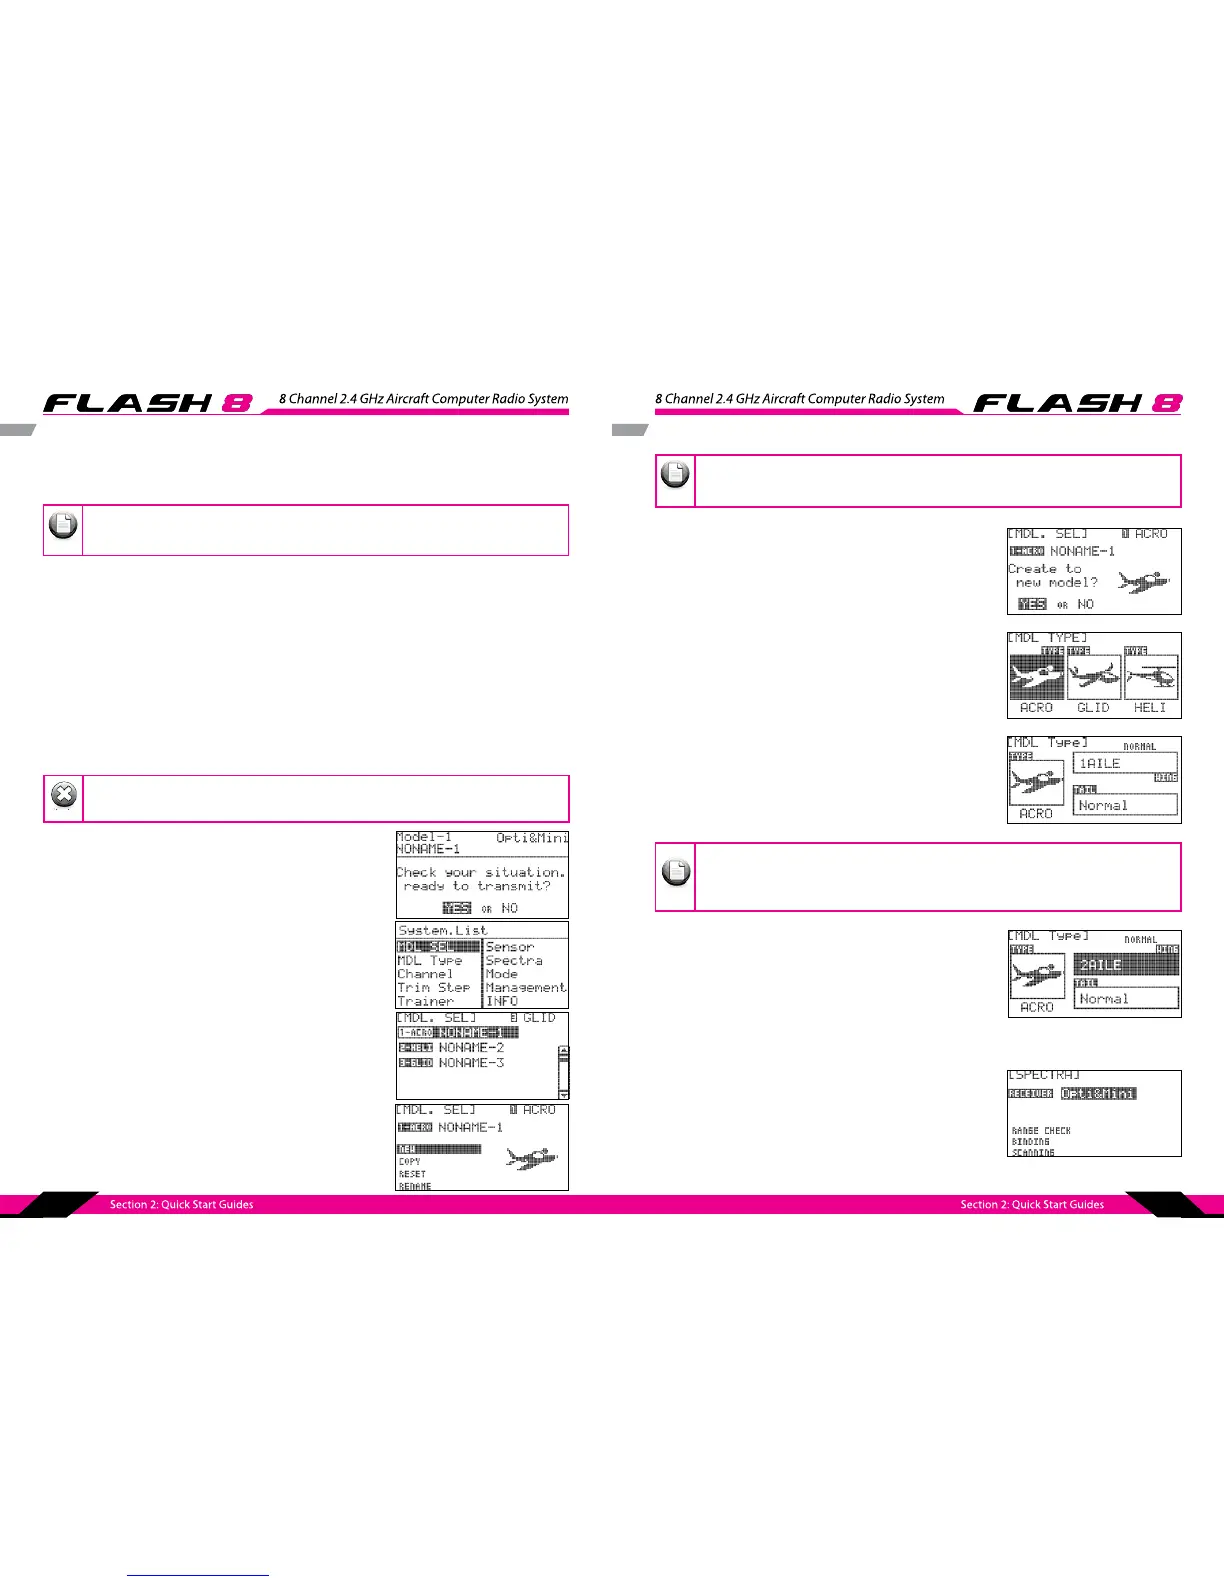
1. Turn on the transmitter; do not turn on the airplane.
2. When prompted if you are “ready to transmit” select “No”.
3. Press the jog dial and back button simultaneously to enter the
System Menu list.
4. From the System Menu list choose MDL.SEL to enter the
model setup.
5. Select the rst default model (NONAME-1) and press the jog
dial to bring up the model maintenance prompts. Select
“NEW” to create a new model.
For safety reasons during this set-up exercise on an electric powered plane, remove the
propeller.
If you are setting up a powered or un-powered glider, we will be programming your plane into
the ACRO menu for this exercise. Later you can explore the functions found in the GLID menus.
Note
Warnin
Airplane Quick Start Guide
6. When asked to create a new model select “Yes.” This will bring
up the Model Type screen.
7. Scroll to Acro/Glid” or “Select Acro/Glid.
8. Now scroll to “wing” and press the jog dial to activate the
choices. If you have 1 aileron servo select 1AILE, if your plane
has two aileron servos select 2AILE. Press the jog dial once to
conrm your selection.
9. Next, select your plane’s tail type. Select “Normal” and press
the jog dial once to conrm your entry .
10. Now press the back button once. You will be prompted to
choose the receiver type. Press the jog dial once to activate
the receiver selections and scroll to the receiver you have in
your aircraft. Press the jog dial once to conrm your receiver
selection.
We are programming a new model into the model memory slot number two, not the model
memory slot one. For the purpose of this exercise it will ensure a fresh model memory with no
existing programming.
Depending on what you select here, and for the following menu choices, the radio will
automatically optimize the functions for your choices. In other words, if you select a wing type
without aps, there will be no ap function control in that model memory’s programming
selection.
Note
Note