80 81
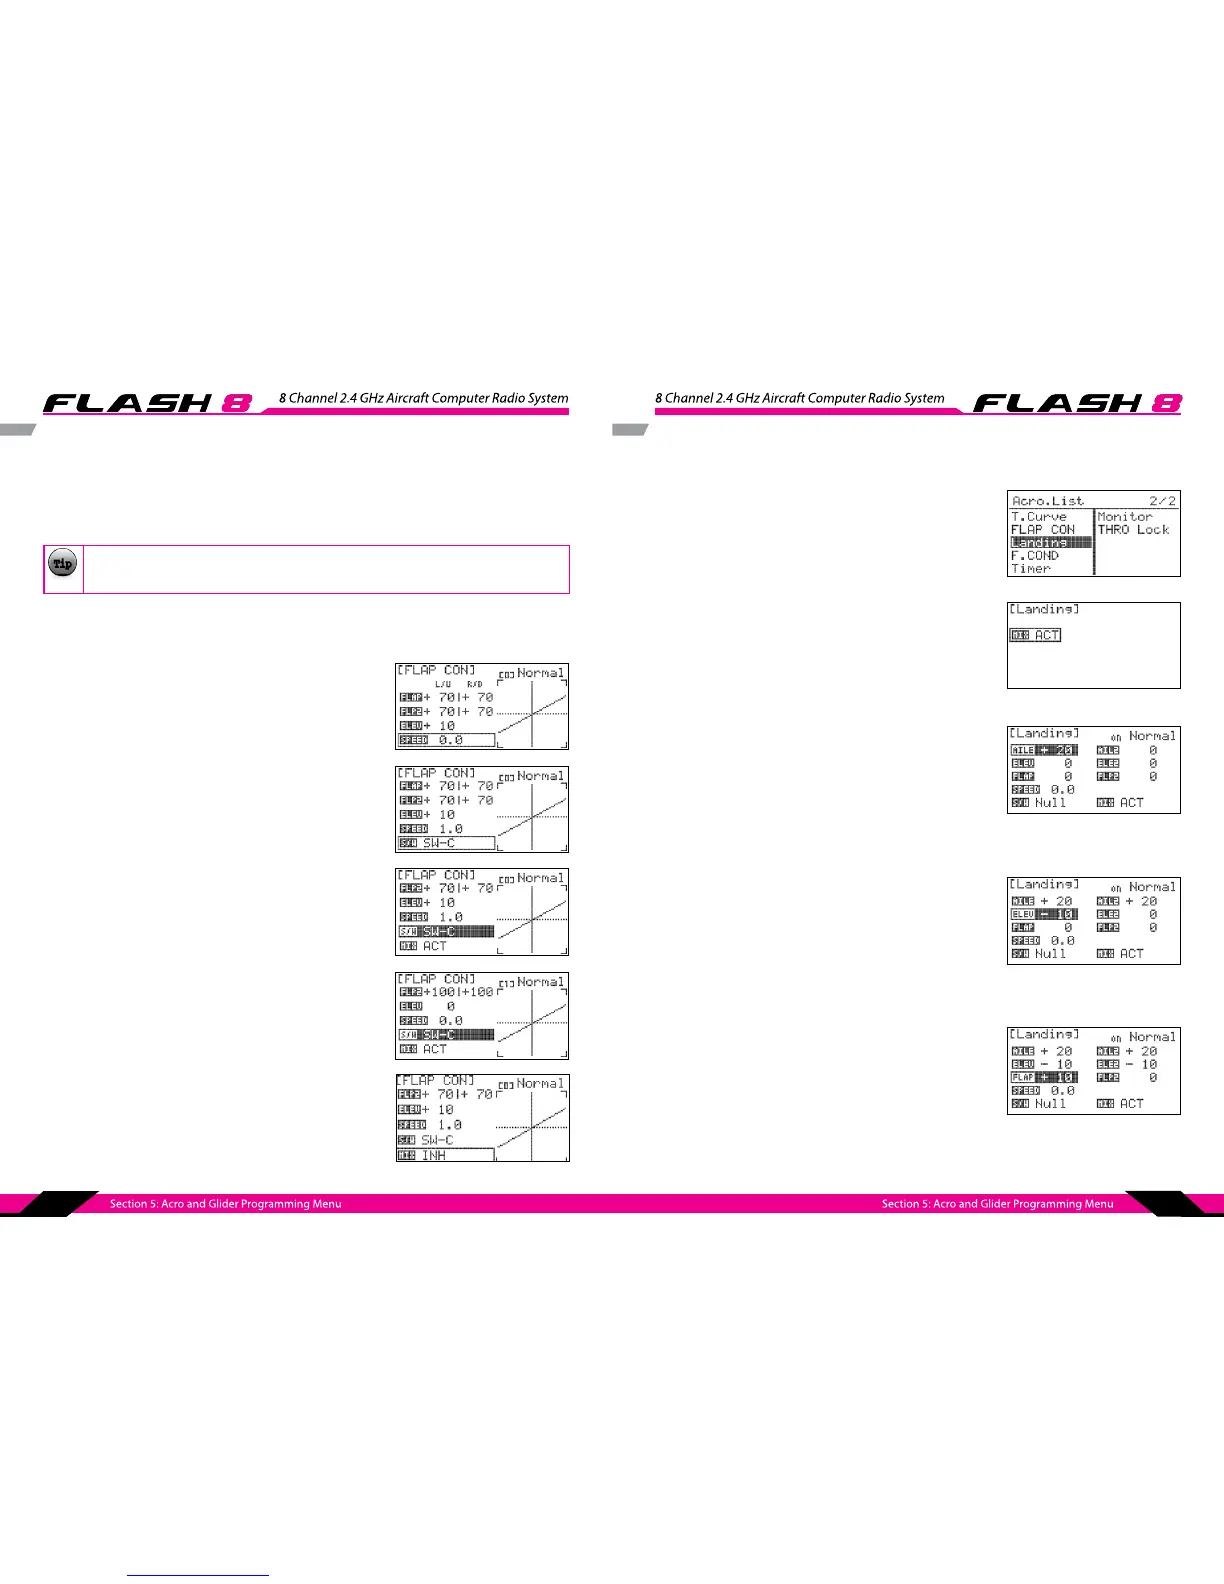
Flap Con cont.
11. If the model has a second ap servo, repeat steps 4-10 on the “FLP2” row of the value table.
12. Press the back button to return to the ap control menu.
13. Scroll to highlight the “ELEV” eld and press the jog dial to activate the menu.
Be sure to have the elevator servo(s) congured properly before performing the next step.
14. Rotate the jog dial to input the desired amount of elevator throw when the aps are fully deployed.
Press the jog dial to conrm your input. Most models require down elevator with ap deployment,
which equates to positive values in this menu. Goes with above screen shot
15. Scroll to highlight the “SPEED” eld and press the jog dial to
activate the menu.
16. Scroll to dene the amount of time (0.0 to 10.0 seconds) for
the aps and elevator mix to fully deploy. Press the jog dial
to conrm your selection.
17. Scroll the jog dial to highlight “S/W” eld and press the
jog dial to activate the menu.
18. Scroll the jog to highlight the desired switch,
then press the jog dial to conrm your input.
19. You may check the switch position with the [0,1,2] above
20. Press the back button to return to the model function menu.
To disable ap control:
1. Scroll to highlight the “MIX” eld in the ap control menu and
press the jog dial to activate the menu. Show Flap Con step 14
screen shot.
2. Select “INH” (inhibit) and press the jog dial to conrm your
selection. Goes with above screen shot.
3. Press the back button to return to the model function menu.
TipTip
Tip
Landing – ACRO only-
Landing mix controls aileron, ap, and elevator to perform as an air brake that reduces the
landing distance of an aircraft dramatically.
1. From the model menu, rotate the jog dial to highlight
“Landing” and press the jog dial once to enter the menu.
2. Press the jog dial to activate the menu.
3. Rotate the jog dial to select ”ACT”(activate), then press the
jog dial to conrm your selection.
4. Scroll to highlight the “AILE” eld and press the jog dial to
activate the menu.
5. Rotate the jog dial to increase (clockwise) or decrease
(counter-clockwise) the desired “AILE” servo angle when right
roll command is given. Press the jog dial to conrm your input.
6. If second Aileron set up for airplane is needed,
repeat the step 1-5 to move “AILE2” eld.
7. Scroll to highlight the “ELEV” eld and press the jog dial to
activate the menu.
8. Rotate the jog dial to increase (clockwise) or decrease
(counter-clockwise) the desired “ELEV” servo angle when right
roll command is given. Press the jog dial to conrm your input.
9. If 2nd Elevator set up for airplane is needed, repeat the
steps 1-8 to move “ELEV2” eld.
10. Scroll to highlight the “FLAP” eld and press the jog dial to
activate the menu.
11. Rotate the jog dial to increase (clockwise) or decrease
(counter-clockwise) the desired “FLAP” servo angle when
right roll command is given. Press the jog dial to conrm
your input.
12. If second Flap set up for airplane is needed, repeat the
steps 1-11 to move “FLAP2” eld.
13. Press the back button to return to menu