The front panel navigation can be done using combination of Up, Down and SET buttons. The
screen displays default screen options viz. Total energy, Rated and date/time information. To
navigate to the main energy menu, users need to press the SET button for once.
The menu options appear on the front panel display, it comprises of 3 main menu tabs
displaying the Energy menu followed by Monitoring and Setup. Use the up/down arrow
buttons to scroll through submenu items for modifying and accessing the respective values.
The display reverts to the default screen if left in ideal condition.
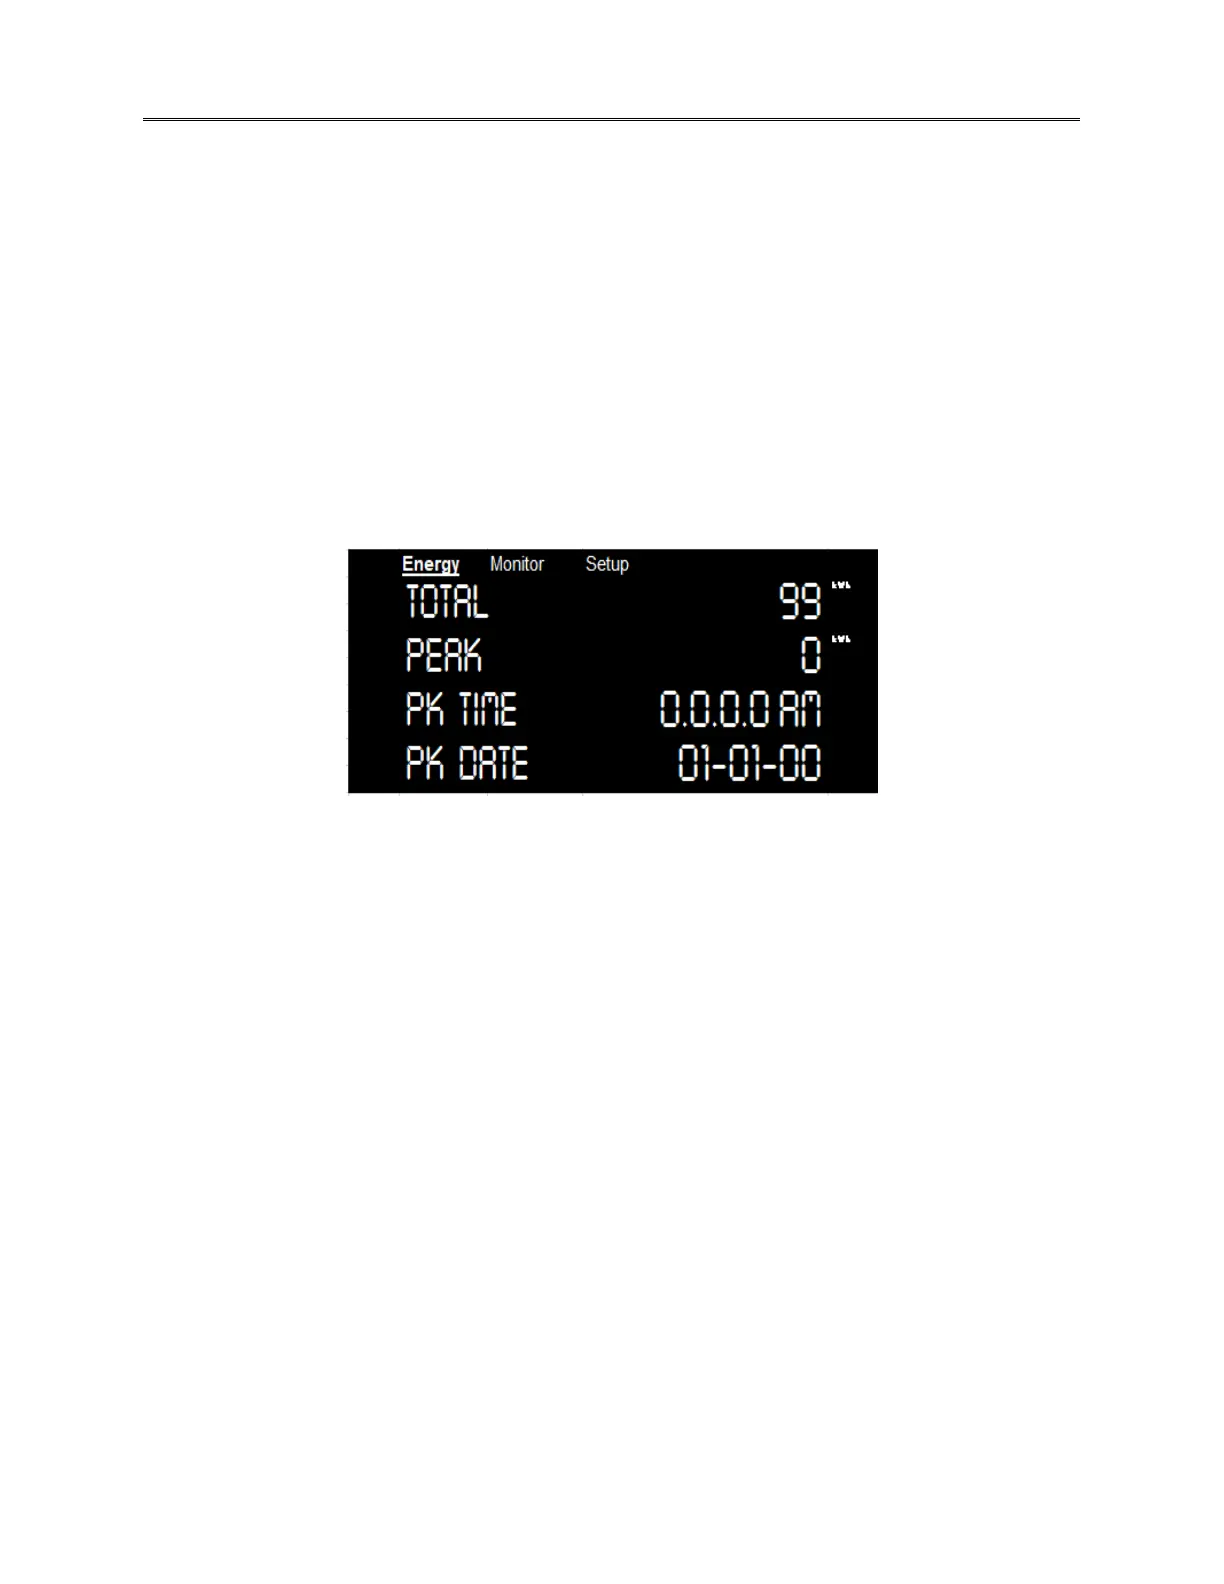
4.3. Default Screens
Default Menu Items are enlisted in section 4.3.1. for the startup screen (default screen) of the
meter. In case of no response for 20 seconds during navigation, the front panel jumps back
to the default screen which contains the below displayed options.
Figure 16. Default Screen
4.3.1. Display Parameters
• Total – Displays the total energy. This option provides the total energy consumption
reading at the front panel screen. This is the cumulative reading for all the phases in kWh.
• Peak – Displays the pea value of energy available in the power line. The next option
provides peak energy utilization or demand reading for every 15-minute time period. This
is the second option in the default display screen. The peak value can be reset using
navigation button and following the steps mentioned in section 4.4.
• Date - Date stamp for the peak value. This section displays the date signature for the peak
value readings. You can reset using the setup menu as described in section 4.4.
• Time – Displays the time when peak kW is recorded. This section displays the time
signature for the peak value readings. The same can be reset using the setup menu as
described in section 4.4Navigating through display screen.
• Selection symbol – The selection symbol indicates the selected criteria in the list options.
It can be moved with the help of up/down button in the navigation panel. Use the SET
button to select the indicated item.
 Loading...