4. Rotate the assembly to gain access to the connector on the module, and then disconnect the cable from
the module.
5. To remove the module from the bracket, remove the two Phillips screws that secure the module, and
then separate the module from the bracket.
To install a webcam module, reverse the removal procedures.
Replacing drives
Replacing the hard disc drive with a 3.5-inch drive or a 2.5-inch drive
Description Spare part number
2-TB, 7200 rpm hard drive 616608-001
750-GB, 7200 rpm hard drive 639363-001
500-GB, 7200 rpm hard drive 751283-001
Hard drive screw bumper 752334-001
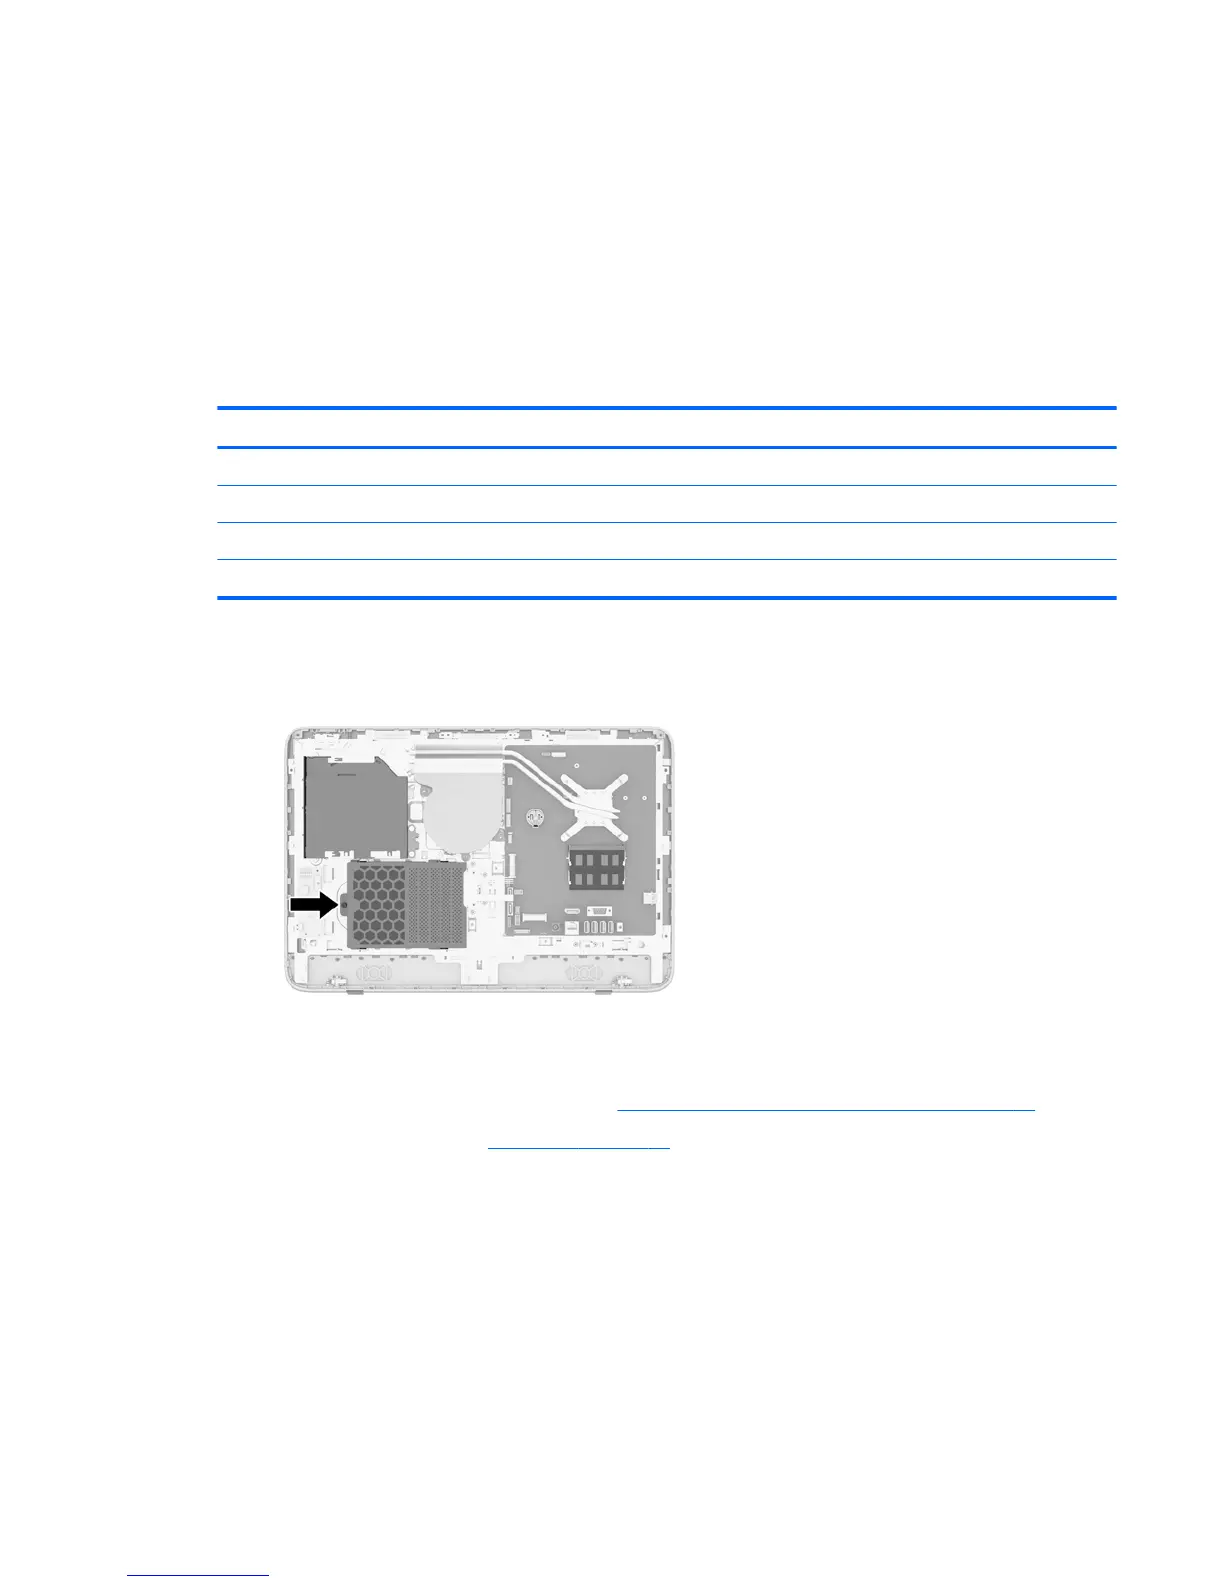
The hard disc drive is located on the left side of the computer (when viewed from behind). The drive is housed
in a removable cage.
To install a 2.5-inch drive, you need a drive adapter.
The hard drive data cable connects to the SATA0 and SATA PWR0 system board connectors.
1. Prepare the computer for disassembly (see Preparing to disassemble the computer on page 19).
2. Remove the rear cover (see Rear cover on page 20).
Replacing drives 23
 Loading...