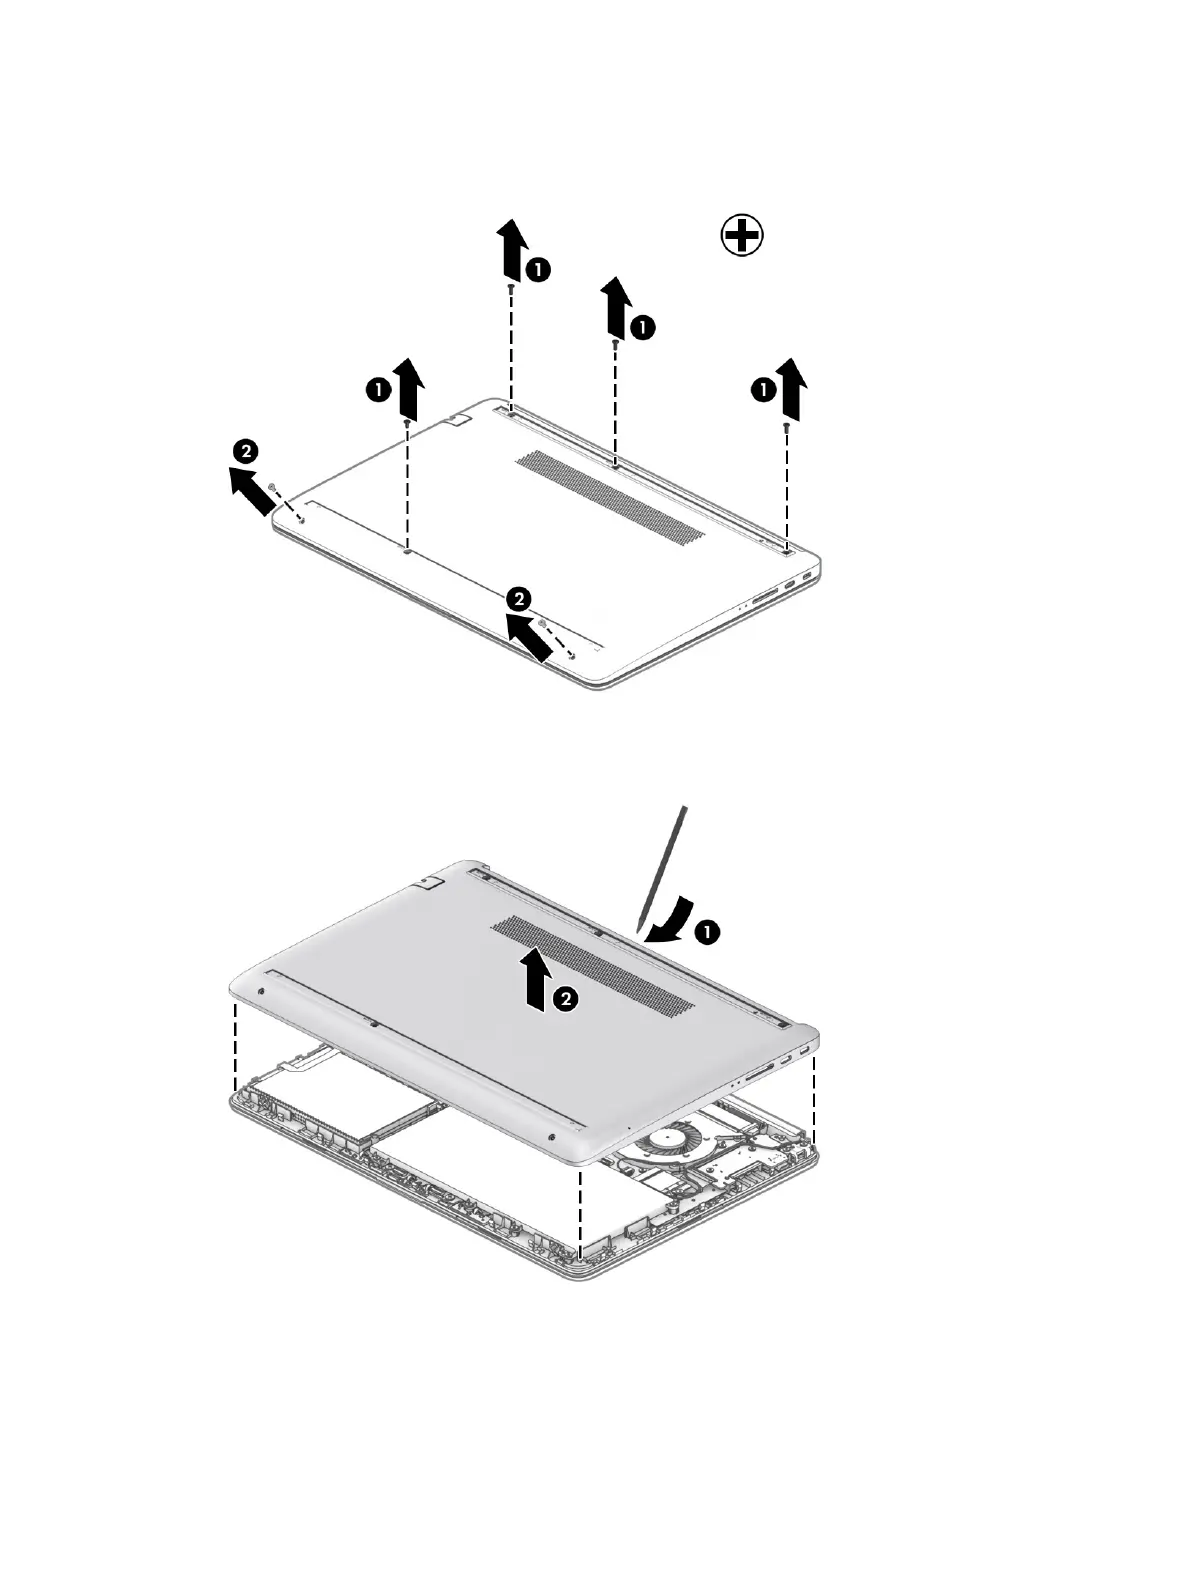
1. Remove the four Phillips M2.5 × 6.0 screws (1) from under the feet, and the two Phillips M2.5 × 4.0
screws (2) in the front corners of the bottom cover.
2. Use a thin plastic tool (1) to release the bottom cover. Work your way around to disengage the
bottom cover from the computer, and then remove the cover (2).
To install the bottom cover, reverse this procedure.
Battery
To remove the battery, use this procedure and illustration.
32
Chapter 5 Removal and replacement procedures for authorized service provider parts
 Loading...