5. Remove the fan (see Fan on page 41).
NOTE: When replacing the system board, be sure that the following components are removed from
the defective system board and installed on the replacement system board:
● WLAN module (see WLAN module on page 33)
● Memory modules (see Memory module on page 35)
● Solid-state drive (select products only) (see Solid-state drive on page 36)
● Heat sink assembly (see Heat sink on page 44)
NOTE: You can remove the heat sink and the system board at the same time.
Remove the system board:
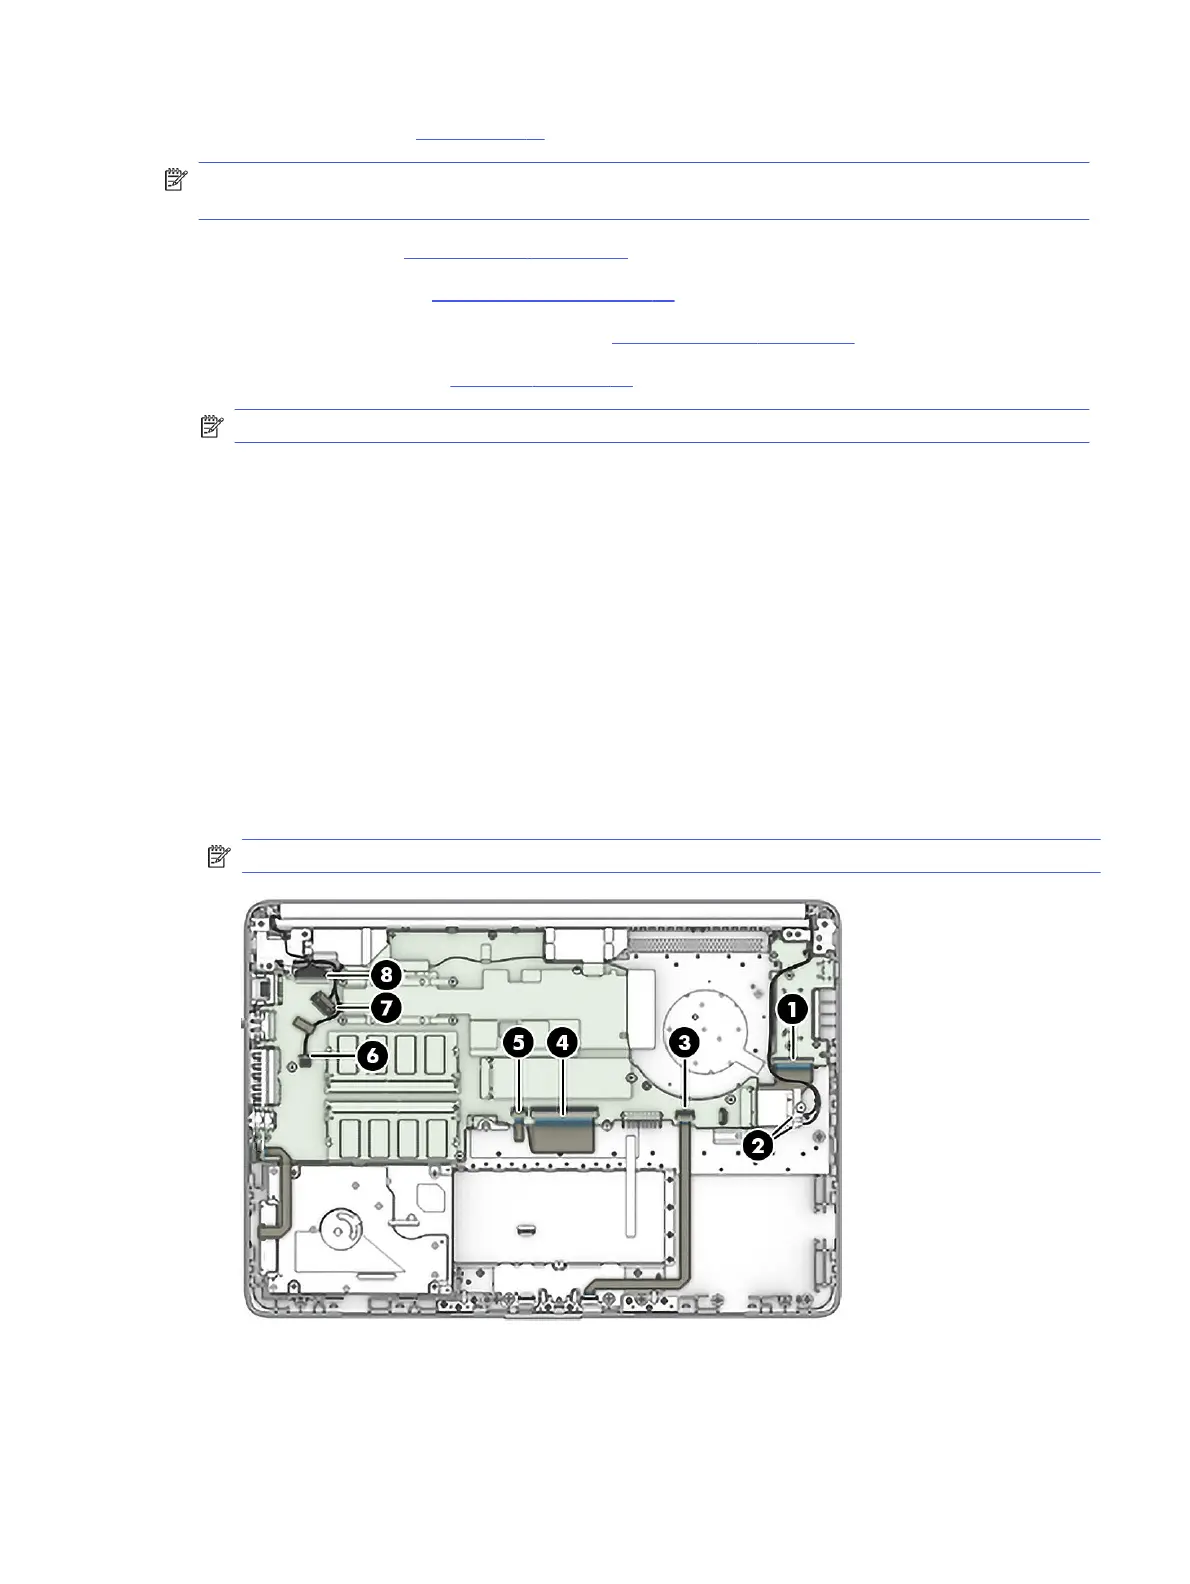
1. Position the computer upright, and then disconnect the following cables from the system board:
(1) USB board cable
(2) WLAN antenna cables
(3) Touchpad button board cable
(4) Keyboard cable
(5) Backlight cable
(6) Speaker cable
(7) Power connector cable
(8) Display cable
NOTE: Hard drive not available in this model.
2. Remove the three Phillips M2.0 × 2.0 screws (1) that secure the system board to the computer.
3. Remove the Phillips M2.0 × 3.5 screw (2) that secures the system board to the computer.
System board
43
 Loading...