module is installed properly and has passed the self test, as described in the “LED Behavior”
table Stacking Module LED Behavior.
Table 18 Stacking Module LED Behavior
Display for a Properly Installed ModuleLED
After boot-up sequencing, LEDs are on steady green.Global
Status and
Back LEDs
on front of
the switch
and Module
Status LED
on the
stacking
module
If stacking cables are connected to the module and to a Stacking Module on another powered on
3810M switch, the LED goes ON green to indicate the stacking port is enabled, connected, and detects
a signal from the attached switch.
Link (for
each
stacking
port on the
module)
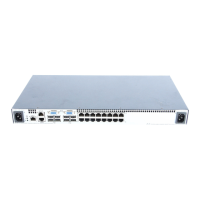
4. Installing the Flex Port Module
1. Unscrew the two retaining screws on the blank filler and remove it.
2. Remove the new Flex Port module from its packaging, be careful not to touch any of the
circuitry on the board.
3. Insert the Flex Port module fully into the slot as shown in Install Flex Port Module. The face
plate of the module will be flush with the front face of the switch.
4. Engage the retaining screws and tighten them. Be sure, to not overtighten the screws.
5. Power on the switch and make sure the module passes its self test. See Flex Port LED Error
Indicators for the module LED behavior that indicates correct installation.
36 Installing the Switch

 Loading...