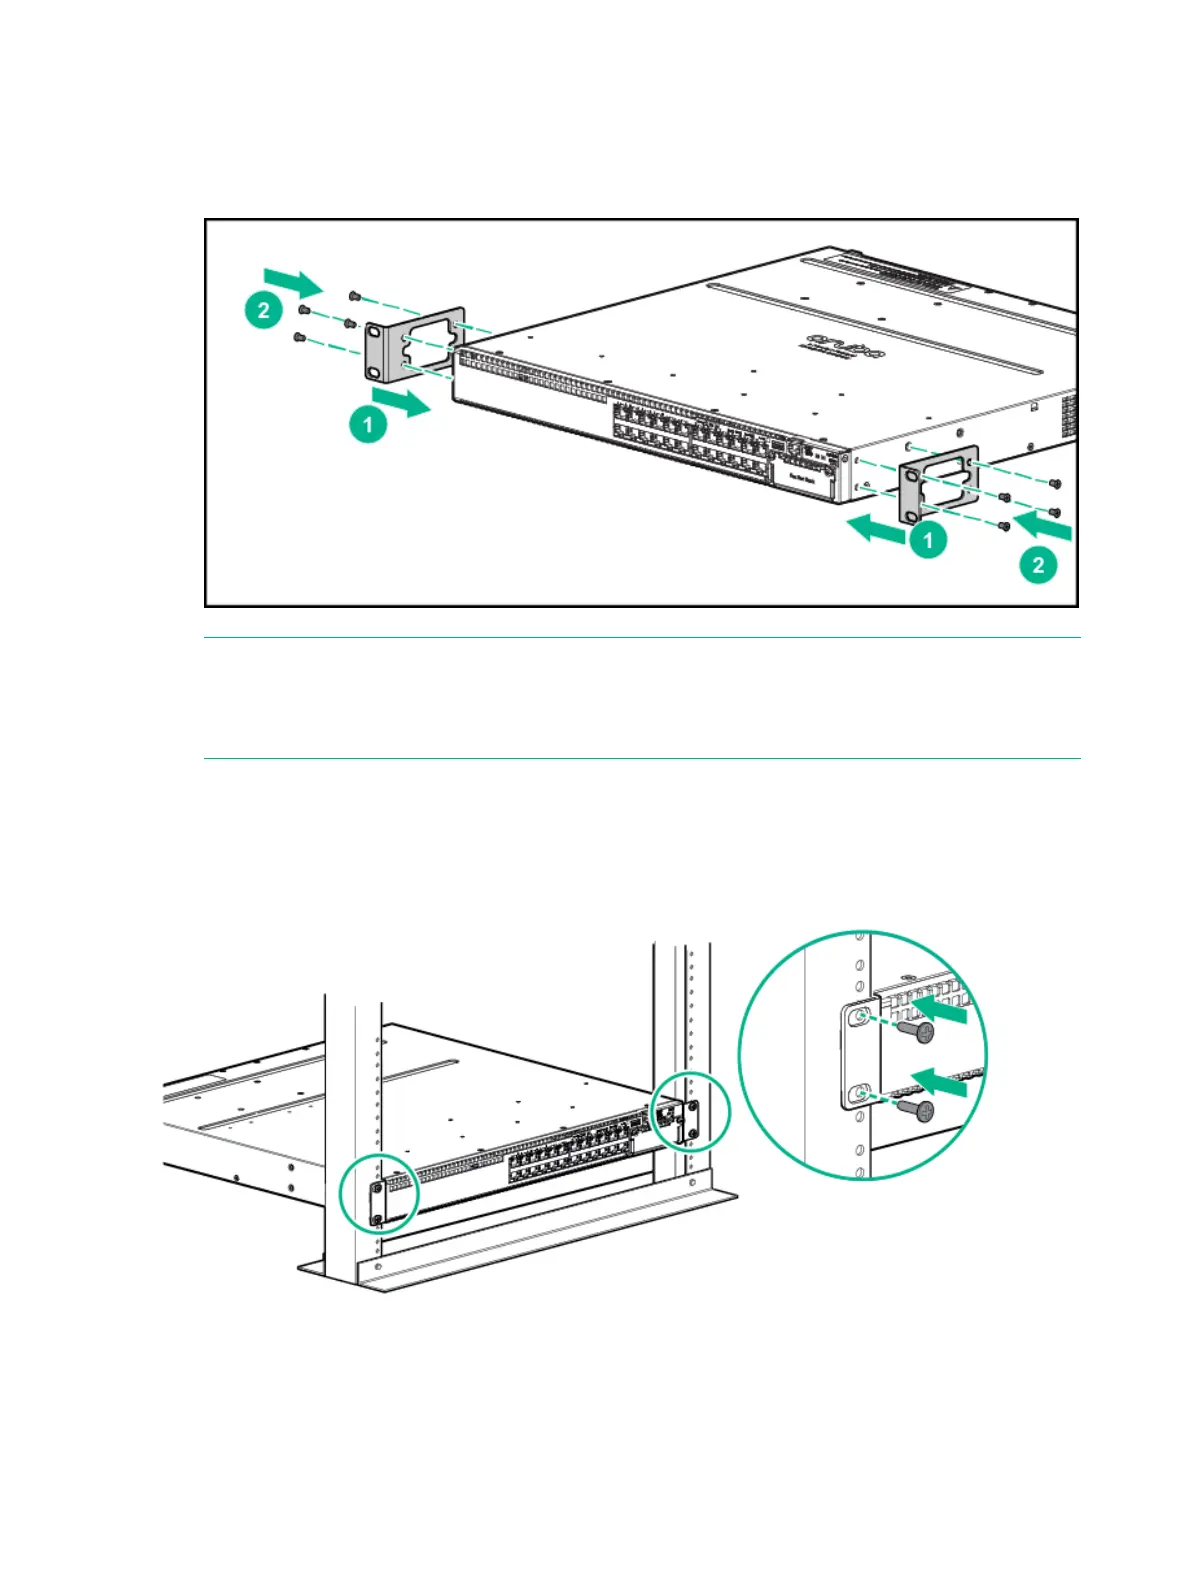
Rack Mounting the 3810M switch in a 2-post rack
1. Use a #1 Phillips (cross-head) screwdriver and attach the mounting brackets to the switch
with the included 8-mm M4 screws.
Figure 15 Attaching the mounting brackets to the switch
NOTE: The mounting brackets have multiple mounting holes and can be rotated allowing
for a wide variety of mounting options. These include mounting the switch so its front face
is flush with the face of the rack as shown in the illustration, or mounting it in a more balanced
position.
2. Hold the switch with attached brackets up to the rack and move it vertically until rack holes
line up with the bracket holes, then insert and tighten the four number 12-24 screws holding
the brackets to the rack.
Figure 16 Mounting the switch in a rack
38 Installing the Switch

 Loading...