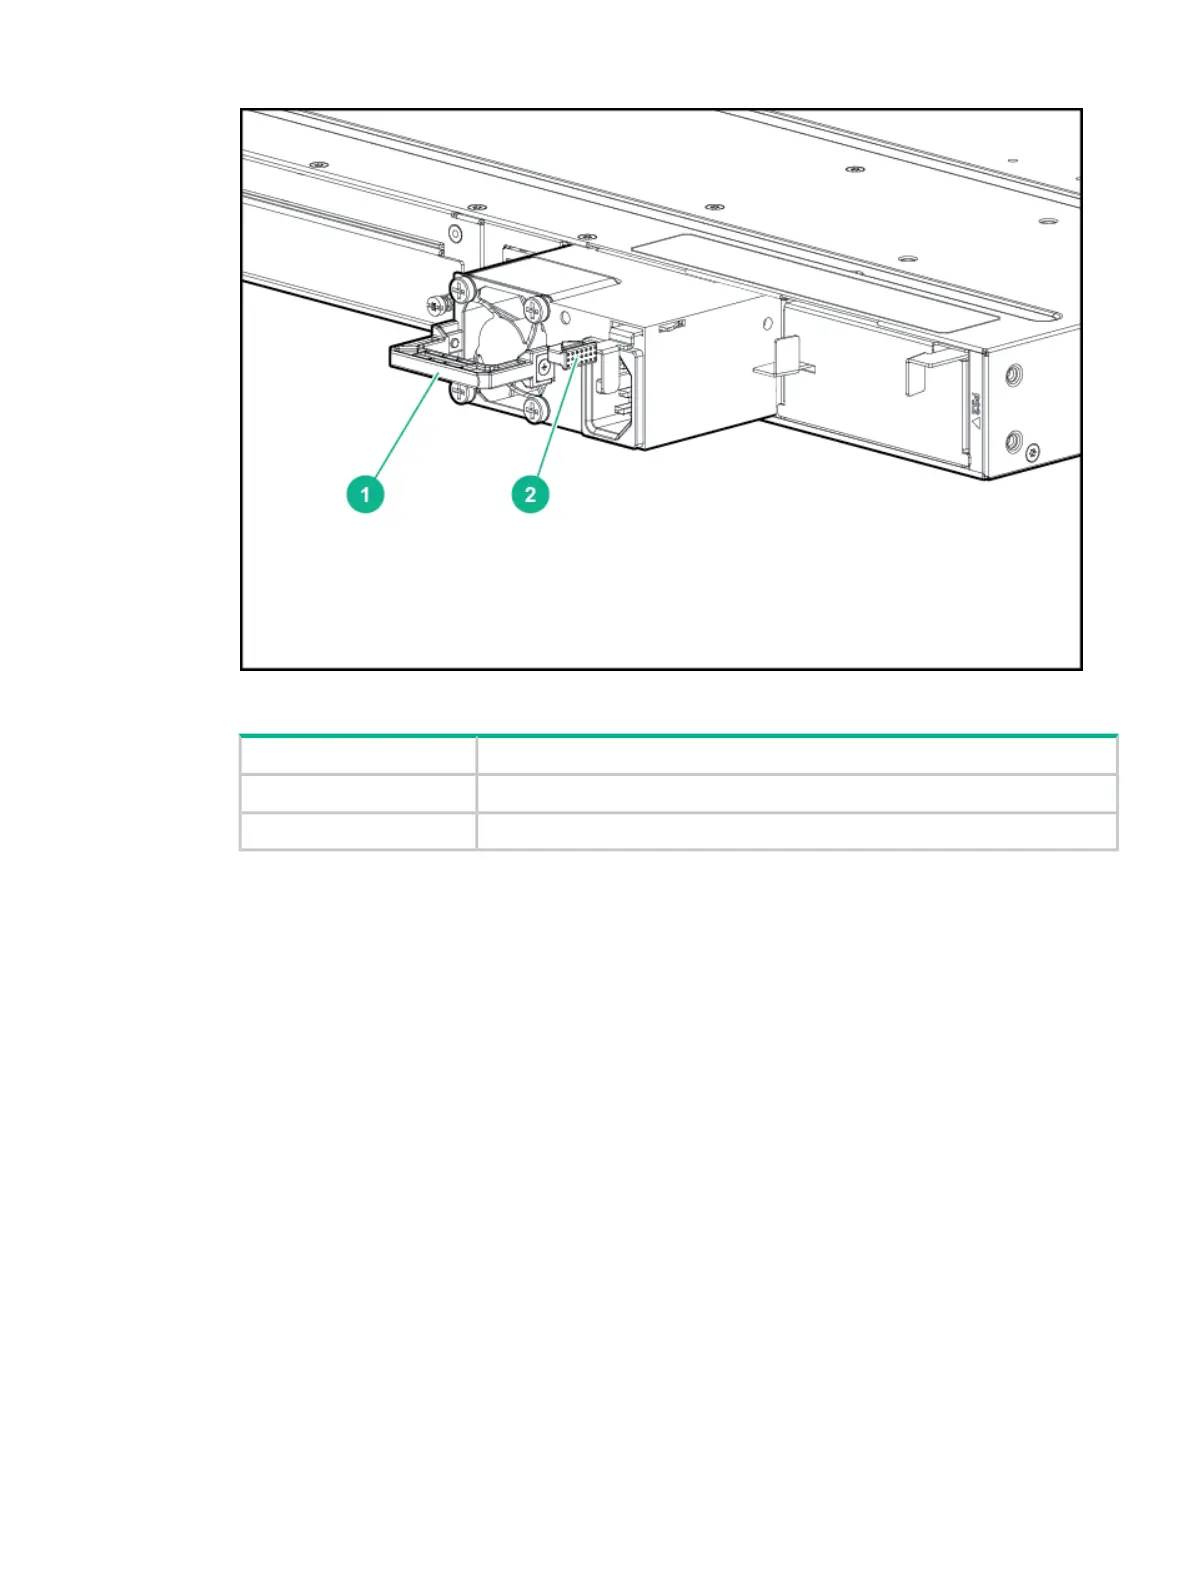
Figure 38 Replacing a failed power supply
Table 25 Replacing Failed Power Supply Label and Description
DescriptionLabel
Handle1
Lock Mechanism2
3. Insert the new power supply. Slide it in all the way in until the locking mechanism locks.
Replacing the Stacking Module
The 3810M Stacking Module is not hot swappable. The switch must be powered off before
replacing the module.
To replace a stacking module:
1. Power off the switch for which the stacking module needs to be replaced.
2. Remove the new stacking module from it’s packaging, being careful to not touch any of the
circuitry on the board.
3. Disconnect the stacking cables from the failed module. You do not need to disconnect the
cables from the switches at the other ends of the cables.
4. Unscrew the two retaining screws on the module.
5. Pull the two extractor handles toward you and outward until they stop and then pull the
module straight out.
6. Insert the new stacking module fully into the slot as shown in Replace Stacking Module..
The face plate of the module will be flush with the back face of the switch.
7. Close the two extractor handles all the way until they stop.
8. Engage the retaining screws and tighten them. Be sure to not over tighten the screws.
9. Power on the switch and make sure the module passes its self test. See Stacking Module
LED Behavior for the module LED behavior that indicates correct installation.
Replacing the Stacking Module 65

 Loading...