EasyManuals Logo

HP Carrier-Grade rx2800 i2 Server DC User Manual

HP Carrier-Grade rx2800 i2 Server DC
149 pages
To Next Page IconTo Next Page
To Previous Page IconTo Previous Page
Page #52 background imageLoading...
Page #52 background image
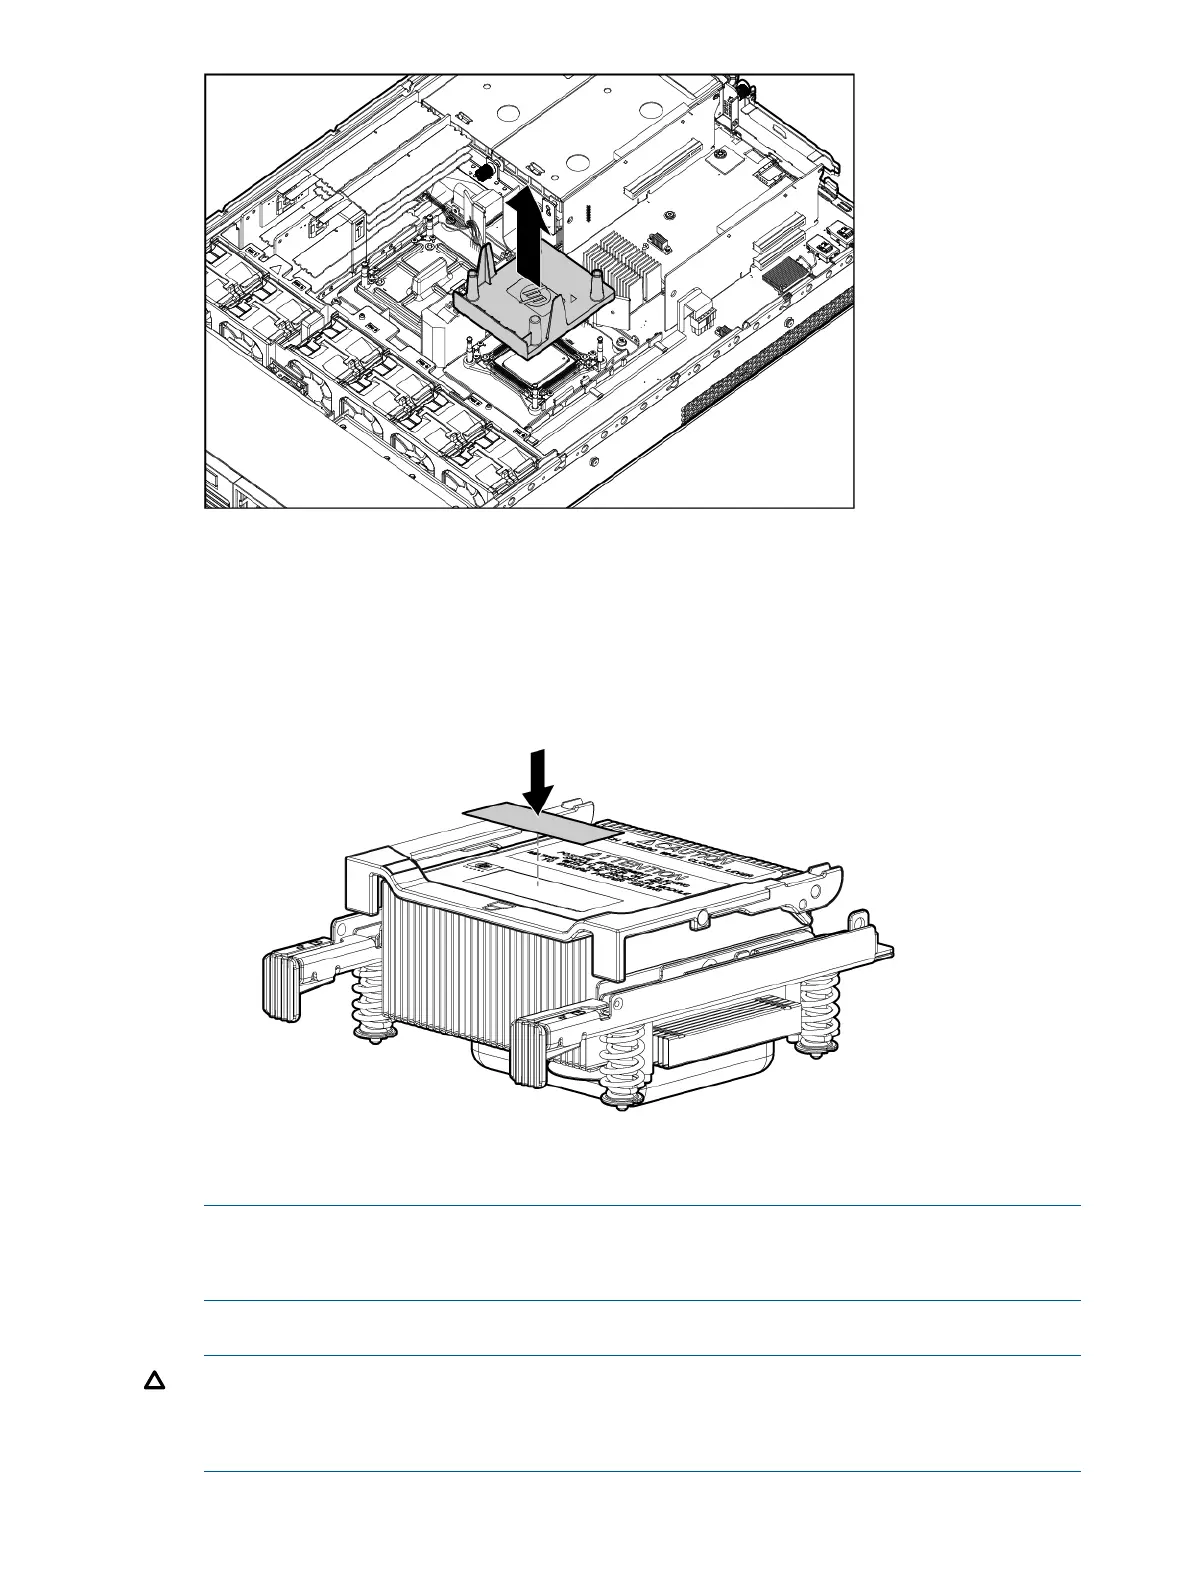
3. Transfer the duplicate part/serial numbers label from the processor module to the processor
heat sink:
a. Remove the duplicate tear-away label that lists the part and serial numbers from the
processor module.
b. Place the label on the top of the heat sink.
4. Install the processor over the load posts.
NOTE: Ensure pin 1, indicated on the empty socket with an embossed triangle, matches the
pin 1 marker on the processor module, the chamfered corner of its attached voltage regulator
heat sink.
5. Remove the heat sink cover.
CAUTION: During installation, after removing the protective cover from the heat sink:
Do not touch or come into contact with the thermal interface material.
Immediately install the heat sink.
52 Optional components

Table of Contents

Questions and Answers:

Question and Answer IconNeed help?

Do you have a question about the HP Carrier-Grade rx2800 i2 Server DC and is the answer not in the manual?

HP Carrier-Grade rx2800 i2 Server DC Specifications

General IconGeneral
Form Factor2U Rack
Product TypeCarrier-grade server
Memory TypeDDR3
Hard Drive InterfaceSAS
StorageUp to 8x 2.5-inch SAS HDDs/SSDs
Power SupplyRedundant Power Supplies
Operating SystemHP-UX
Operating System SupportHP-UX
ProcessorIntel Itanium Processor 9300 series
MemoryUp to 384 GB (24 DIMM slots)

Related product manuals