EasyManuals Logo

HP ProLiant DL320 Generation 5p Maintenance And Service Guide

HP ProLiant DL320 Generation 5p
85 pages
To Next Page IconTo Next Page
To Previous Page IconTo Previous Page
Page #52 background imageLoading...
Page #52 background image
Removal and replacement procedures 52
14.
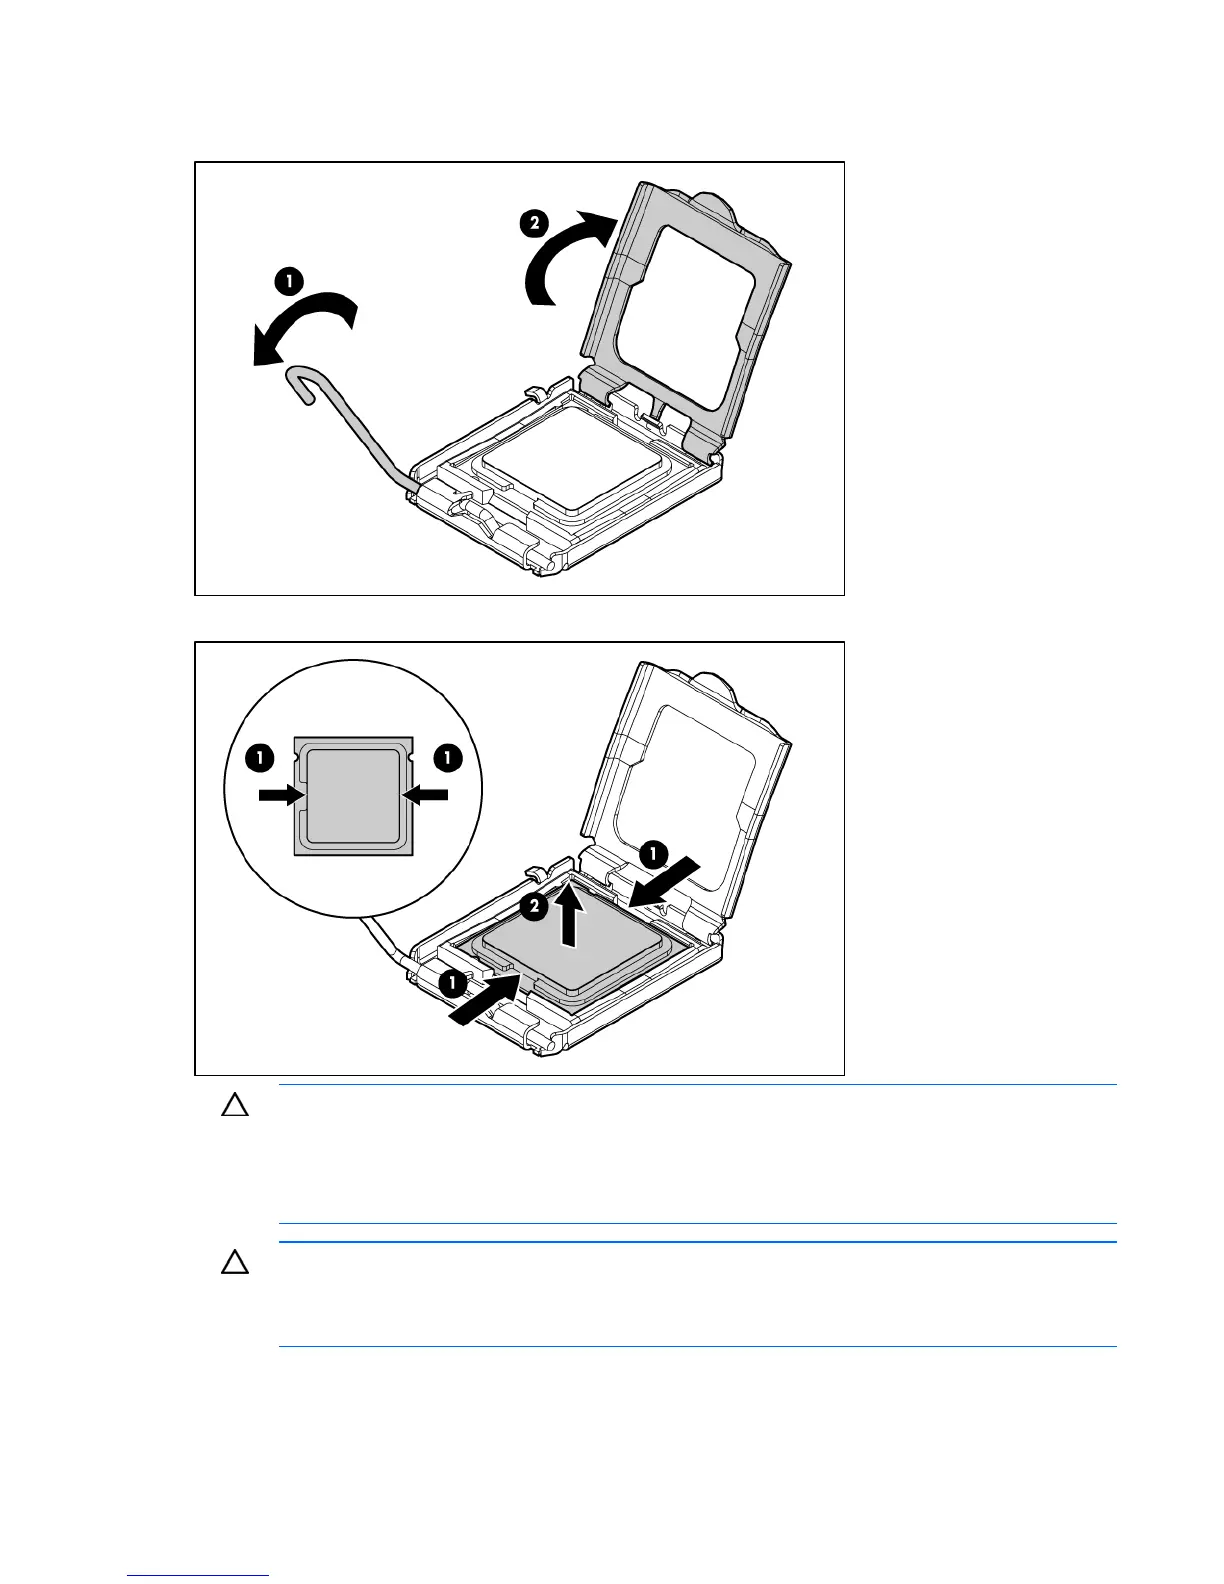
Open the processor retaining latch and the processor socket retaining bracket on the failed system
board.
15. Using your fingers, remove the processor from the failed system board.
CAUTION: To avoid damage to the system board:
Do not touch the processor socket contacts.
Always install the processor socket cover after removing the processor from the socket.
Do not tilt or slide the processor when lowering the processor into the socket.
CAUTION: To avoid damage to the processor:
Handle the processor only by the edges.
Do not touch the bottom of the processor, especially the contact area.
16. Remove the seven T-15 screws securing the failed system board.

Table of Contents

Other manuals for HP ProLiant DL320 Generation 5p

Questions and Answers:

Question and Answer IconNeed help?

Do you have a question about the HP ProLiant DL320 Generation 5p and is the answer not in the manual?

HP ProLiant DL320 Generation 5p Specifications

General IconGeneral
Processor Sockets1
Memory Slots4
StorageSATA or SAS
Form Factor1U rackmount
Operating System SupportMicrosoft Windows Server, Red Hat Enterprise Linux, SUSE Linux Enterprise Server
ProcessorIntel Xeon 3000, 3200 series
MemoryUp to 8GB DDR2
Drive Bays2 x 3.5" Non-hot plug SATA or SAS
Expansion Slots1 PCI-Express x8, 1 PCI-Express x4

Related product manuals