Installing Hardware Options
3-58 HP ProLiant ML370 Generation 3 Server Setup and Installation Guide
HP CONFIDENTIAL
Writer: Jennifer Hayward File Name: d-ch03 Installing Hardware Options.doc
Codename: Dizzy Devil Part Number: 281992-002 Last Saved On: 12/3/02 12:45 PM
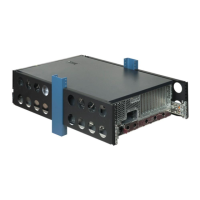
5. Using the Torx T-15 tool attached to the back of the server, position two screws
in the upper mounting holes on each side of the drive cage.
Figure 3-47: Installing screws on the SCSI drive cage
6. Slide the drive cage into the chassis until it locks into place.
Figure 3-48: Sliding the drive cage into the chassis
IMPORTANT: Be sure that the unit identification numbers (0 and 1) appear on the right side
of the drive cage front panel.
 Loading...