I/O assembly
Follow these steps to remove the I/O assembly:
1. Prepare the computer for disassembly (see Preparation for disassembly on page 17), and then remove the
following components:
a. Access panel (see Access panel on page 22)
b. Interior upper cover (see Interior covers on page 24)
c. Internal PCIe bracket (see Internal PCIe bracket on page 27)
d. Memory fan (see Memory fan on page 28)
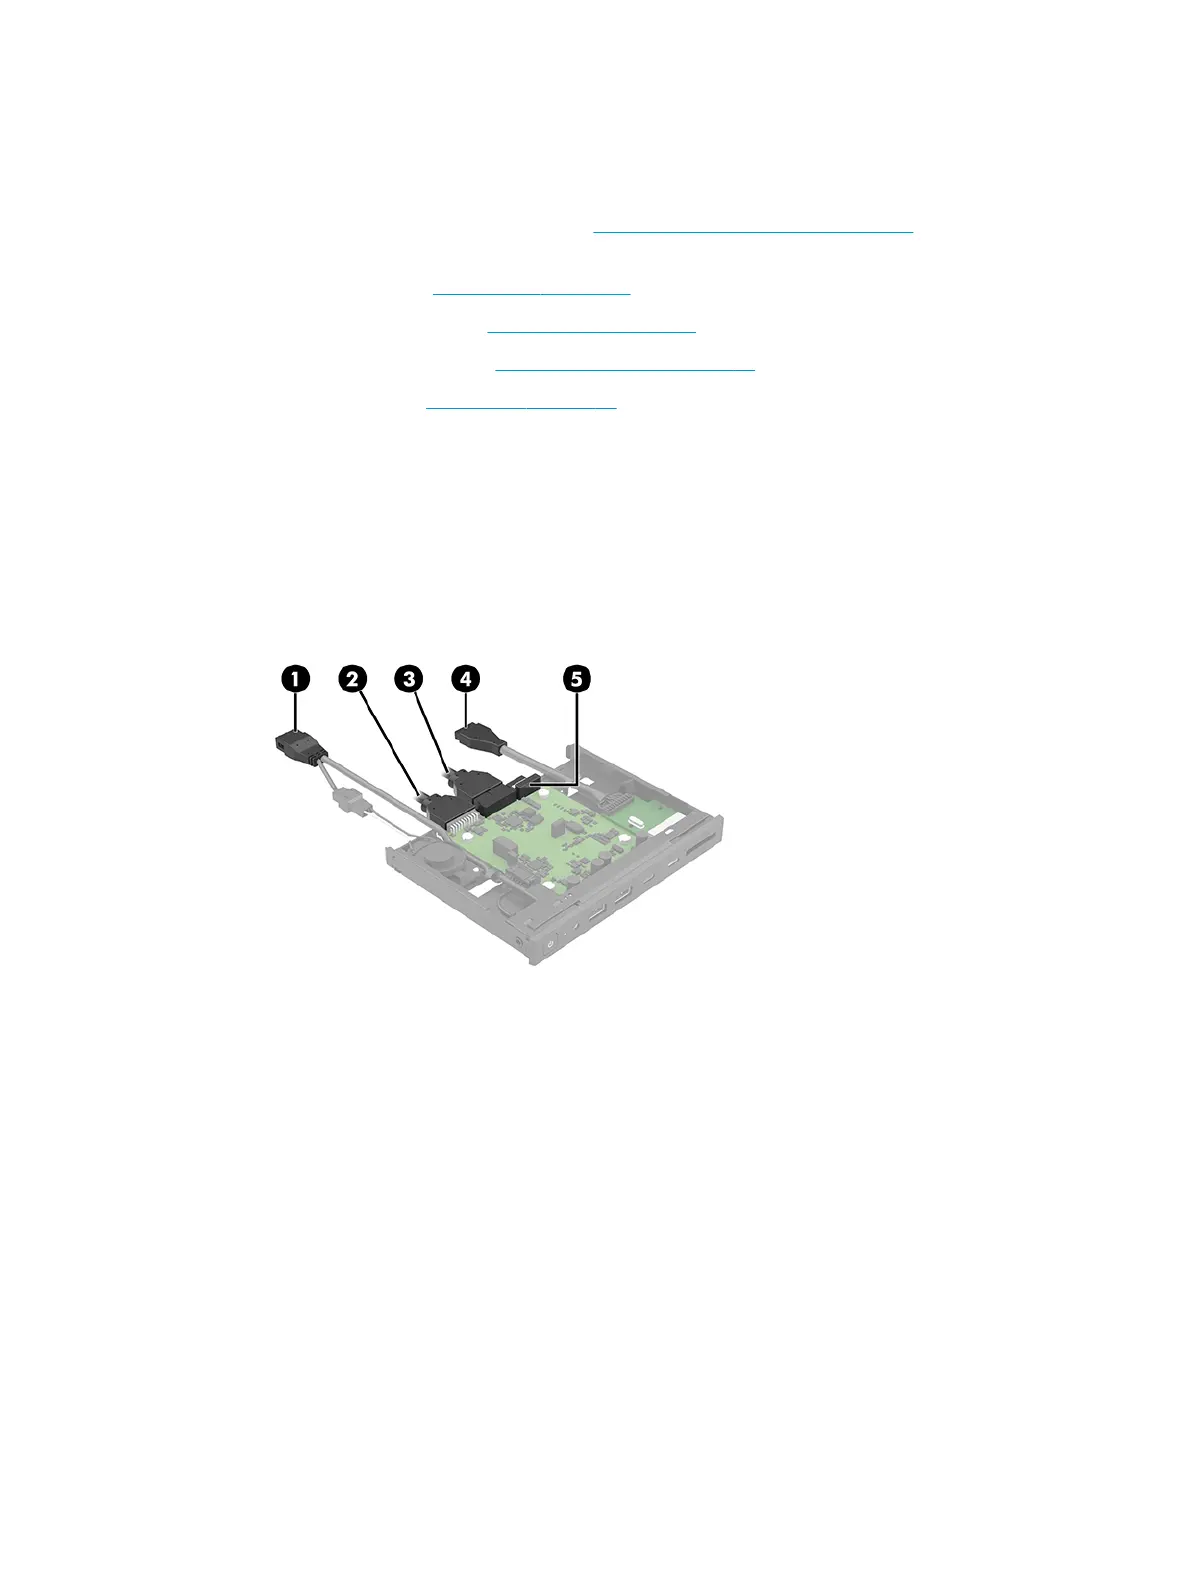
2. Disconnect the I/O front audio cable (1) from the system board.
3. Disconnect the I/O assembly UI cable (2) from the I/O assembly.
4. Disconnect the I/O assembly USB cable (3) from the I/O assembly.
5. Disconnect the I/O assembly memory card reader cable (4) from the I/O assembly.
6. Disconnect the I/O assembly FIOUI-Premium (OClink) cable (5) from the I/O assembly.
7. Release the I/O assembly by lifting up on the drive release bar (1).
I/O assembly 29
 Loading...