Installing the switch | 43
Both the HPEAruba Networking CX 6200F 12G Class4 PoE 2G/2SFP+ 139W Switch (R8Q72A) and the
Aruba 6200F 12G Class4 PoE 2G/2SFP+ 139W TAA Switch (R8V13A) ship with a wall mounting bracket to
support a more robust wall mount.
The switch is designed to support mounting in a 12-inch (304.8 cm)-wide enclosure with a top and
bottom air opening. Natural convection with at least a 40 LFM airflow is required in this configuration.
To mount the switch, use either the mounting brackets or mounting holes provided on the bottom of
the switch.
For safe operation, read Installation precautions and guidelines before mounting the switch.
The switch should be mounted only to a wall or wood surface that is at least 1/2-inch (12.7 mm) plywood or its
equivalent.
Mounting brackets
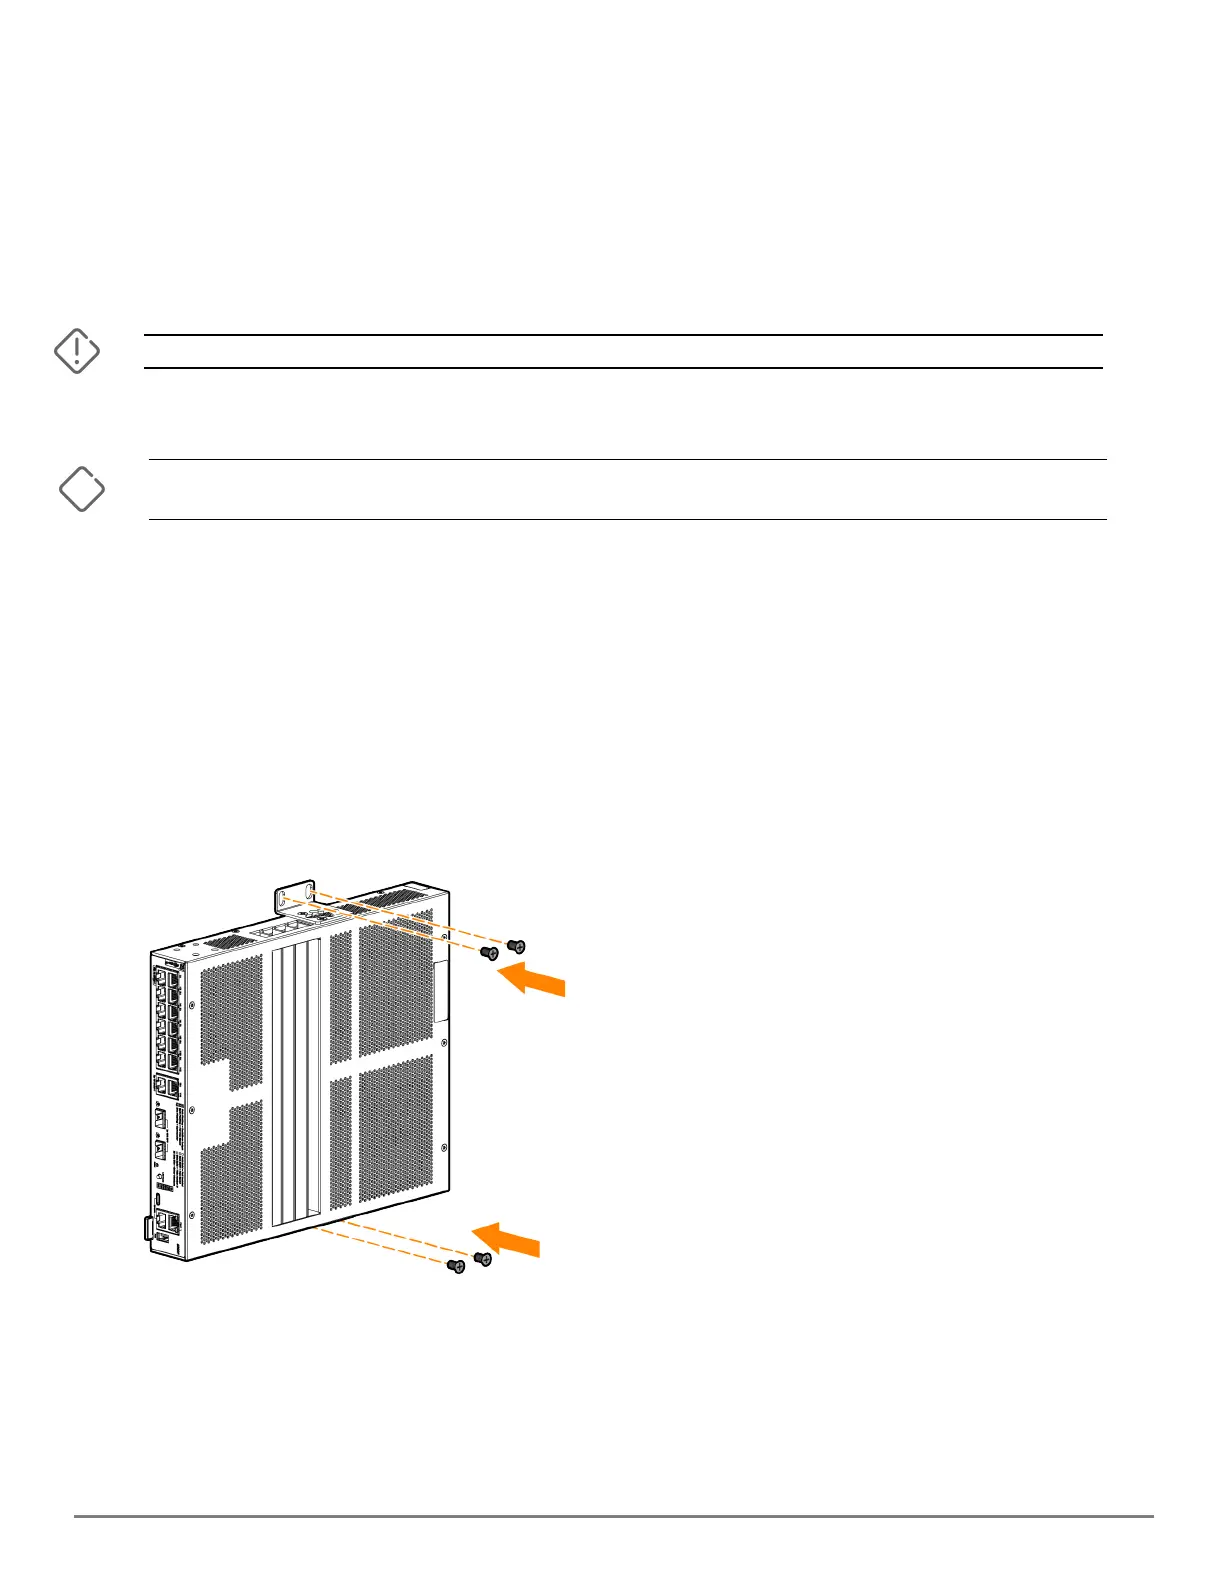
To mount the 12-port switch to the wall:
1. Determine and mark screw hole locations by positioning the switch where it will be installed.
2. Drill four holes in the wall.
3. Use a #1 Phillips (cross-head) screwdriver and attach the mounting brackets to the switch with the
included 10-mm M4 screws.
4. Mount the switch to the wall using four screws (not included), applicable for the type of wall being
used.
Figure 9 Mounting switch to the wall
Mounting holes
To mount the HPEAruba Networking CX 6200F 12G Class4 PoE 2G/2SFP+ 139W Switch (R8Q72A) and
the Aruba 6200F 12G Class4 PoE 2G/2SFP+ 139W TAA Switch (R8V13A) using the holes located on the
bottom of the switch, follow these steps:
 Loading...