GSC60
EN - 89
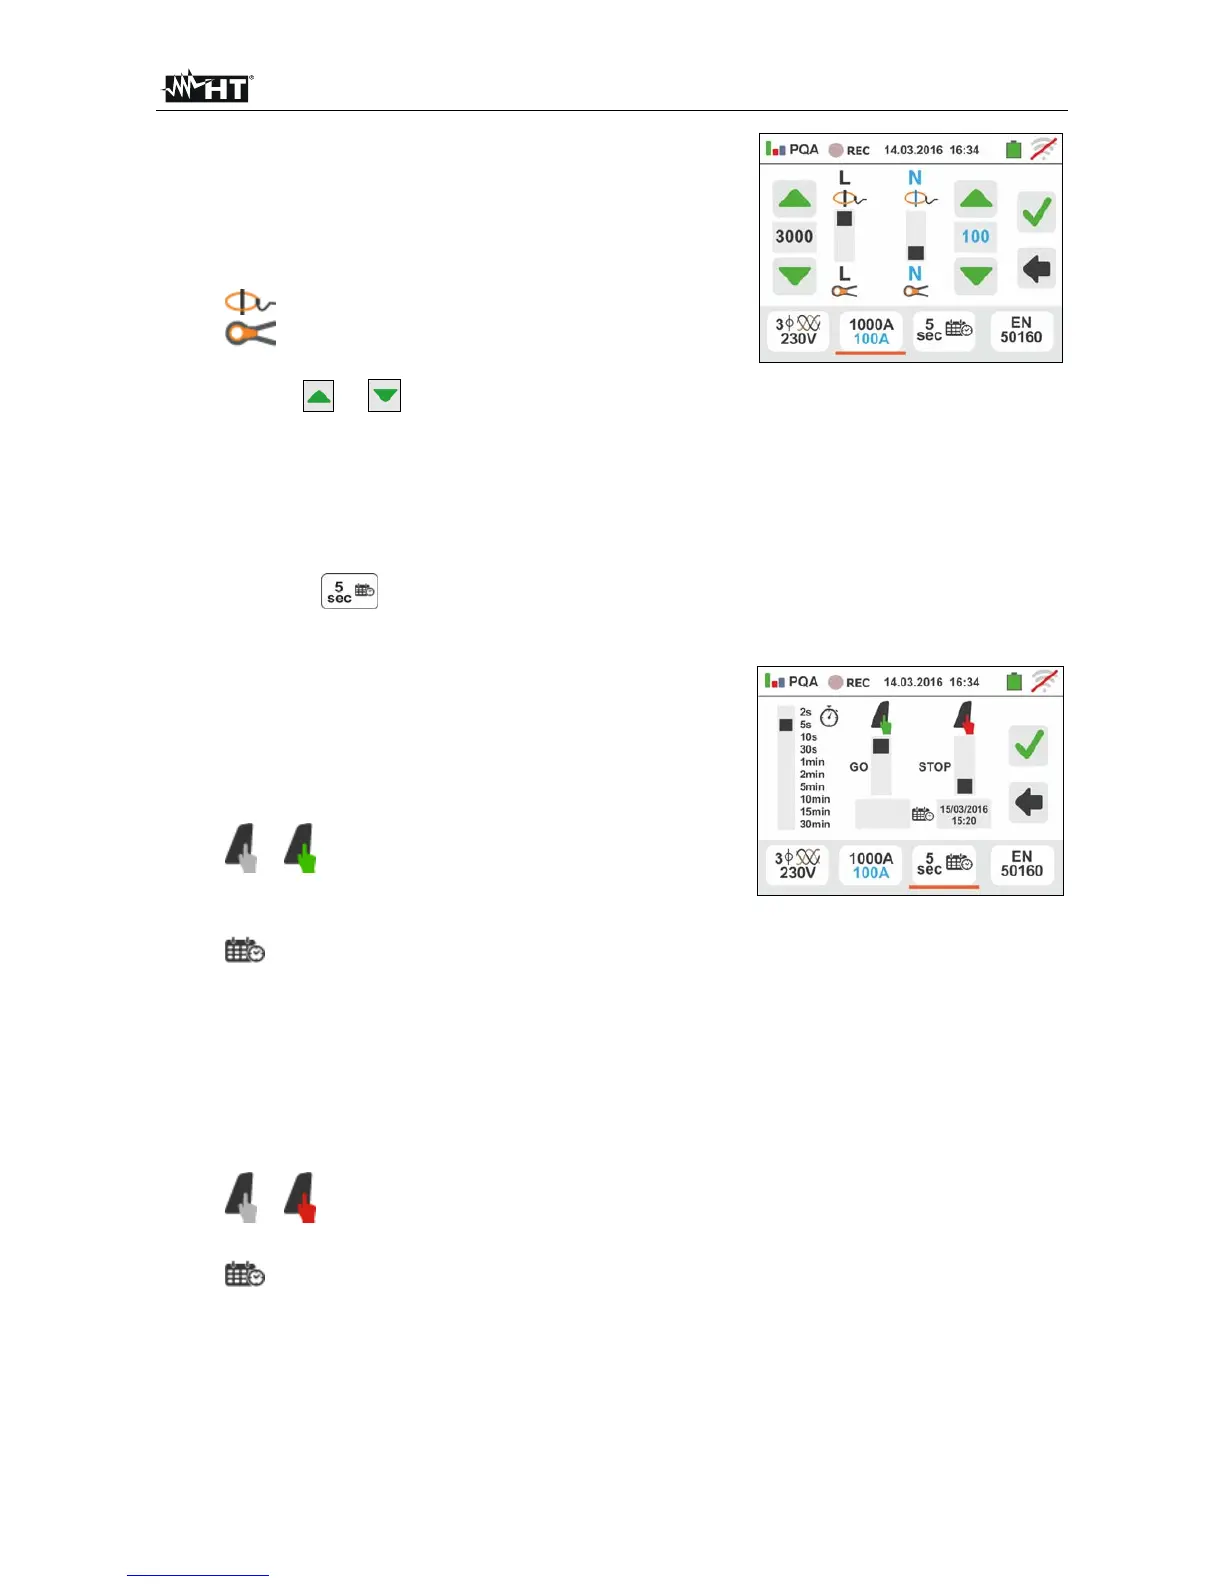
3. Move the slide bar cursor in order to select the type of
clamp for phase current and neutral current
measurement (marked in blue color), considering that
the clamps can be of different types, between the
options:
Flexible transducer clamp type (FLEX)
Standard rigid clamp (STD)
Touch the or icon keys in order to set the full
scale value of the clamps selected for phase and
neutral current (marked in blue color) between the
options: 300A or 3000A (FLEX clamp), range: 1A ÷
3000A (STD clamp). Press and hold the keys for a
quick selection of values
Touch the icon to set the parameters of
recording. The following screen is shown
4. Move the left slide bar cursor in order to select the
aggregation time (see § 12.17) among the options: 2s,
5s, 10s, 30s, 1min, 2min, 5min, 10min, 15min, 30min
Move the central slide bar cursor (“GO” symbol) to the
positions:
Manual start of recording by pressing the
GO/STOP key (at the next minute after the pressure
of key)
Automatic start of recording at the date/time
set by the user (after a preliminary pressure of
GO/STOP key in order to set the instrument in
stand-by mode). Touch the corresponding field to
set the date/time in the “MM:DD:YY HH:MM”
format and confirm
Move the right slide bar cursor (“STOP” symbol) in the
positions:
Manual stop of recording by pressing the
GO/STOP key
Automatic stop of recording at the date/time
set by the user. Touch the corresponding field to
set the date/time in the “MM:DD:YY HH:MM”
format and confirm