PVCHECKs-PRO
EN - 45
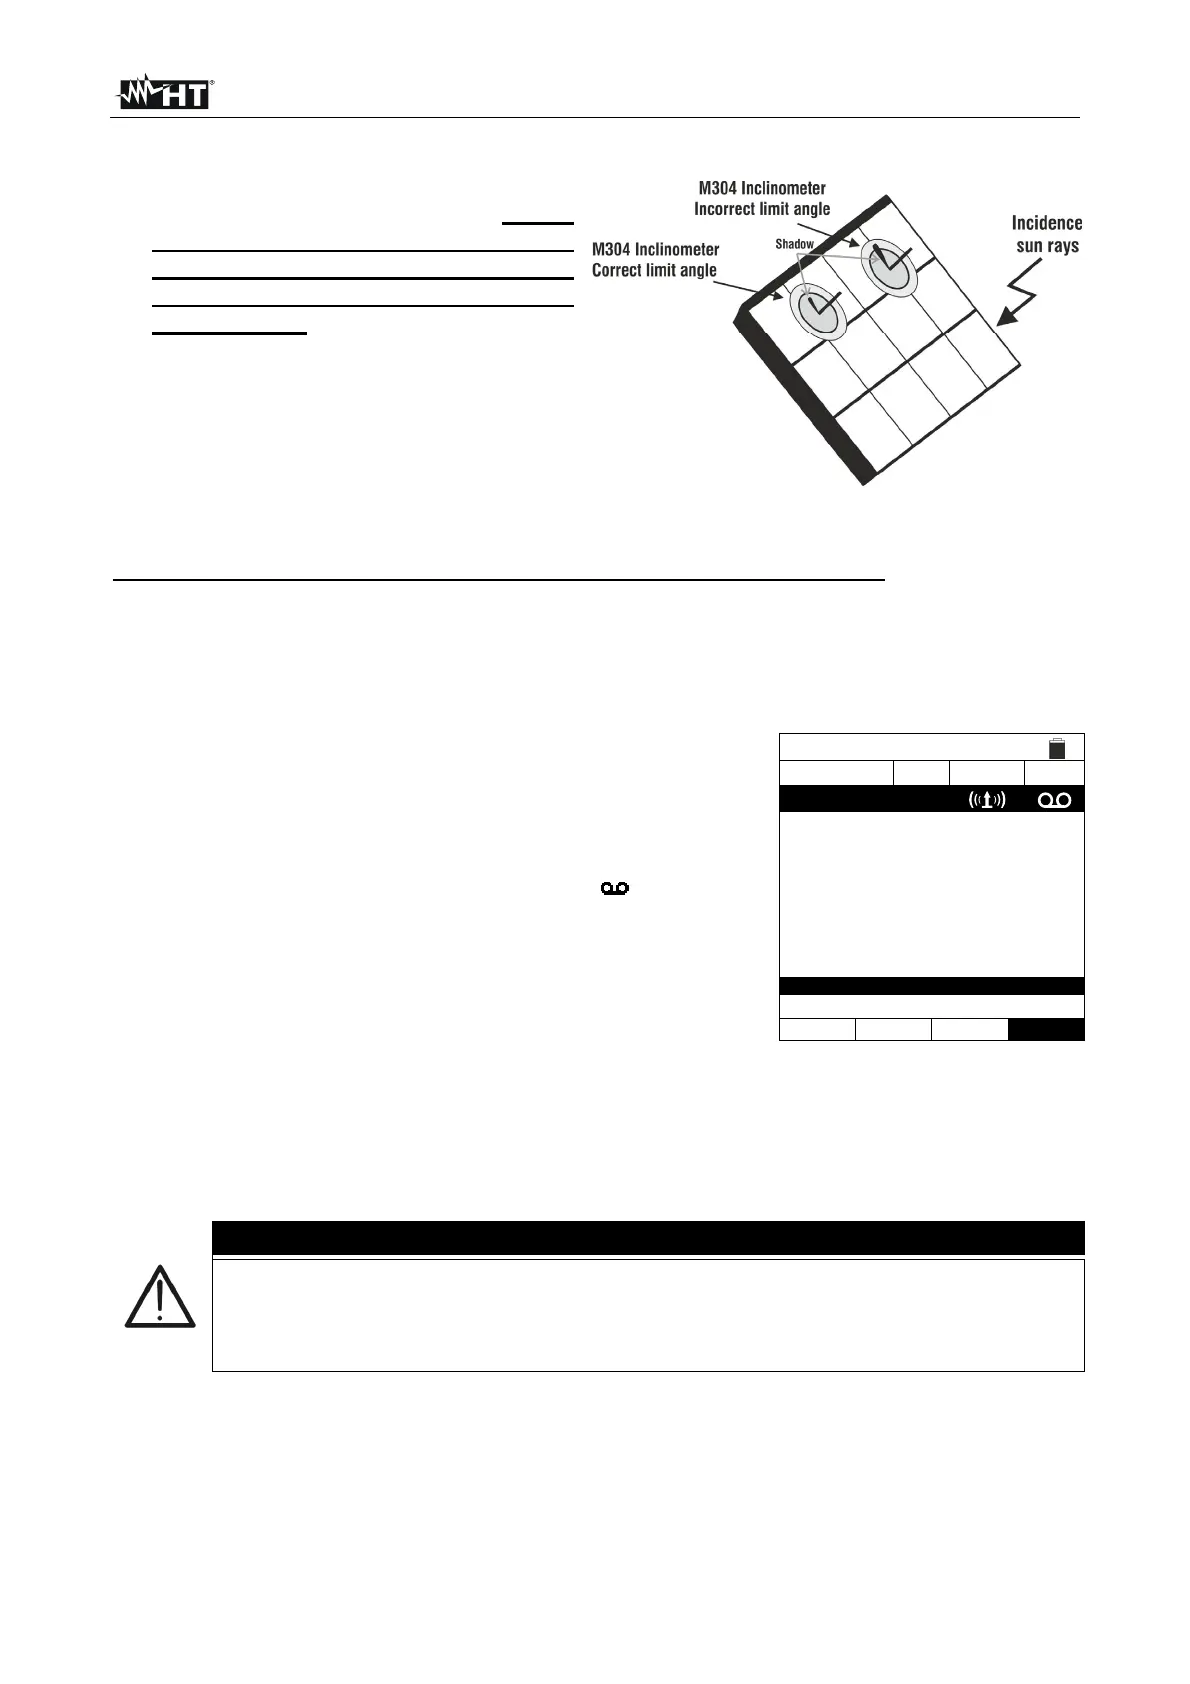
6. Assemble the stem onto the disk of the
optional accessory M304 and keep it
resting on the module’s surface. Check
that the shadow of the stem on the
disk falls within the internal “limit
concentric circle” of the disk itself
(see picture). Otherwise, the angle
between the sun strays and the
module’s surface is too big and,
therefore, the measurements carried
out by the instrument are NOT to be
trusted. Repeat the operations at
other times of the day.
In case it is necessary to record of irradiance values over time (e.g. in unstable
irradiance conditions or in case the distance between the modules and the instrument is
high), follow the steps from 7 to 9, or jump to step 10.
7. Select option UREM from the main menu, pair and connect the remote unit SOLAR03
to the instrument as shown in step 6 of § 6.2
8. Use the arrow keys or to select “Start” to start the
instrument’s recording (with non-modifiable 1s scan)
with the remote unit. The screen on the side appears on
the display. In this condition, the instrument sends its
system date / time to the remote unit SOLAR03, which is
thus synchronized with it. The symbol “ ” appears on
the display and the message “REC” appears on the
remote unit’s display to indicate that recording is in
progress.
UREM 15/10 – 18:04
SOLAR03
ct
Status
Rec.
23051204
√
U.Rem. Connected
Find Unpai
Delete Start
9. Bring the remote unit near the modules and connect the irradiance/temperature probes
as shown in Fig. 11. Since recording has already been activated on remote unit
SOLAR03, it is not strictly necessary to maintain the Bluetooth connection
anymore. Maintaining the connection will only allow to immediately obtain the outcome
of the test without waiting for the measuring campaign to be completed.
CAUTION
Upon pressing the GO/STOP key, different error messages can be displayed by
the instrument (§ 6.8) and, therefore, the test cannot be started. Check and
eliminate, if possible, the problem causing the error message before going on
with the test.