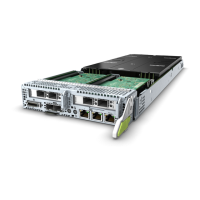
Step 13 Connect the cables to the mainboard. For details, see 3 Internal Cabling.
Step 14 Install all fan module brackets in the chassis. See Figure 5-107.
Figure 5-107 Installing a fan module bracket
Step 15 Install the fan modules. For details, see 5.10 Fan Module.
Step 16 Install the air duct. For details, see 5.9 Air Duct.
Step 17 Install the chassis cover. For details, see 5.8 Chassis Cover.
Step 18 Install the PSUs. For details, see 5.7 PSU.
Step 19 Install the FlexIOs. For details, see 5.17 FlexIO Card.
Step 20 Install the server. For details, see 5.4.3 Installing the Server on Guide Rails.
Step 21 Connect the power cables. For details, see 5.7 PSU.
Step 22 Power on the server. For details, see 5.4.1 Powering On the Server.
Step 23 (Optional) To burn the original SN into the new mainboard after replacement,
contact Huawei engineers.
If original device SN is not burnt in the new mainboard, the iBMC and OS cannot
obtain the device SN. This may
aect the running of some services or the
monitoring and management on the device.
Step 24 After the mainboard is replaced, the iBMC and BIOS congurations are restored to
the factory defaults of the new mainboard. You need to
congure the iBMC and
BIOS again based on the actual situation.
Step 25 (Optional) To upgrade iBMC, BIOS, and CPLD
rmware after replacing the
mainboard, see the
TaiShan Rack Server Upgrade Guide
. If the iBMC and BIOS
TaiShan 200 Server
Maintenance and Service Guide (Model 2280) 5 Removal and Installation
Issue 04 (2020-01-16) Copyright © Huawei Technologies Co., Ltd. 162
 Loading...
