controllers be mounted 15' (4.5 m) away from pumps and high-voltage devices.
1. Detach the pump start relay cover plate by removing the four screws with
Phillips screwdriver.
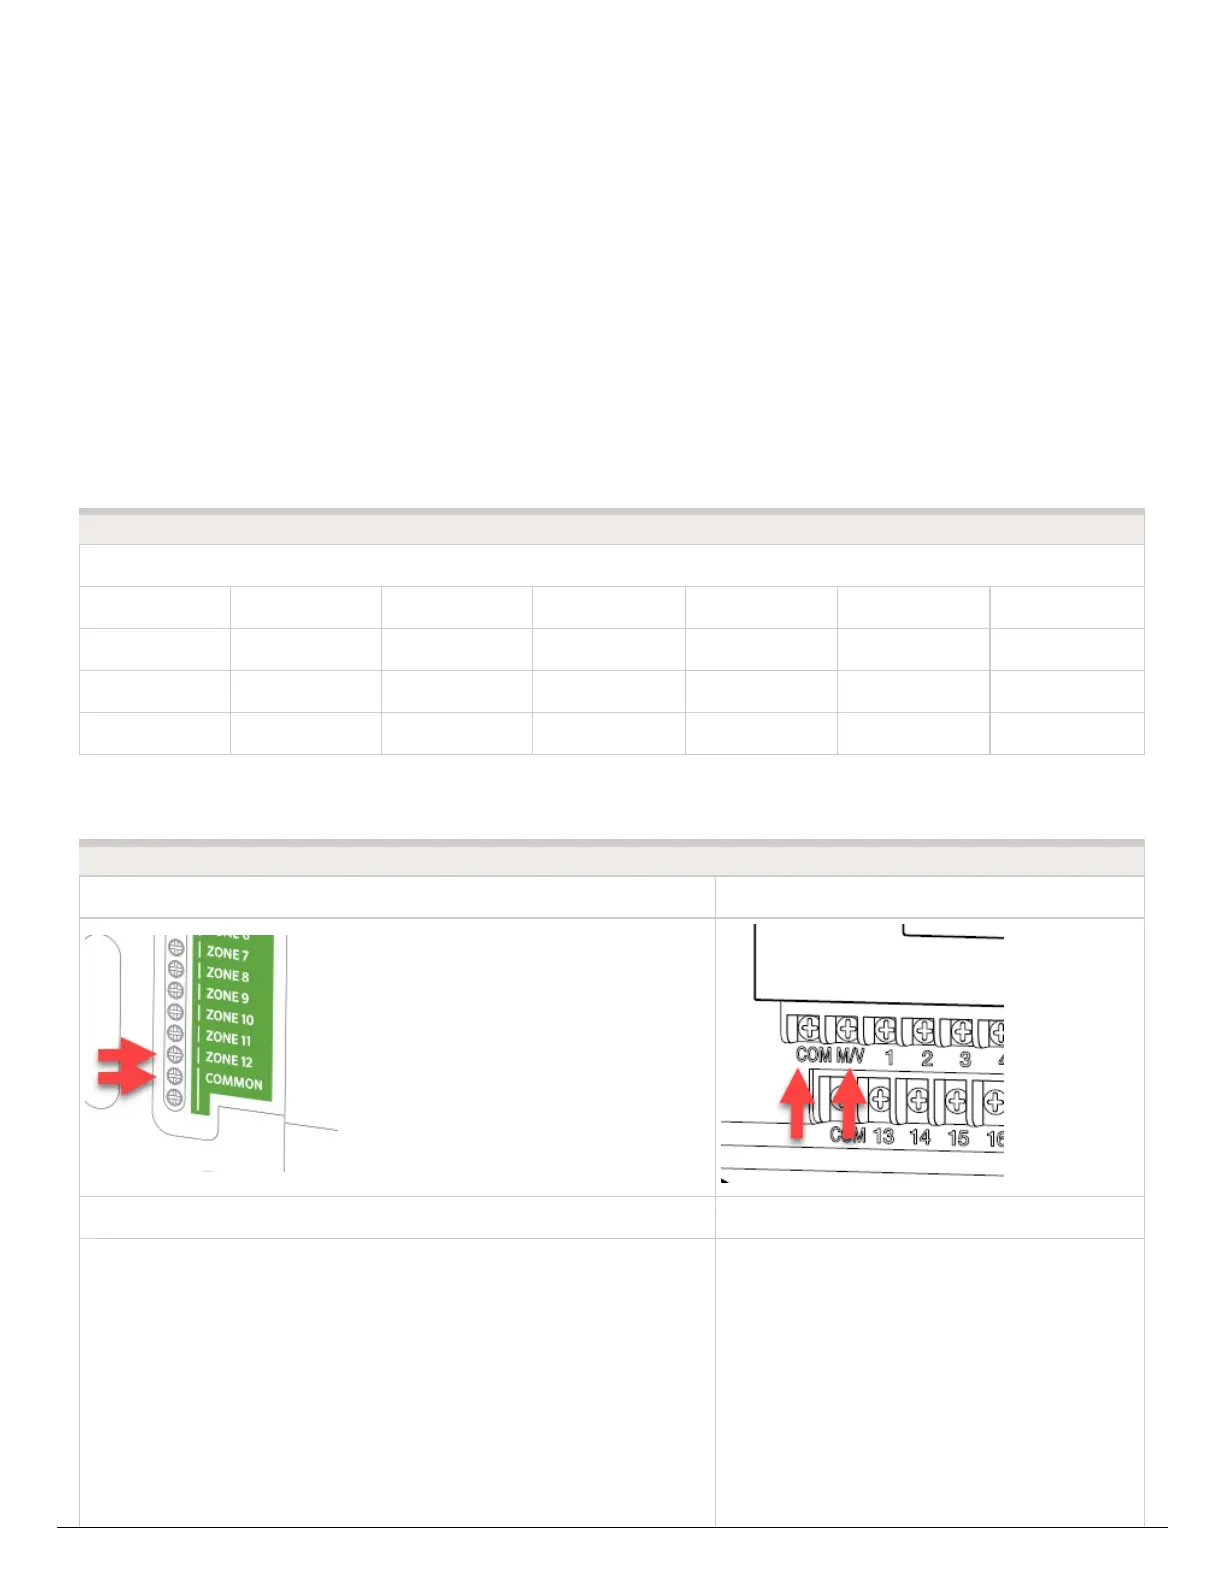
2. Run a single wire from the "common" terminal on the controller to one of the yellow
wires on the pump start relay.
3. Run a single wire from the "P/MV" terminal on the controller to the other yellow wire on
the pump start relay.
4. Use wire nuts to make the connections and verify they are secure.
5. Install pump start relay cover plate and four screws. Close and lock the cabinet door.
6. Route wire through the conduit or one of the openings on the bottom of the cabinet.
7. Strip ½" (13 mm) of insulation from the ends of all wires. Secure the valve common
wire to “COM” (Common) terminal. Attach the opposite control wire to the M/V terminal.
Pump Start Relay Maximum Wire Lengths
MAXIMUM one-way wire length (do not go this far!)
Model 18 AWG 16 AWG 14 AWG 12 AWG 10 AWG 8 AWG
PSR-22 243 ft 386 ft 616 ft 976 ft 1,551 ft 2,463 ft
PSR-52 134 ft 214 ft 341 ft 540 ft 859 ft 1,365 ft
PSR-53 134 ft 214 ft 341 ft 540 ft 859 ft 1,365 ft
HC PRO-HC
HPC HCC
 Loading...