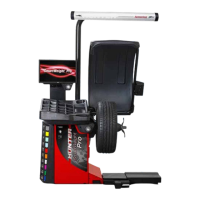
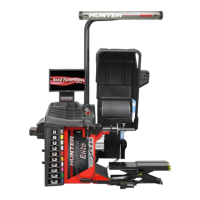
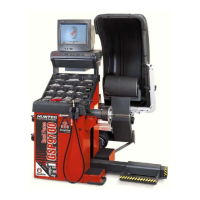
BALANCING PROCEDURES 49
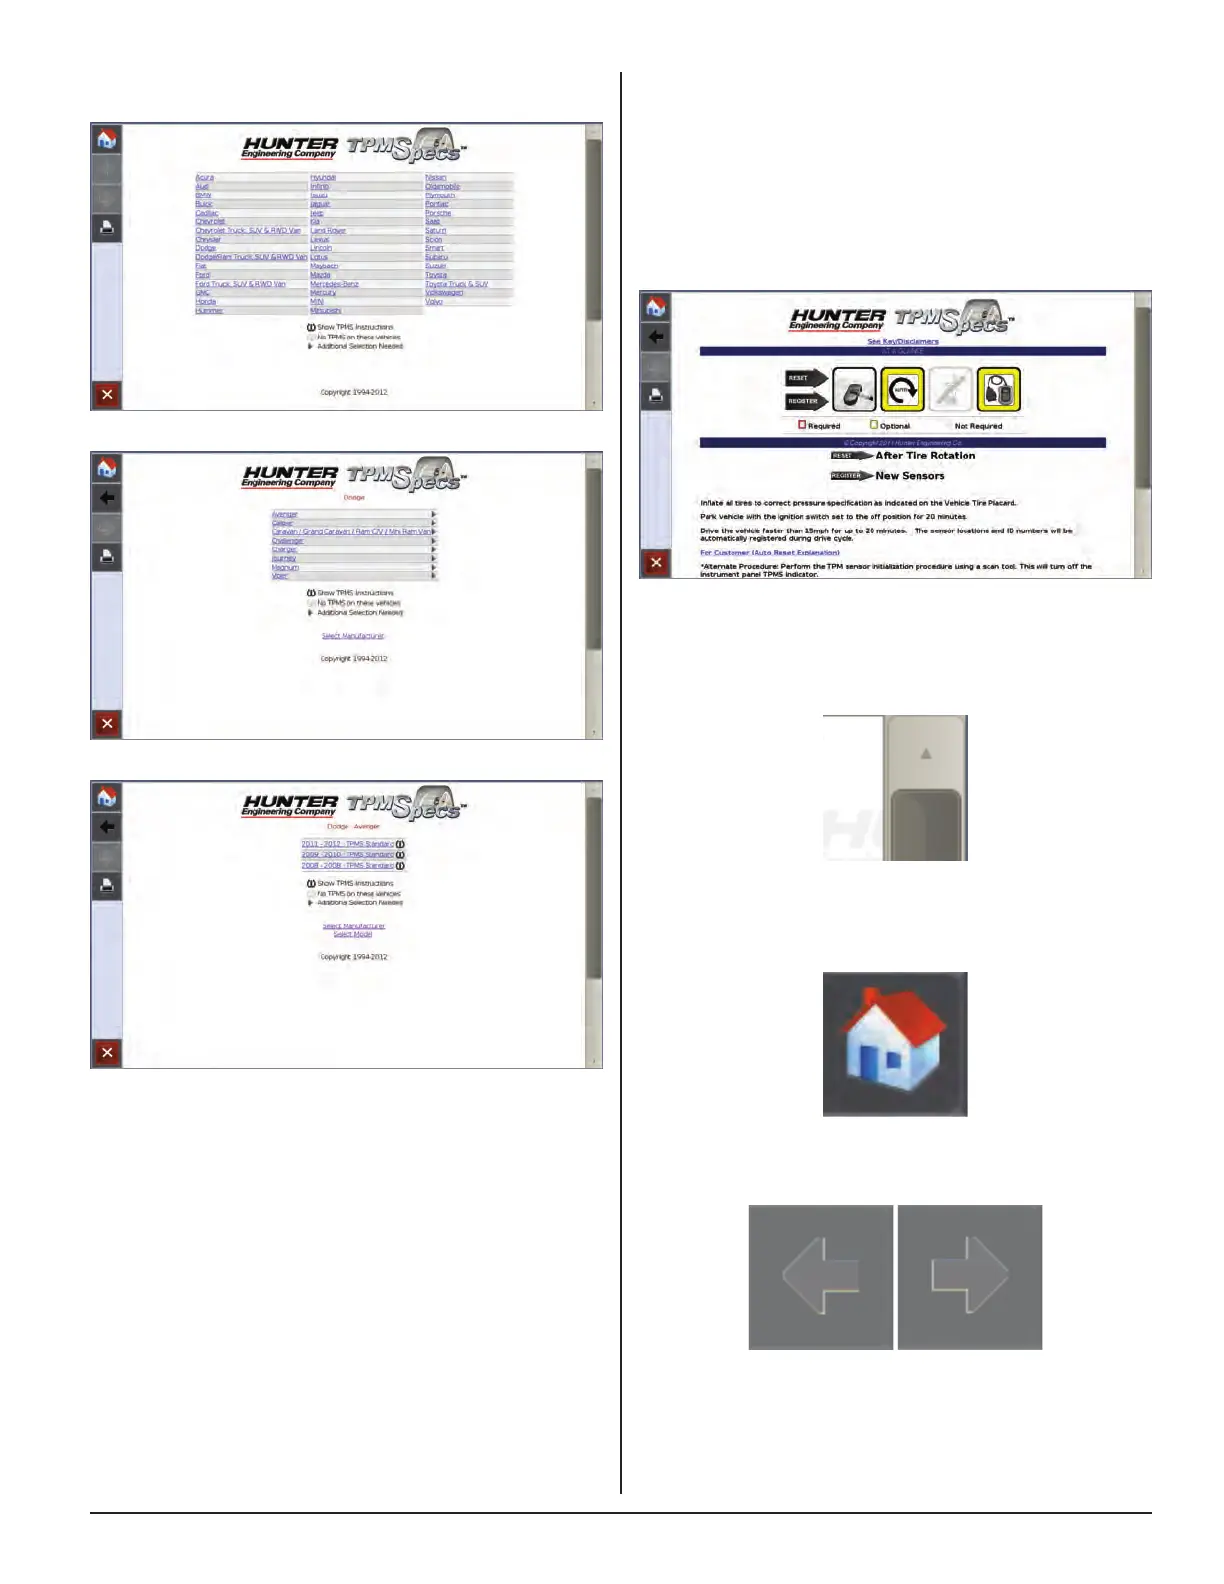
The “AT A GLANCE” overview starts each vehicle TPMS
specification. The first image shows the type of TPMS
sensor on the vehicle. The following three images show
the requirements for servicing the wheel: process, scan
tool and OEM scanner. The red border, yellow border or
grayed appearance of the image denotes the requirement
as required, optional or not required. Red and white
striped border indicates the requirement is possibly
required; refer to the explanation below the images.
Figure 188.
Scroll up or down by dragging the scroll bar, or touching
the “up” and “down” arrows on the right side of the
screen.
Figure 189.
Touch the “Home” button to return to the main
TPMSpecs® Menu.
Figure 190.
Touch the “arrows” to navigate backward or forward.
Figure 191.
The main TPMSpecs® screen is displayed. Select the
make, model and specifics of the vehicle being serviced.
Figure 185.
Figure 186.
Figure 187.