286 IBM eX5 Implementation Guide
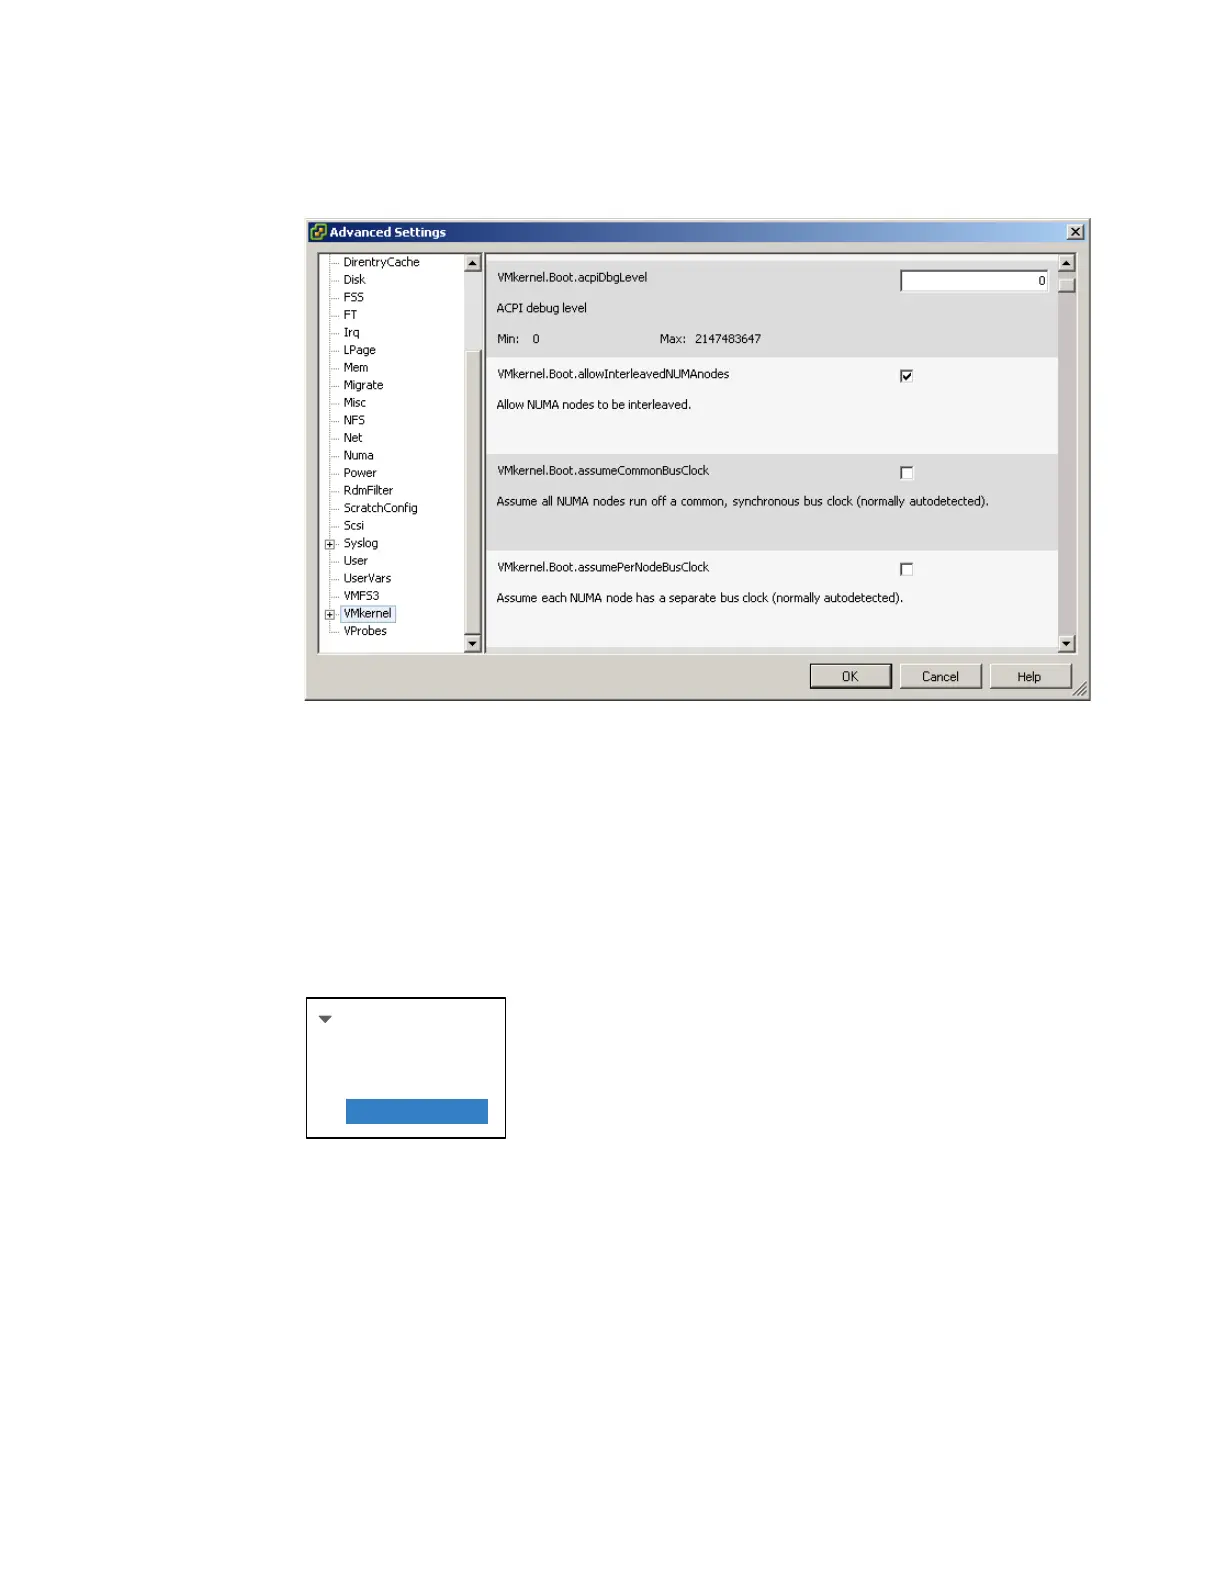
3. Click VMkernel in the left pane and select
VMkernel.Boot.allowInterleavedNUMAnodes. Click OK.
Figure 6-73 Editing the WMkernel settings in vSphere Client
4. Power off the x3850 X5 and unplug all power cords.
5. Attach the MAX5 to the x3850 X5. For more information, see 6.4, “Attaching the MAX5
memory expansion unit” on page 230.
6. Replug the power cords on x3850 X5 and MAX5 but
do not power on the complex
configuration.
7. Log in to the IMM web interface.
8. Click Firmware Update under Tasks, as shown in Figure 6-74.
Figure 6-74 IMM menu bar
9. Click Browse and select the FPGA update file.
10.Click Update to start the update process. A progress indicator opens as the file is
transferred to the temporary storage of IMM.
11.When the transfer is completed, click Continue to complete the update process. A
progress indicator opens as the firmware is flashed. A confirmation page opens to verify
that the update was successful.
12.Unplug the power cords from the x3850 X5 and MAX5. Wait 1 minute and replug the
power cords. This procedure activates the new FPGA code on the x3850 X5 and MAX5.
Tasks
Power/Restart
Remote Control
PXE Network Boot
Firmware Update
 Loading...