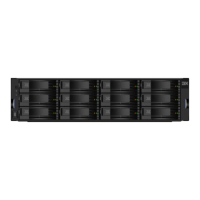
a. Install the front display (4U) and PSU (1U) fascia on the new enclosure, as
described in “Installing or replacing the fascia: 2145-92F” on page 89.
2. Remove the display panel assembly from the old enclosure, as described in
“Removing the display panel assembly: 2145-92F.”
a. Install the display panel assembly into on the new enclosure, as described
in “Installing or replacing the display panel assembly: 2145-92F” on page
132.
3. Remove the fan interface boards from the old enclosure, as described in
“Removing a fan interface board: 2145-92F” on page 125.
a. Install the fan interface boards into on the new enclosure, as described in
“Installing or replacing a fan interface board: 2145-92F” on page 101.
4. Remove the inner section of the slide rail from the old enclosure, as described
in “Removing the support rails: 2145-92F” on page 135.
5. Attach the inner rail section to the new enclosure, as described in “Installing
or replacing the support rails: 2145-92F” on page 58.
6. Replace the new enclosure in rack, as described in “Installing or replacing an
expansion enclosure in a rack: 2145-92F” on page 61.
7. Reinstall the remaining parts into the enclosure, as described in the following
topics. You can install the parts in any order.
Important: Ensure that a mechanical lift is available and in place to support
the additional weight as the FRUs are reinstalled in the enclosure.
v “Installing or replacing a power supply: 2145-92F” on page 91
v “Installing or replacing a drive: 2145-92F” on page 81
v “Installing or replacing a secondary expander module: 2145-92F” on page
86
v “Installing or replacing an expansion canister: 2145-92F” on page 69
v “Installing or replacing a fan module: 2145-92F” on page 100
v “Installing or replacing the top cover: 2145-92F” on page 80
8. Reconnect the SAS cables, as described in “Connecting the optional 2145-92F
SAS expansion enclosures” on page 136 .
9. Reconnect the power cables, as described in “Powering on the expansion
enclosure: 2145-92F” on page 140.
10. Run the next recommended fix procedure in the management GUI to set the
serial number of the 2145-92F enclosure.
Removing the display panel assembly: 2145-92F
You can remove the display panel assembly from a 2145-92F expansion enclosure.
Procedure
1. Slide the expansion enclosure out of the rack, as described in “Removing an
expansion enclosure from a rack: 2145-92F” on page 104.
2. Remove the top cover, as described in “Removing the top cover: 2145-92F” on
page 56.
3. Press the release tab at the top of the display panel assembly, as shown in
Figure 125 on page 131.
130 SAN Volume Controller: Model 2145-SV1 Hardware Installation Guide

 Loading...
