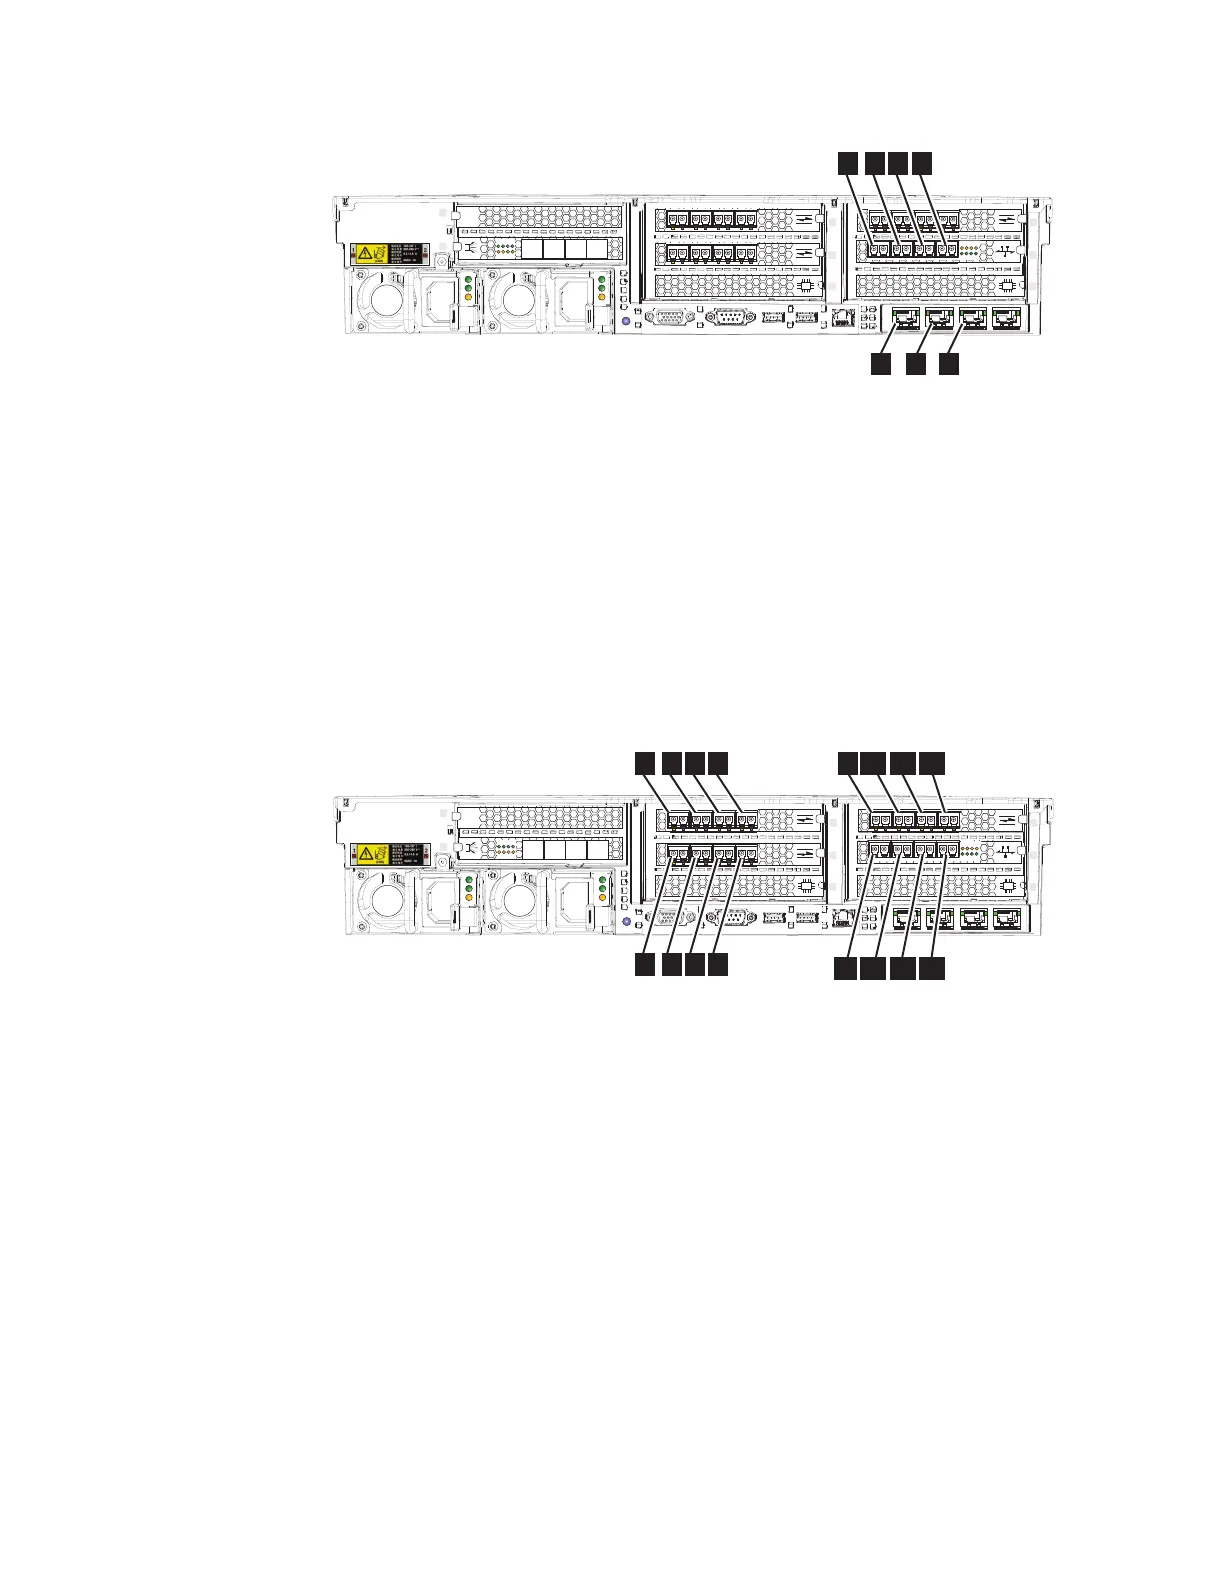
▌1▐ - ▌3▐ 10 Gbps Ethernet ports 1-3
▌4▐ - ▌7▐ 10 Gbps optical Ethernet ports 4-7
2. Connect the other end of the Ethernet cable to the proper connector on the
Ethernet hub or switch.
3. Optional: If the Fibre Channel feature is installed, you can connect Fibre
Channel cables to the Fibre Channel ports as required by your configuration.
Figure 29 shows an example of the device with 16 Gbps Fibre Channel adapters
that are installed in slots 3, 4, and 6. A 10 Gbps Optical Ethernet adapter is
used for Fibre Channel over Ethernet (FCoE) communications and is installed
in slot 7, providing additional Fibre Channel ports.
▌1▐ - ▌16▐ Fibre Channel ports 1-16
Attention: When routing the Fibre Channel cables, do not tighten the cable
straps or bend the cables to a radius smaller than 76 mm (3 in.).
4. Connect the other ends of the Fibre Channel cables to the proper connectors of
the Fibre Channel switches.
Verifying the SAN Volume Controller 2145-SV1 installation
You must verify the installation after the installation has completed.
Before you begin
This task shows you how to verify the installation after you install the system in
the rack and connect it to the storage area network (SAN) and the Ethernet.
sv100014a
1
2
4
5
3
7
8
6
12
4 5 6 7
1
2 3
Figure 28. Ethernet ports on the rear of the SAN Volume Controller 2145-SV1
sv100014
1
2
4
5
3
7
8
6
12
1 2 3 4
5
6 7 8
109 11 12
14
13
15 16
Figure 29. Fibre Channel ports
26 SAN Volume Controller: Model 2145-SV1 Hardware Installation Guide
 Loading...