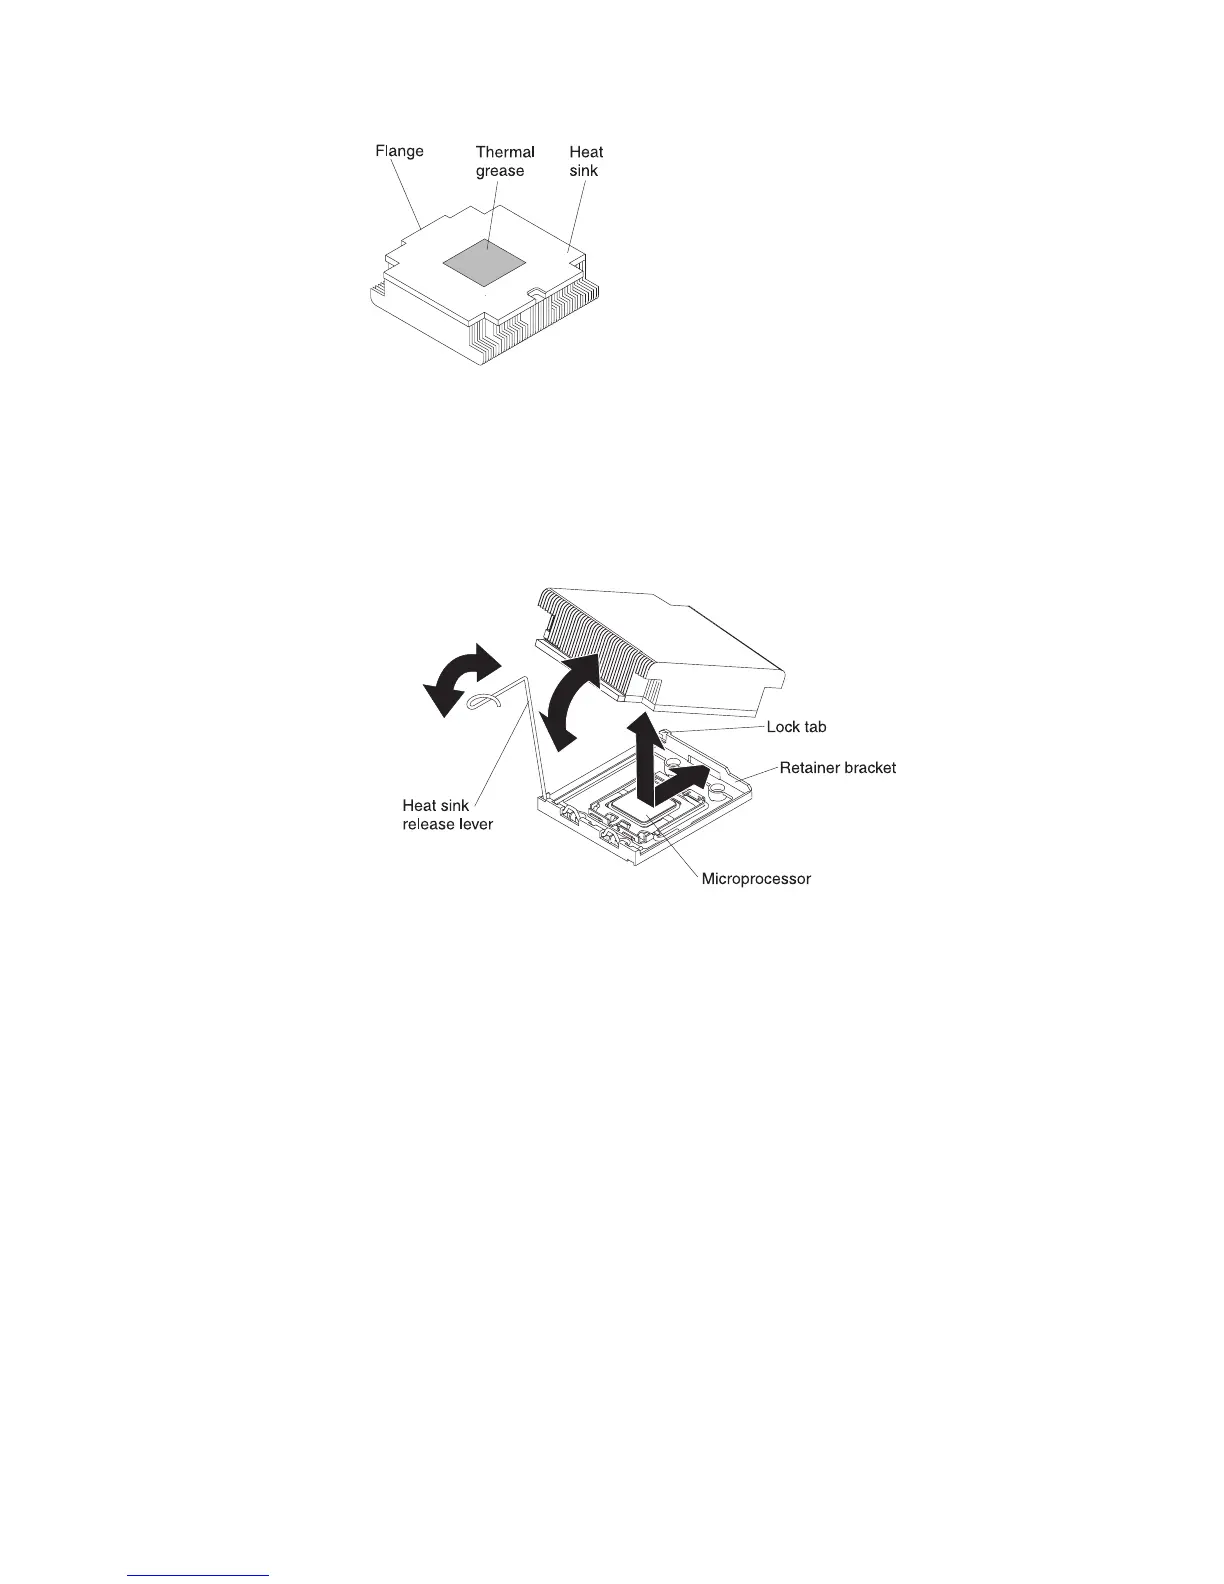
a. Make sure that the heat-sink release lever is in the open position.
b. Remove the plastic protective cover from the bottom of the heat sink.
c. If the new heat sink did not come with thermal grease, apply thermal
grease on the microprocessor before you install the heat sink (see
“Thermal grease”).
d. Align the heat sink above the microprocessor with the thermal grease side
down.
e. Slide the flange of the heat sink into the opening in the retainer bracket.
f. Press down firmly on the heat sink until it is seated securely.
g. Rotate the heat-sink release lever to the closed position and hook it
underneath the lock tab.
13. Replace the components that you removed in “Removing a microprocessor
and heat sink” on page 238:
v Microprocessor 1: DIMM air baffle and PCI riser-card assembly 1 (see
“Installing the DIMM air baffle” on page 182 and “Installing a PCI riser-card
assembly” on page 189)
v Microprocessor 2: Microprocessor 2 air baffle and PCI riser-card assembly 2
(see “Installing the microprocessor 2 air baffle” on page 180 and “Installing a
PCI riser-card assembly” on page 189).
14. Install the cover (see “Installing the cover” on page 178).
15. Slide the server into the rack.
16. Reconnect the external cables; then, reconnect the power cords and turn on
the peripheral devices and the server.
Thermal grease
The thermal grease must be replaced whenever the heat sink has been removed
from the top of the microprocessor and is going to be reused or when debris is
found in the grease.
244 IBM System x3650 M3 Types 4255, 7945, and 7949: Problem Determination and Service Guide

 Loading...


